I miss Brazil, so I developed a Proverbs maker with Vlocity
Hey! Already been five months since my last article. Time moves so fast! Since my last article, I moved to Brazil for my vacation. Wow, this country is really beautiful…Let’s move forward. I remember sitting at Guimini’s office, probably with a pizza slice in my hands, speaking about Brazil. I don’t know how at this time we moved to this subject, but we began asking to ChatGPT some Brazilian proverbs. The game was simply to read them(with a Brazilian accent, of course), and to try to translate them. it was fun! I don’t know if saudade gave me the idea for this article, but…maybe, you know? I mean, saudade is a Brazilian term to describe a state when you miss your friends, your family, or even a country. It’s like melancholy, I think. And maybe this melancholy made me think of this game, I don’t know…
 Adriano for me is the definition of saudade. I love this player, he is a great guy, he deserved a better carrer
So, let’s go back to the article. My idea now would be to get some new proverbs every time I open my Salesforce home page. You know the old-fashioned way to do so. We would use a flow, or an LWC if we want something even more customized, and we would call an API to get the proverbs and to display them to the screen. Ok, this is what we used to do in the previous articles. Now, let’s do it differently. Instead of using a Sales cloud organization, let’s use Vlocity. Vlocity is in general used for specific industries, like energy, media, and communication…And it has its own automation tools. Of course, you can use Salesforce flows, apex code, and LWC in Vlocity. See Vlocity as a supplementary layer on Salesforce. It’s still point and click though, like flows. Now, let’s design our proverbs displayer.
Before we begin, you have to get a Vlocity org. How?
You just have to go to this link, and you should receive a confirmation email in a few moments.
Note: While using Omnistudio processes for the first time, you may encounter some error messages like this one:
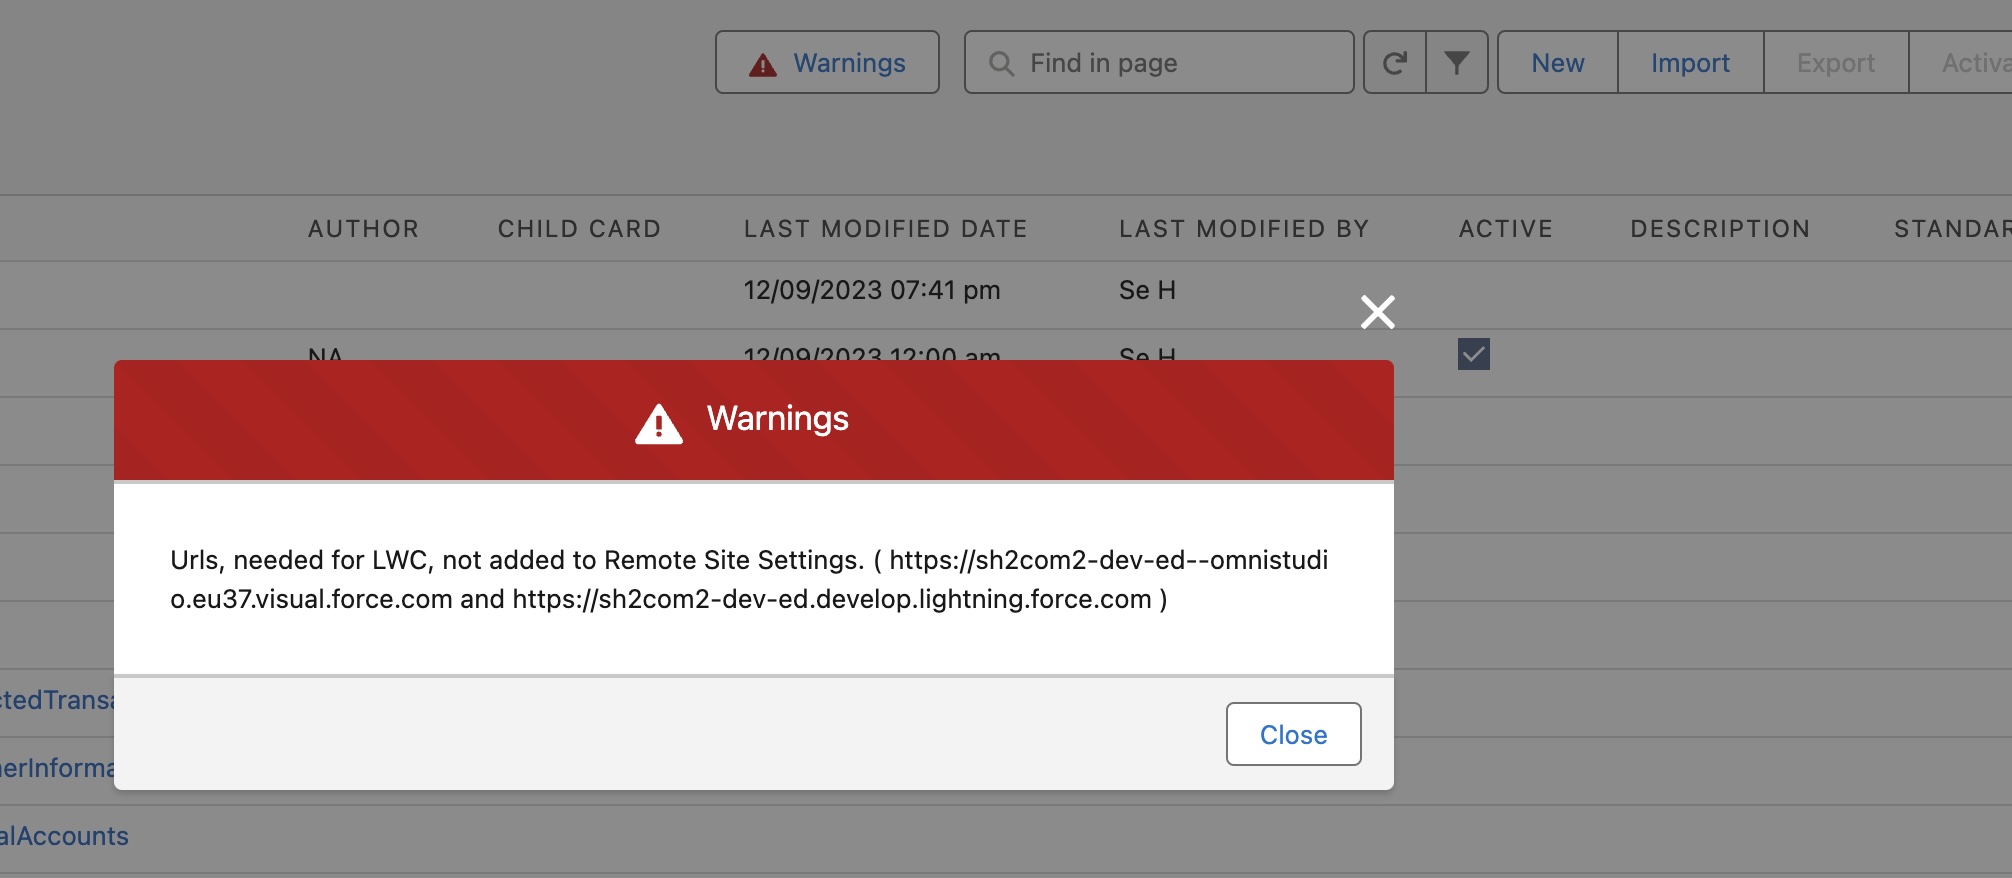
To avoid them, just add the endpoints listed in the warning to your remote site settings. That’s it.
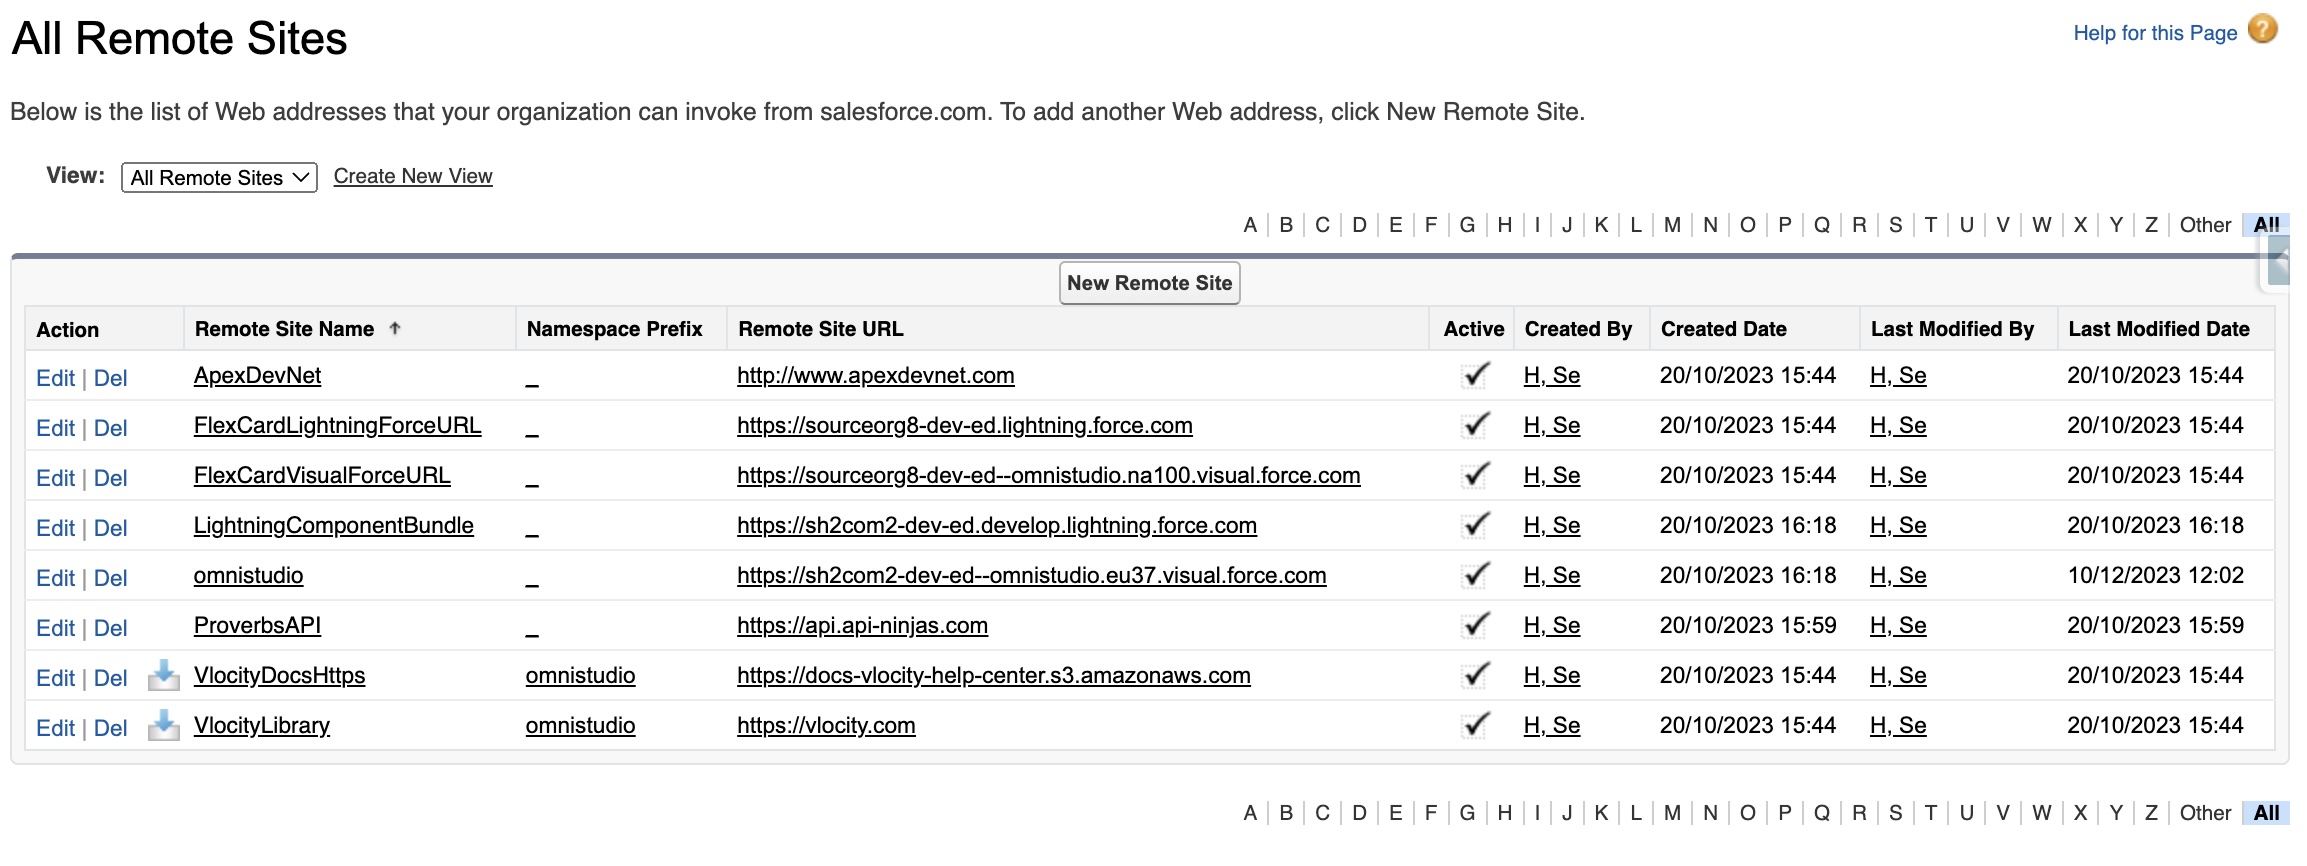 Don’t worry, we only added three remote site settings here: the three we got from the Warning, and an other one to authorize the connexion to the Ninja Proverbs API
Where we design our solution
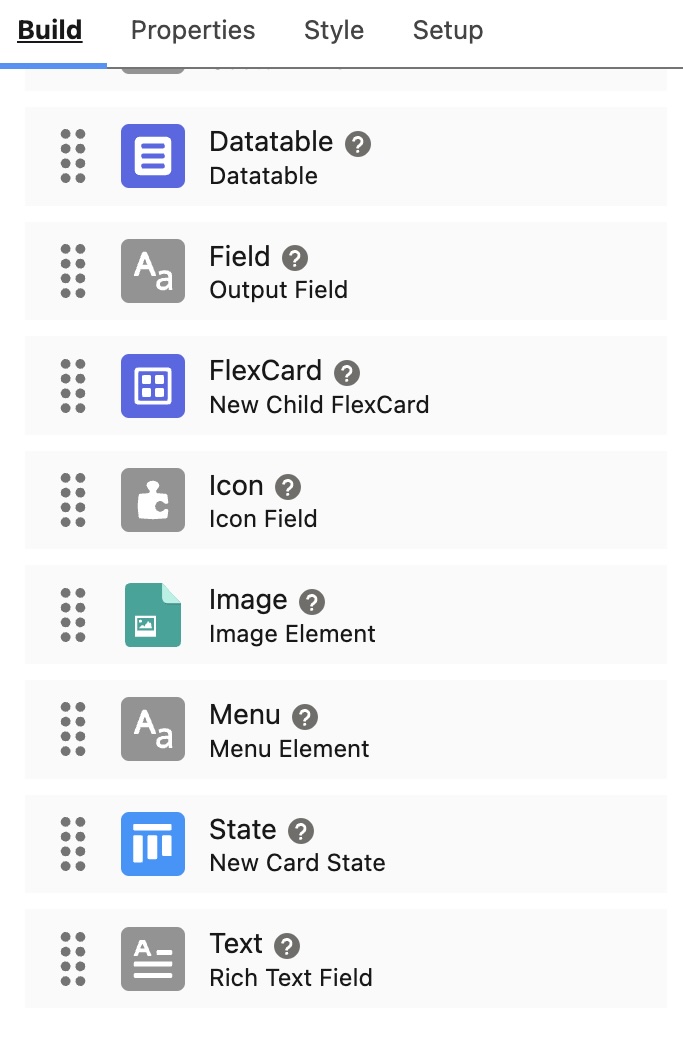
Ok, there are four principal tools in Omnistudio. The two first are more front-end tools, and the two other are exclusively backend tools.
- Flexcards: As it’s indicated by its name, it’s a card, and inside it, you can write some things, like a letter to your loved ones, or a proverb. Yes, you can do more sophisticated things, like elapsing some bullet points or calling some other processes, but just remember its first role.
- Omniscripts: It’s like a Flexcard, but can contain multiple steps. In professional projects, this tool is usually used to allow users to fill some data, step by step. For example, in step 1 the user would enter its name and address. In step 2, it will add the quantity of energy he needs, and in step 3 he will be able to choose between multiple subscribings.
- Dataraptors: It’s useful when you need to get some data, to update/insert/delete them, or when you need to transform a JSON object. In the example of the latter point(Omniscripts), you would need to save the user’s data to Salesforce. For this use case, you will need a Dataraptor.
- Integration procedure: Integration procedures look like what you have with Salesforce flows: you can call multiple actions to do things. It could be Dataraptors, other integration procedures, HTTP actions to call a web service, or even calling Apex code through a remote action. Also, remember that integration procedures are used to do everything that is in the Backend part.
Now that we know the role of each Omnistudio tool, let’s decide which strategy we will use to display proverbs on our Home page. So, what do we need? We need to call an API, that’s sure, and also display it somewhere. Here we don’t need a multi-step process, just one card will be enough. So, a Flexcard is OK for this need. Concerning the API callout, an integration procedure can do this. And, we have to know that the API used is too simple to allow OAuth and named credentials. So, we will store our API key inside a custom metadata type, and get it from our Integration Procedure. Bad news, for now, it’s not possible to directly get custom metadata types from integration procedures. Yeah, there is no “click and code method” getInstance methods, which gets your custom metadata types without using some SOQL(even if we use Vlocity type SOQL, it’s still SOQL, and it still involves Salesforce governor limits). So, we will need to call a dataraptor to get the stored API key, and then give it back to the integration procedure, which will be able to perform the callout. Ok, we got our plan, let’s begin(finally!).
Where we talk about pure integration
To request proverbs, we will use the Ninja Proverbs API. Ninja Proverbs API. Just one thing to notice here. You can see in these articles that everything is so similar to what we normally do with Salesforce. And here is why: Vlocity is not like Marketing Cloud or SFCC, where everything is so different. We can consider that, except for the new automation processes and some objects designed to target specific industries, Vlocity IS Salesforce. Thus, the integration architecture and the ways we will use to resolve problems will be basically the same. Of course, there are some new processes and new objects with Vlocity, but the solution is pretty easy to adopt if you already know Salesforce.
As we did previously, we log in(or sign up) to the API, and copy its key.
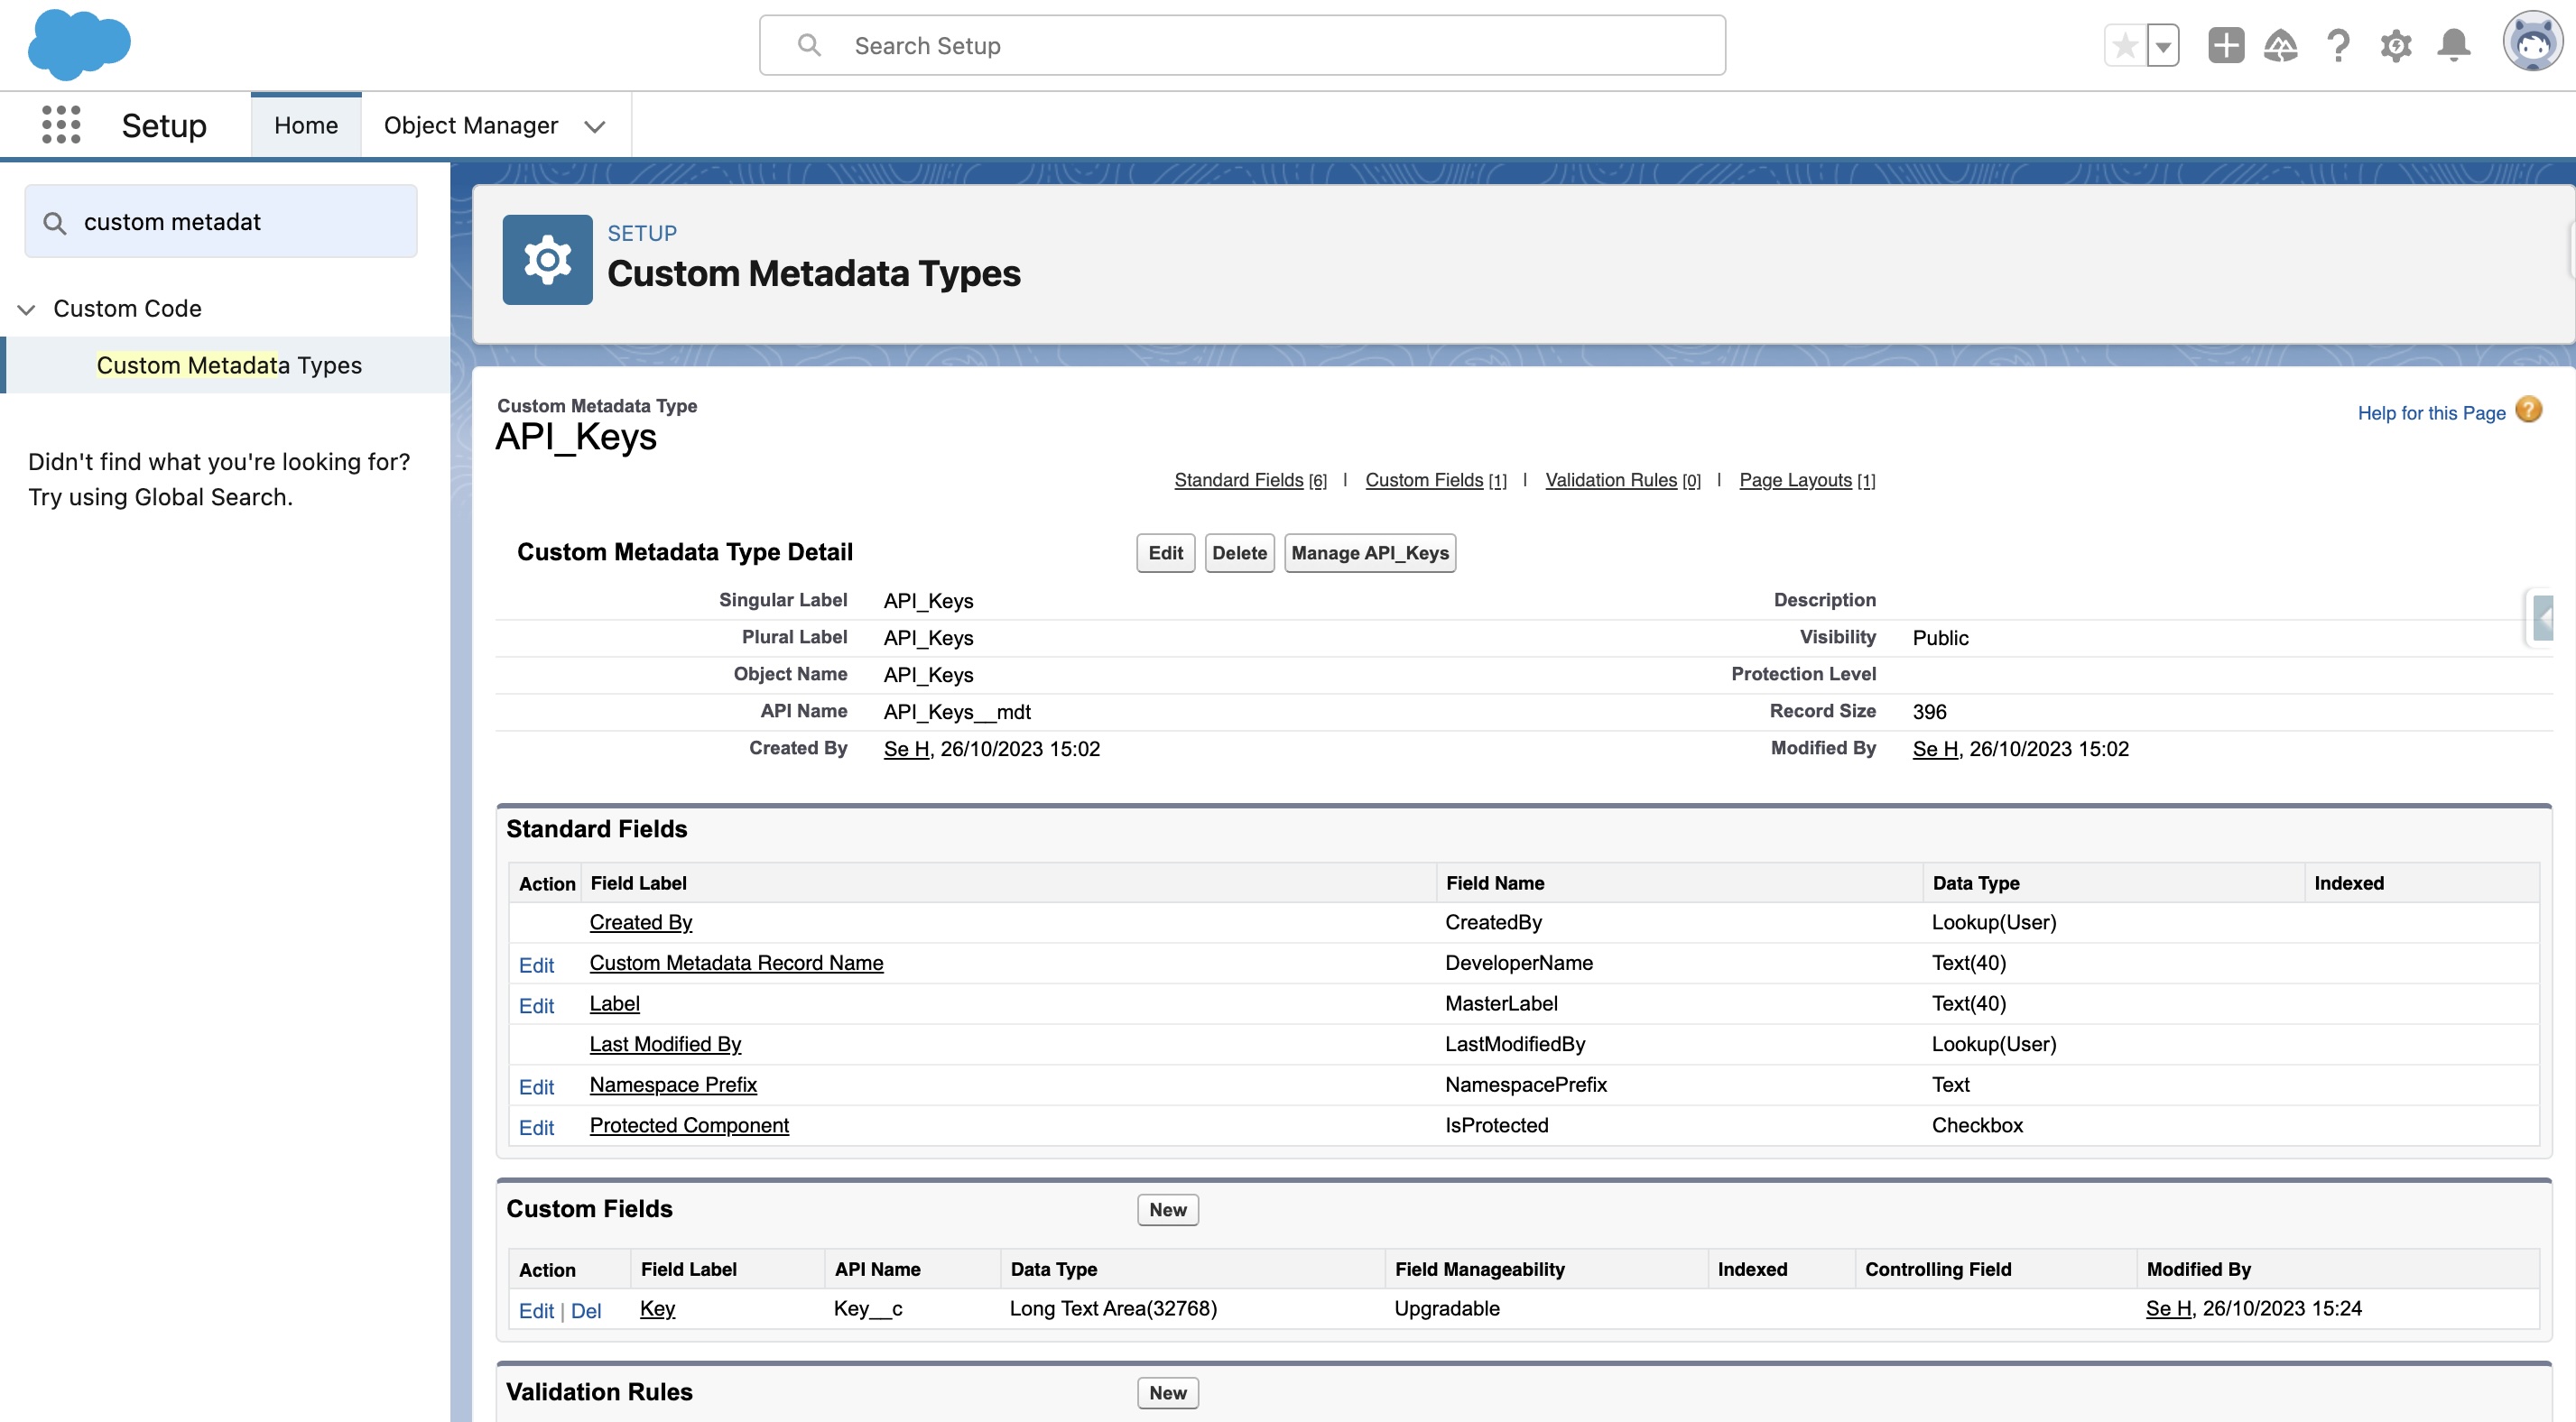
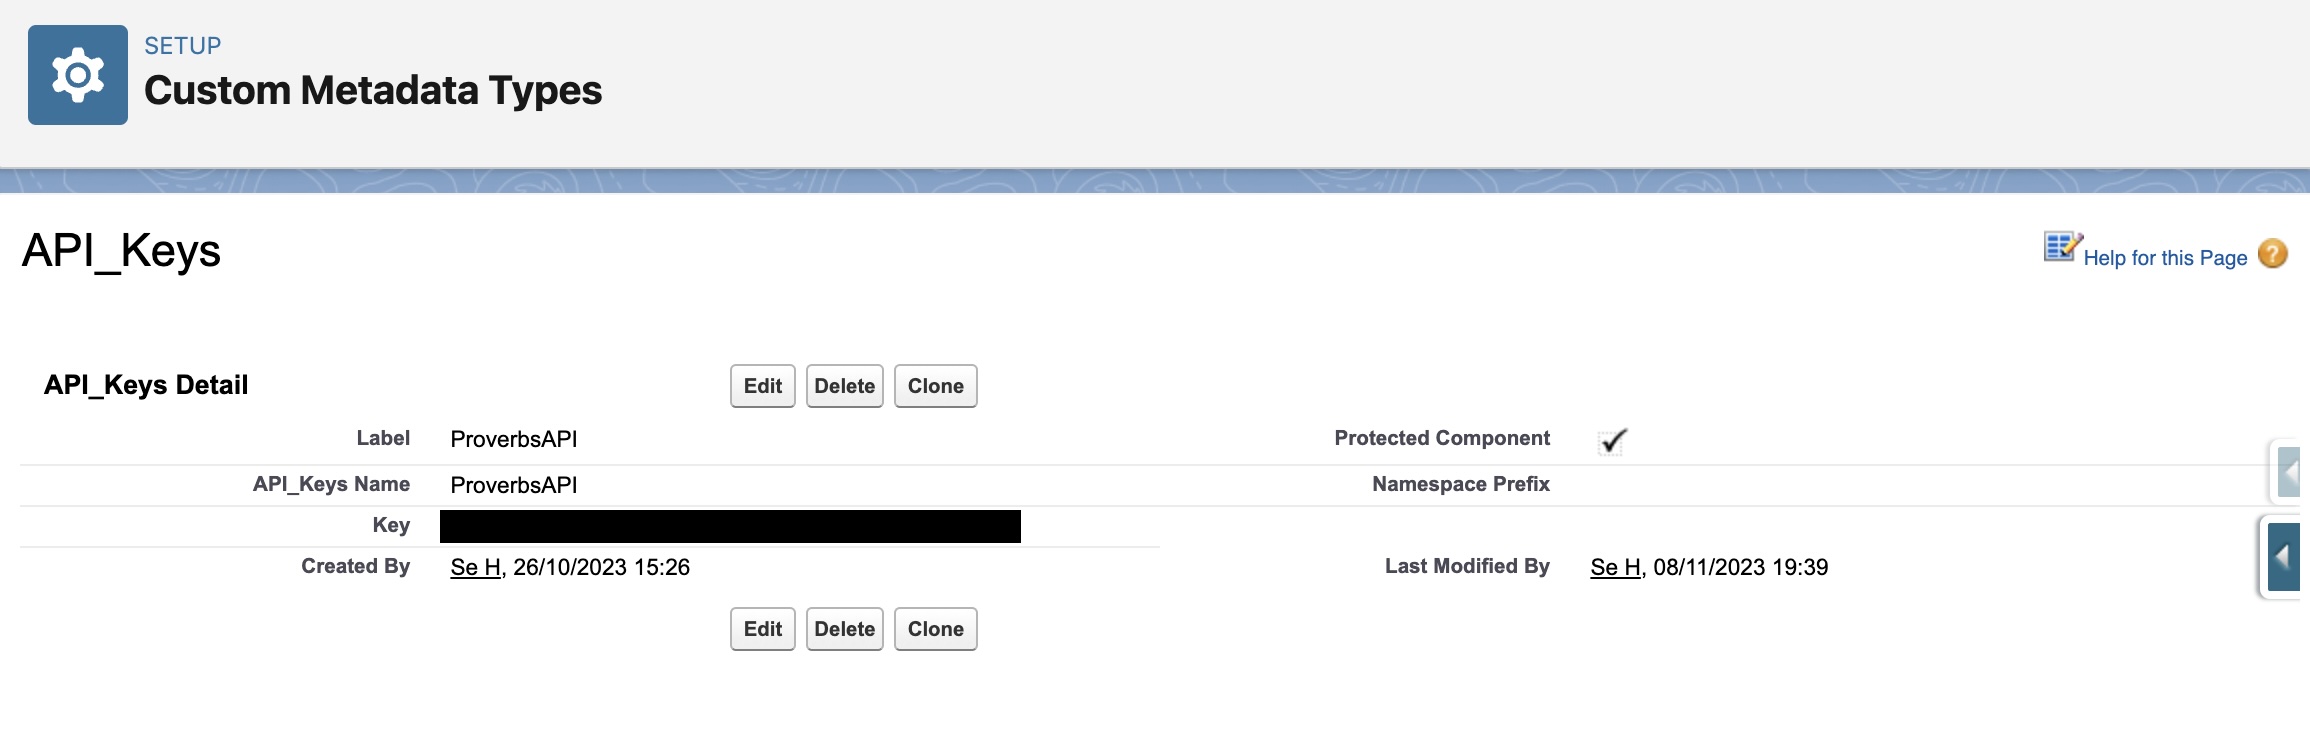
We also created a custom metadata type for the occasion and added the Key__c field to store it, on a record. And you probably guess that the endpoint has to be added to our remote site settings.
The Vlocity show has to begin, let’s move to Omnistudio.
To do this, we have to go to the App Launcher, and search for Omnistudio. You can select Integration Procedures, which will be the core process of our solution.
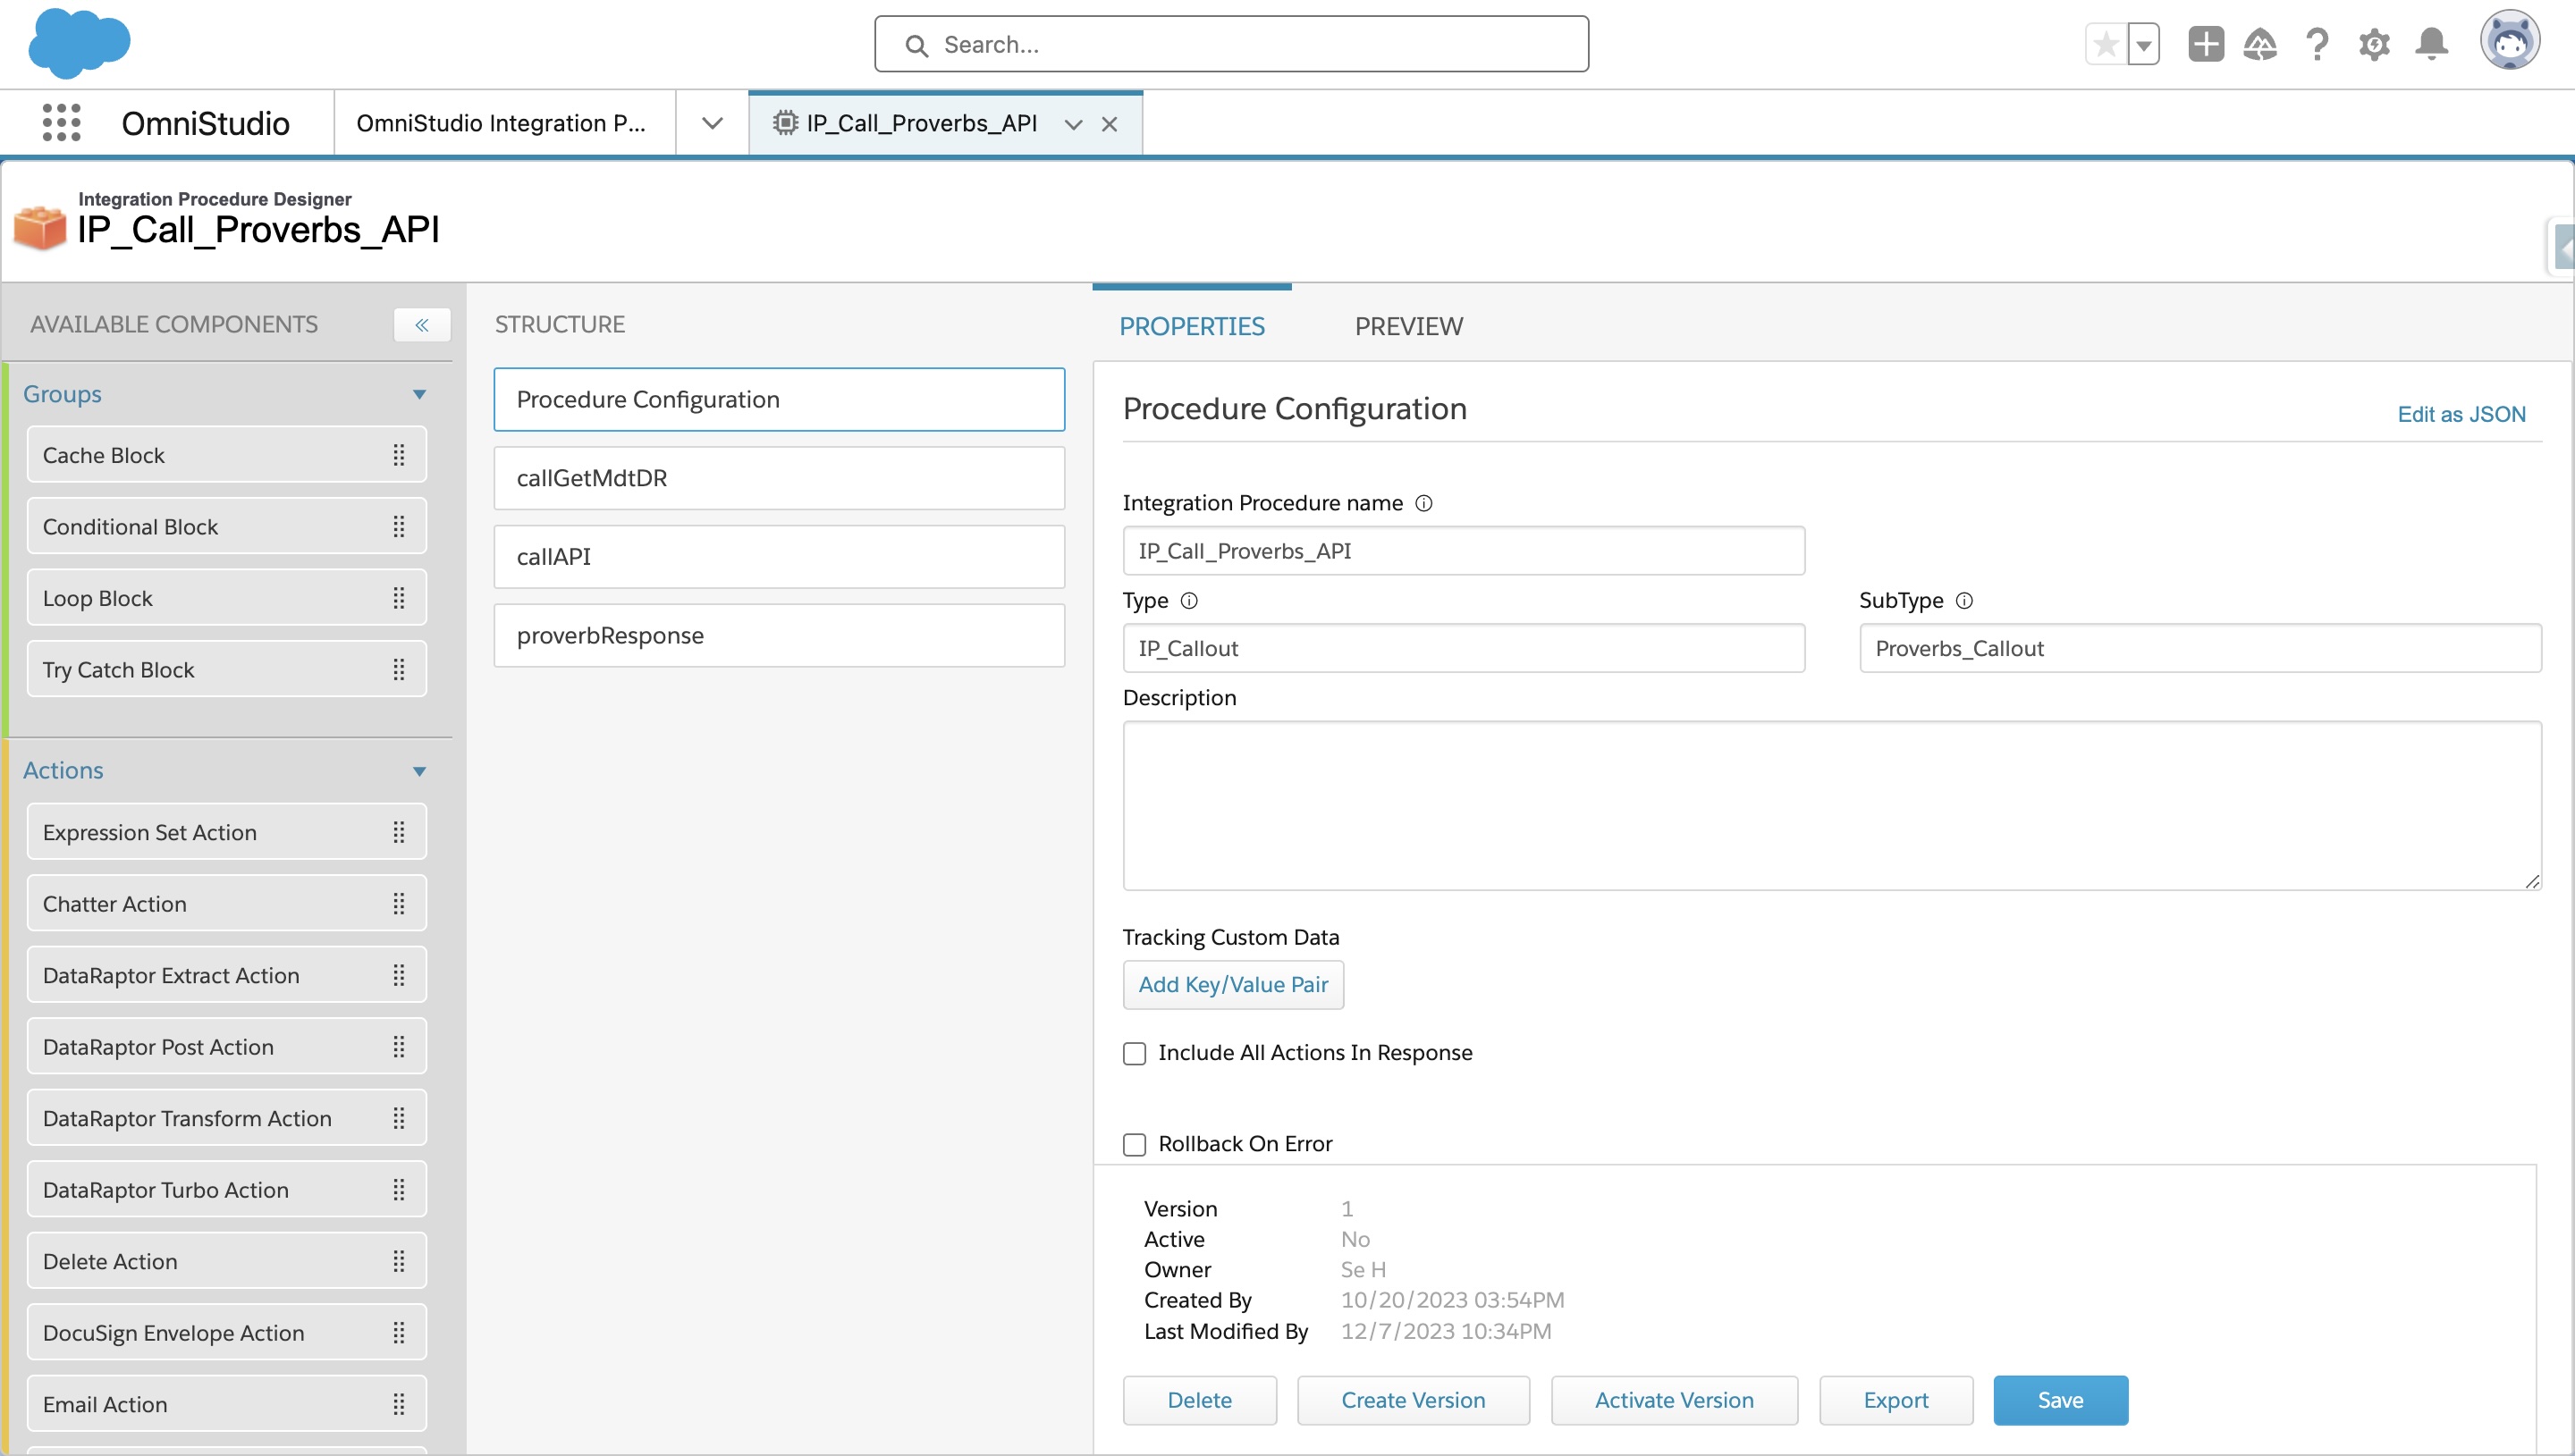
Where we define our Integration Procedure
While creating a new integration procedure, a good practice to know is to specify in its name the type of process you are using. So, when you create a process in Vlocity, it’s better to call it IP_MyIntegrationProcedure, OS_MyOmniScript, FC_MyFlexCard, or DR_MyDataRaptor. By doing this, it’s easier to remember the role of your components, especially knowing that some of them will be dependent on each other.
So we create a new Integration procedure by defining its name, type, and subtype. Nothing too exciting here. This menu also allows us to activate or deactivate an integration procedure. It’s important to know this though, because you won’t be able to modify an already activated integration procedure(or whatever process you use in Vlocity).
Where we get our credentials
That’s where we perform our SOQL to get the custom metadata type. For now, we leave our Integration Procedure and move to Dataraptors. Don’t worry, changes are saved automatically. While creating your Dataraptor, you notice there are four types:
- Extract: If you want to get data from multiple objects. These objects can be related, or nonrelated.
- Turbo extract: It’s “turbo”, it’s faster, but you can only query one object(and its related objects) at a time.
- Load: You have to do a DML operation(so an update, insert or delete);
- Transform: You have a JSON with a specific form, and you want to transform it.
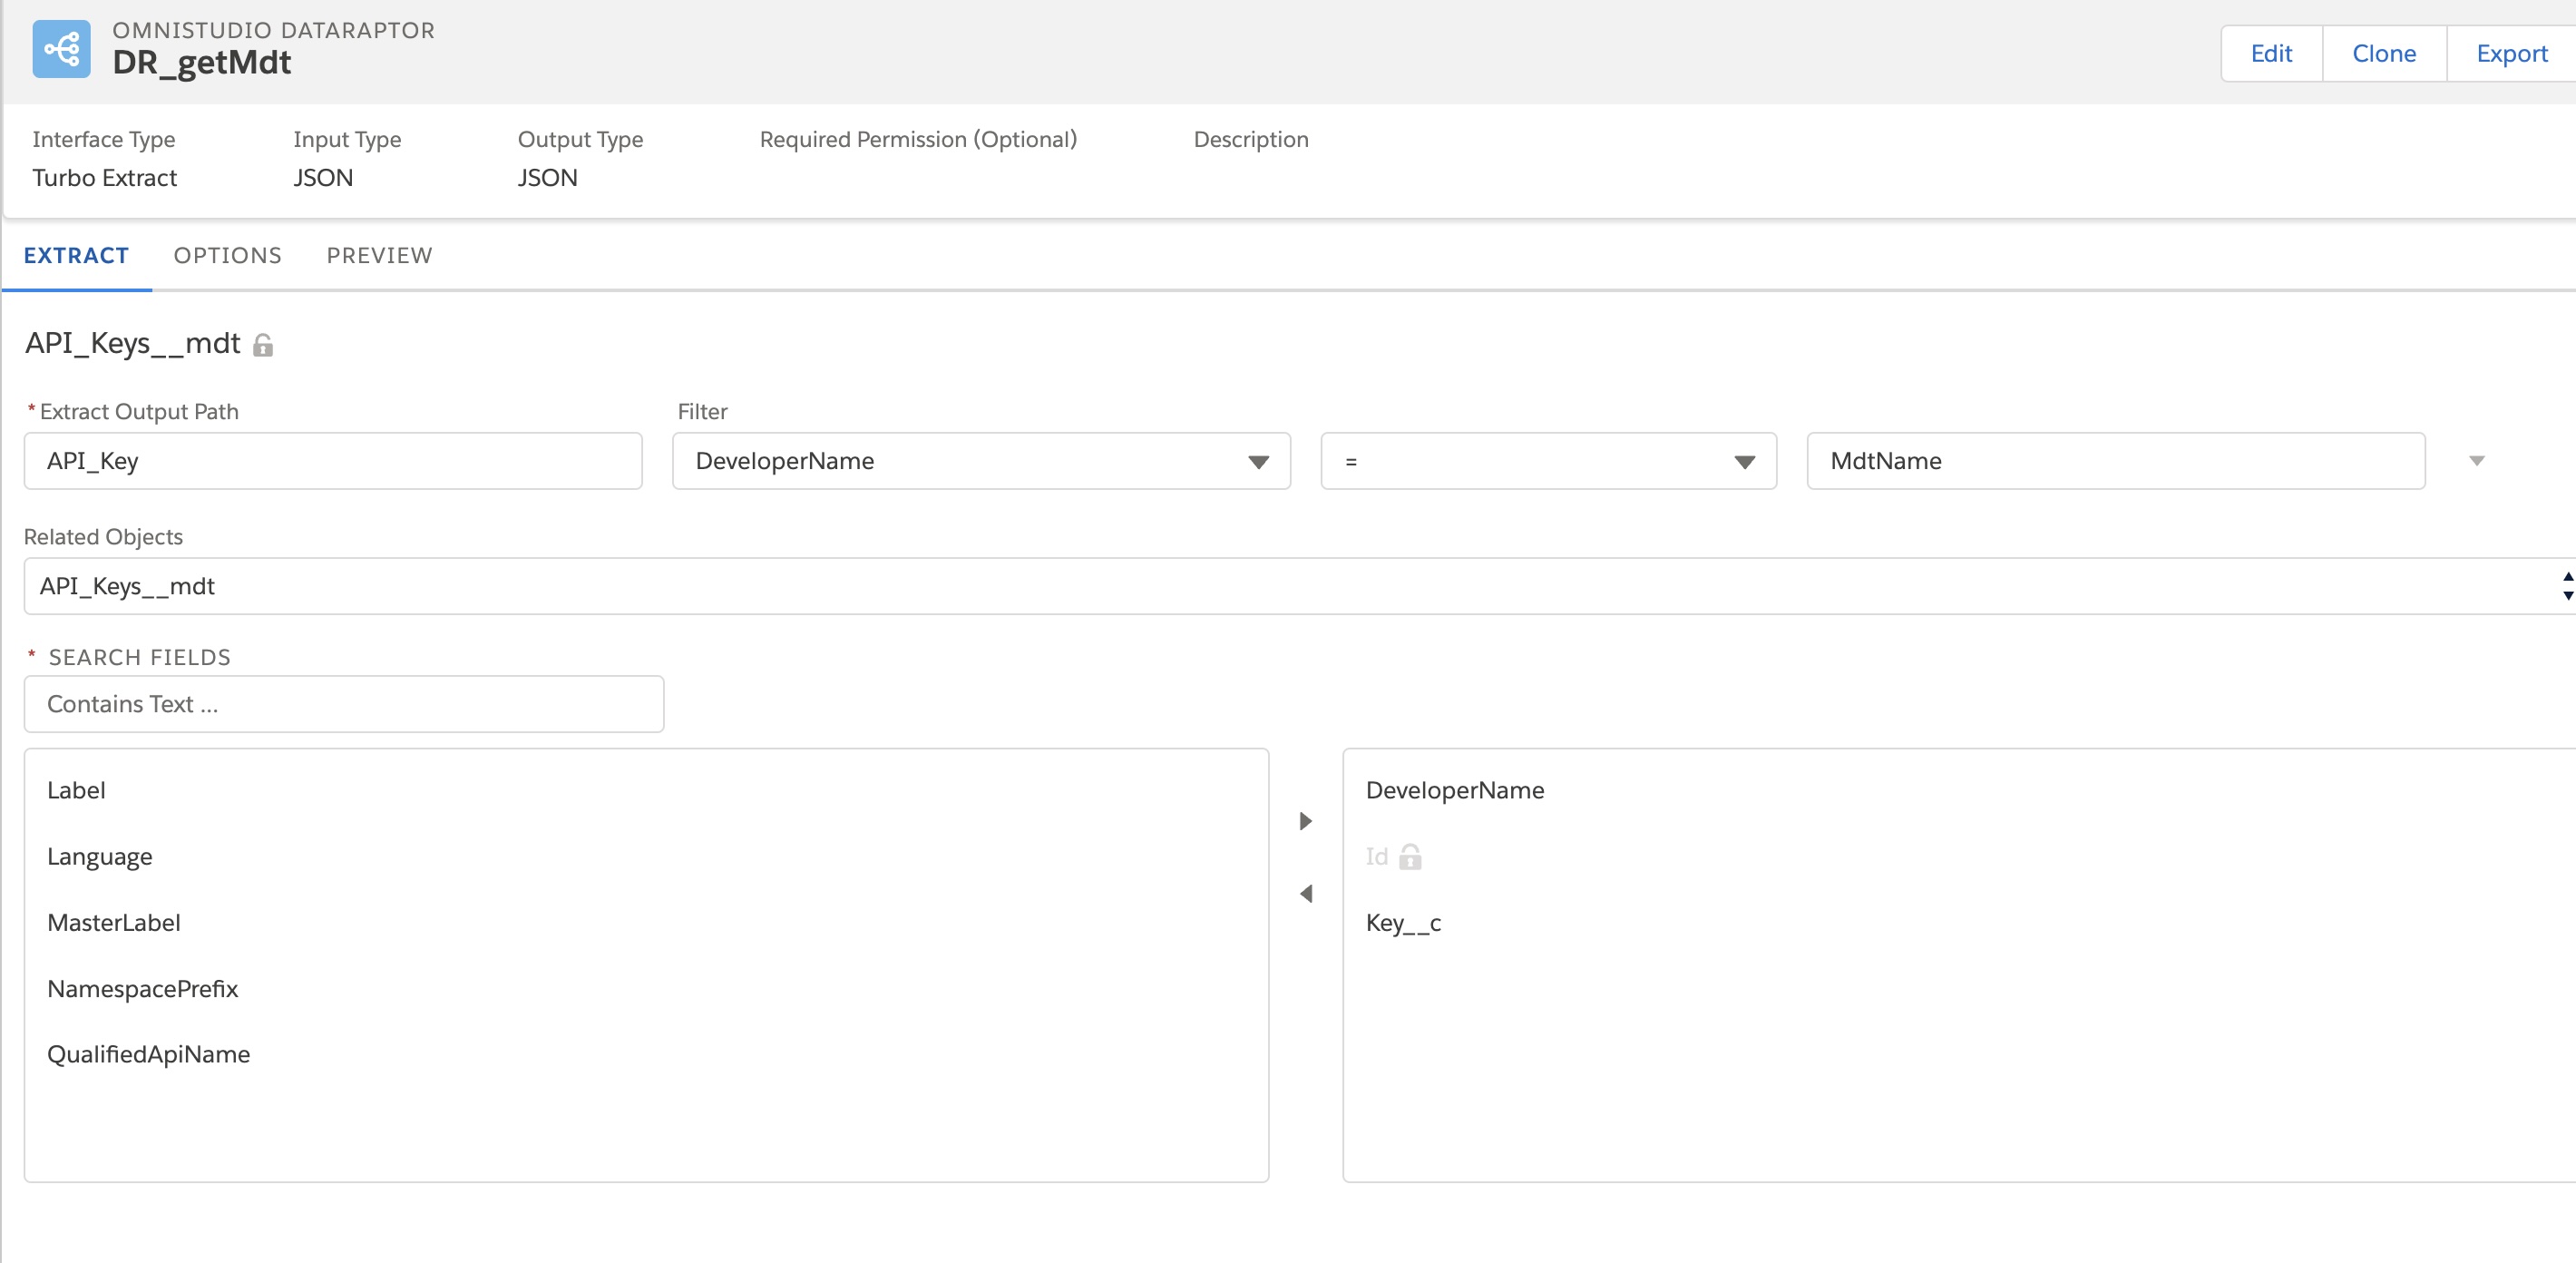
Here we simply use a turbo extract Dataraptor, because it’s sufficient for our needs. We don’t need something really fancy. Just getting one custom metadata type record.
Also, don’t be confused by the input and output data types, just select JSON. It’s the most common data type you will have to use, to my mind.
When we finished defining our Dataraptor, we selected the object we wanted to fetch(API_Keys__mdt) and the node where we put the data(I called it API_Key, you can call it whatever you want, it’s just a way to say to Vlocity “Hey, the data you get, you put them here”).
Also, we only get the records that have the ‘ProverbsAPI’ as a DeveloperName. Yes, you can specify filters on Dataraptors, just as you would do with SOQL and the WHERE clause.

Ok, we need to clarify something here. This Dataraptor, as you know, won’t have its best life alone. It needs to be called by our integration procedure. That means that the Integration Procedure will tell him “OK guy(or girl), I am giving you a variable value, and you will do an SOQL, and return me a value”. Of course, we can call our Dataraptor while directly defining the variable value on the Dataraptor, but it would make it less maintainable. What would we do if tomorrow we need to get some other credentials from other APIs? Will we create another Dataraptor? Hell no. To avoid this situation, we will use a parameter.
Now, we can verify if our Dataraptor works as expected. We go to Preview and add the name of our custom metadata type. Tomorrow, if we use a custom metadata type called RamboMdt, we will be able to find it. As you can guess, the Preview mode is for tests(changes are not rolled back though). Here you can specify the values of your parameters. In real life, Dataraptors are called by other processes. It could be a text typed by the user on an Omniscript, it could be the value of the current temperature, it could be anything. Here, it’s the name of the custom metadata type record, which is given by the Integration Procedure we just began to develop.
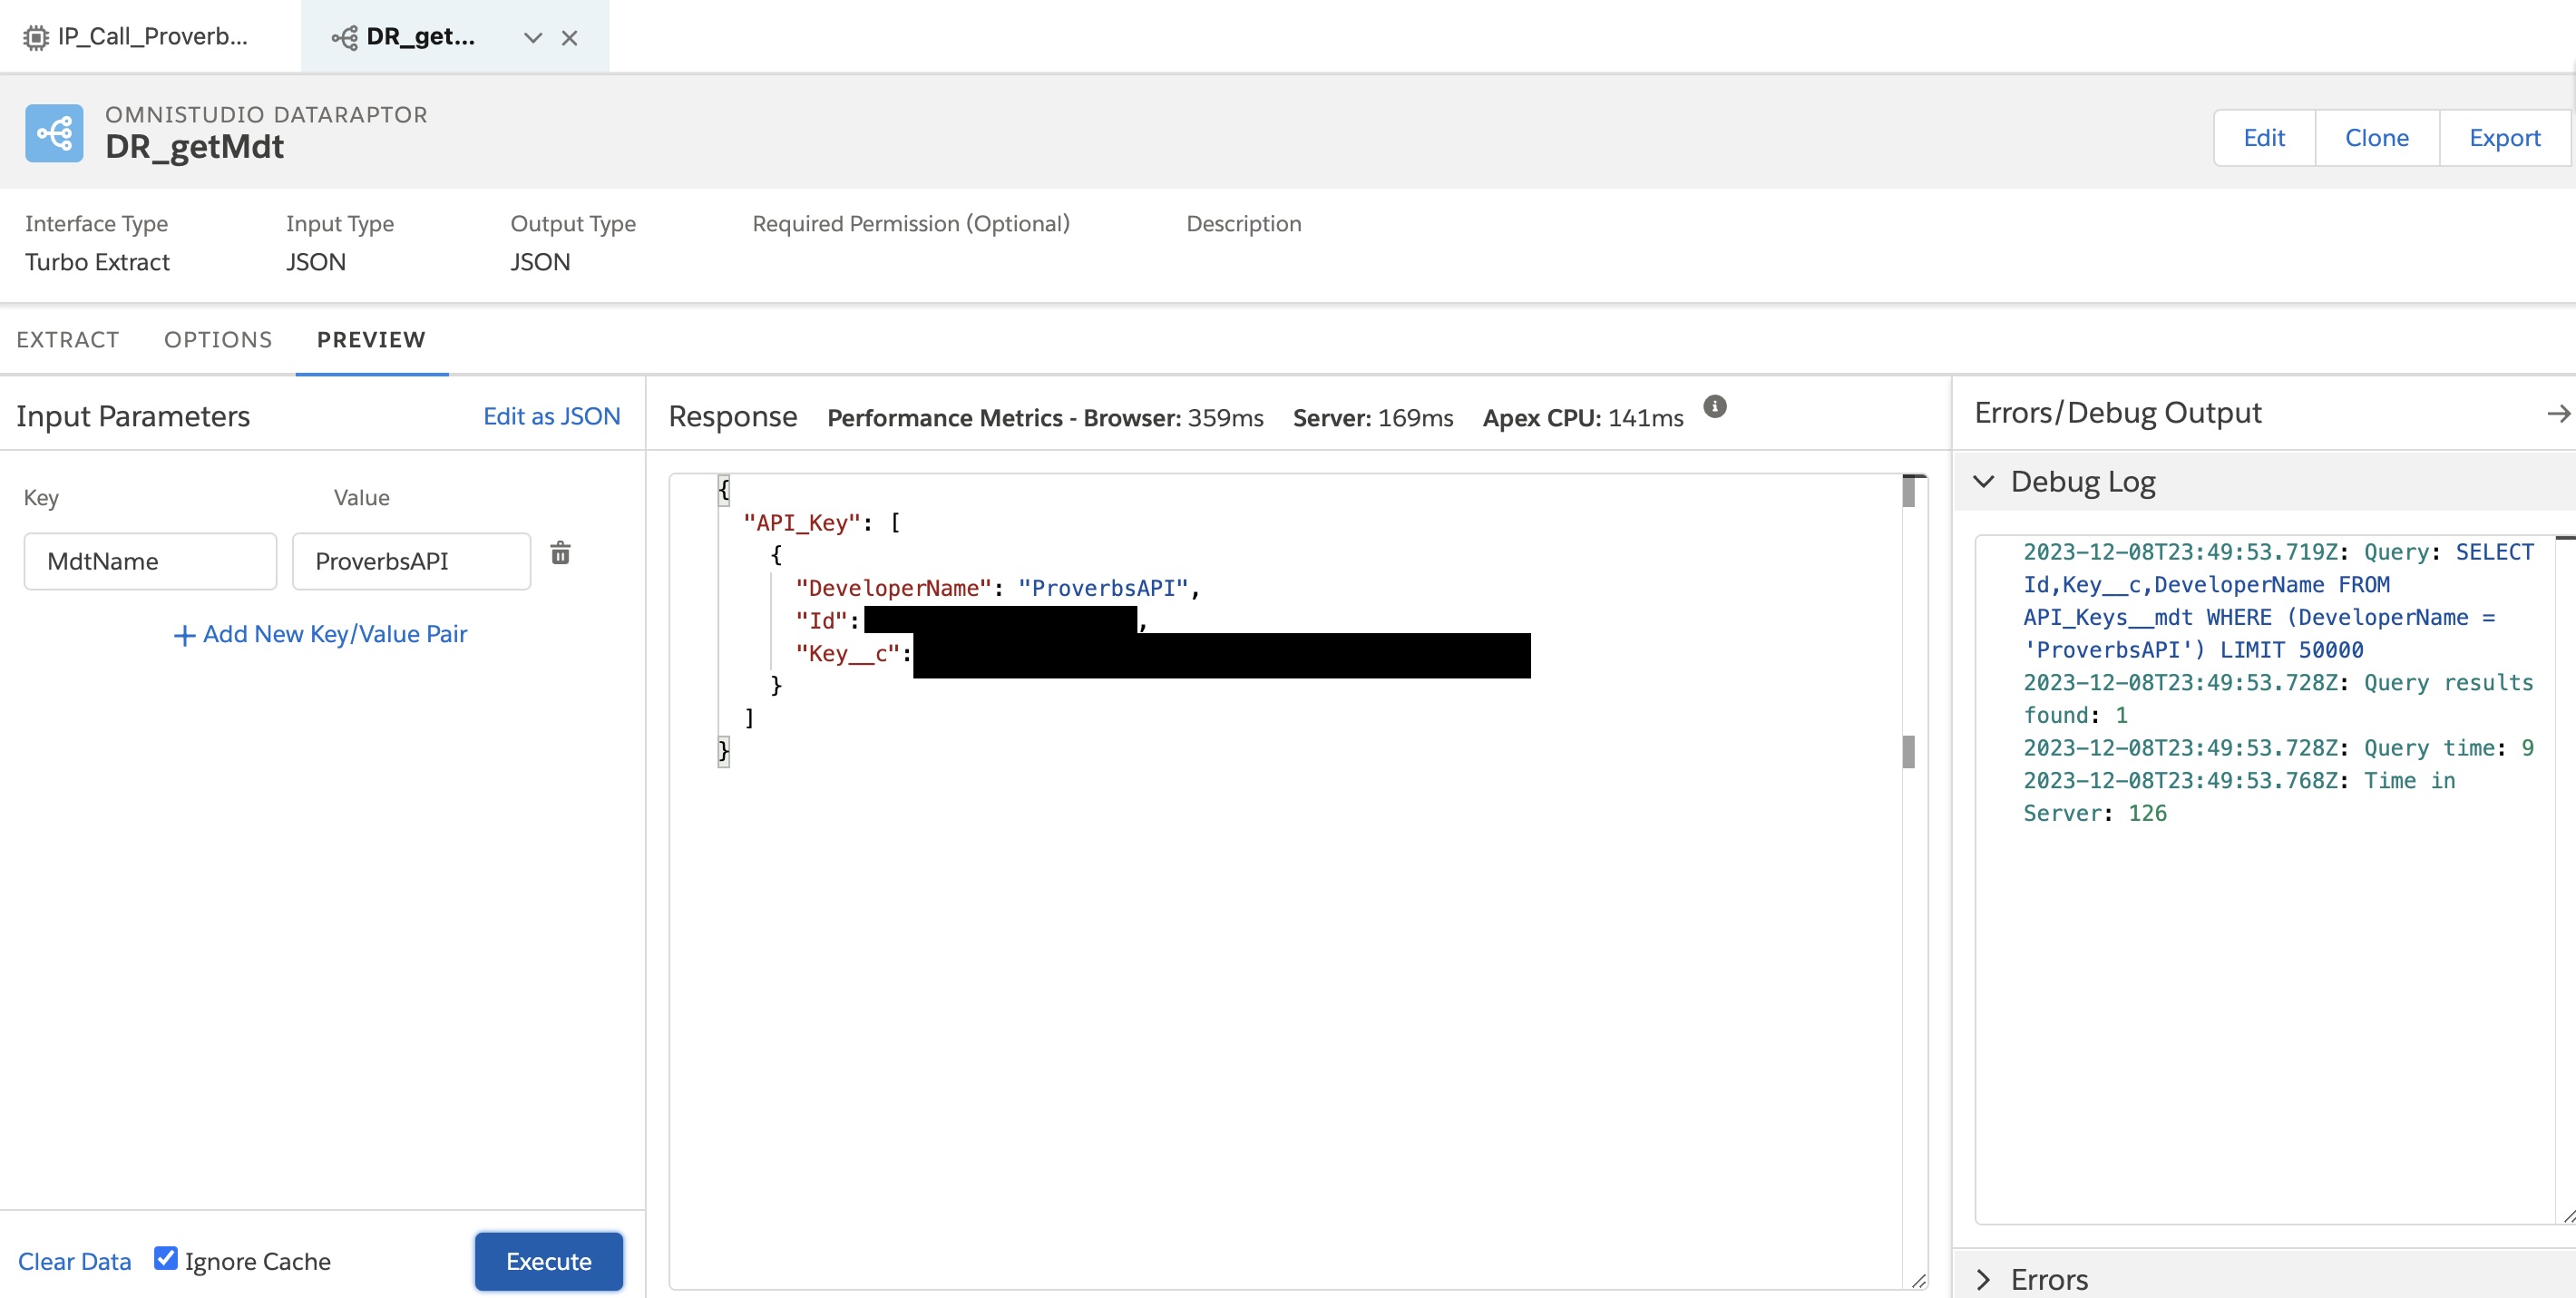
When we click on Execute, we can see that everything is perfect. Thus, we can activate our Dataraptor and go back to our integration procedure.
Be careful, if you don’t activate it, you won’t be able to see it on your integration procedure!!!
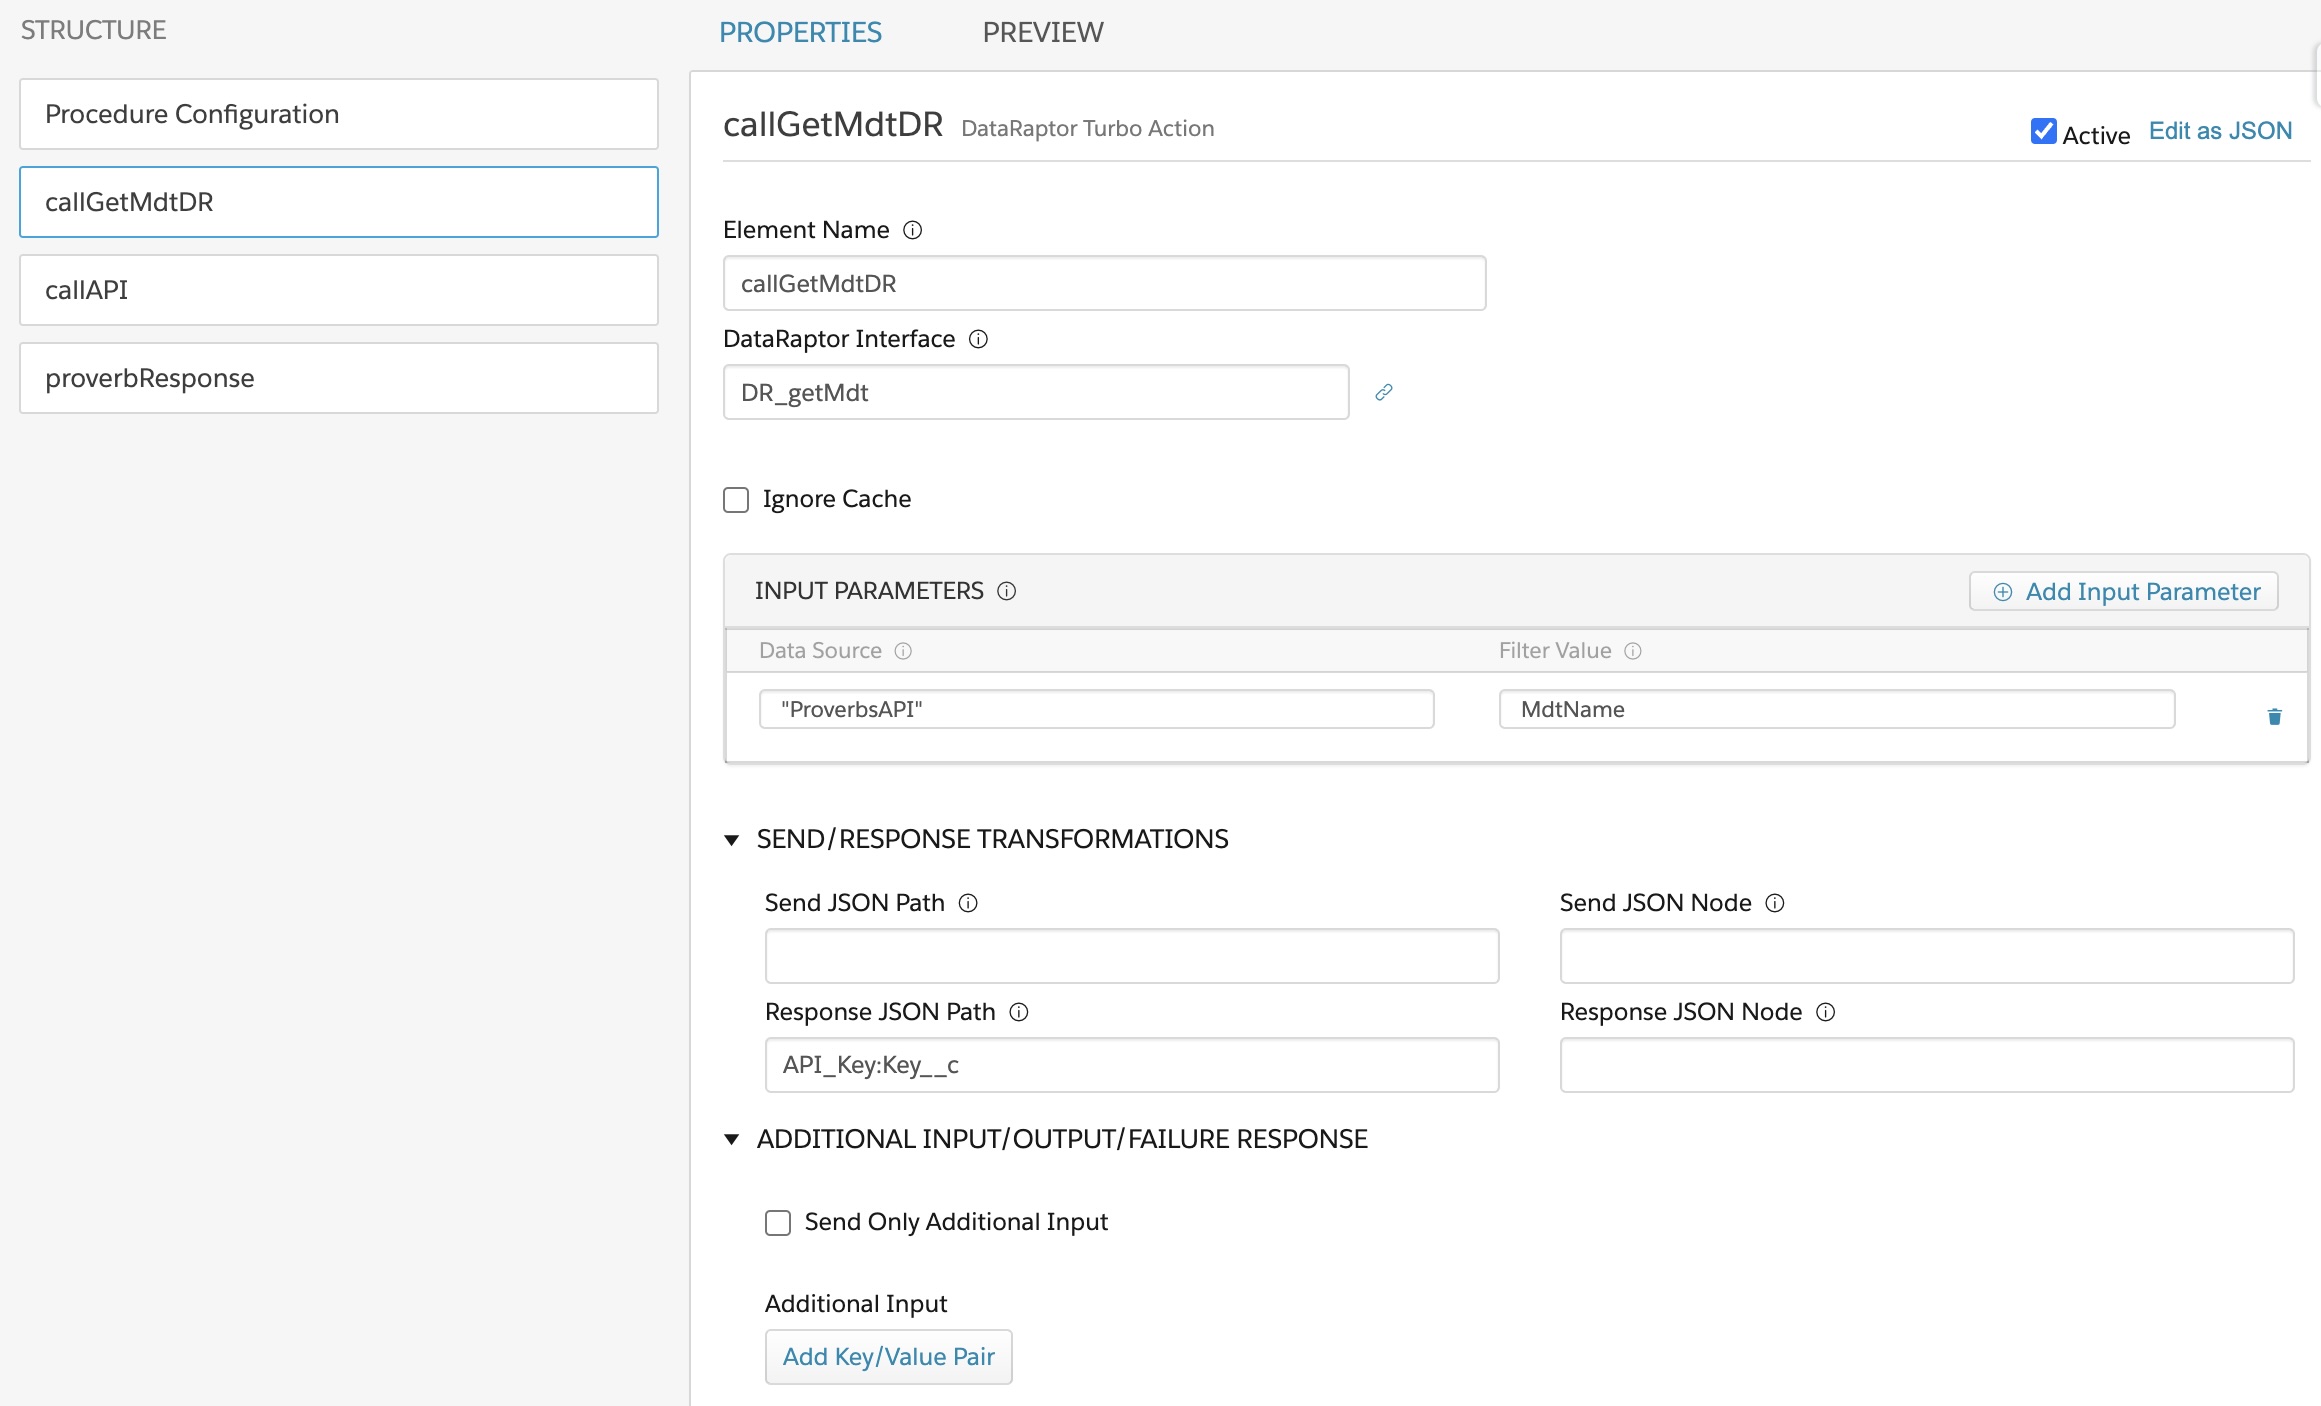
We add a Dataraptor turbo action. As a parameter, we add the name of our custom metadata type record. So we say to Omniscript: “Do you see the MdtName variable on the DR_getMdt Dataraptor? OK, so this variable equals ‘ProverbsAPI’, ta bom?” . And then, the SOQL will be performed exactly the same way we did on the Preview mode, and return a response. This response is a JSON, we are just simple people, we want something simple. So we only take what we want, nothing more: the API key. How do we do that? We add API_Key:Key__c on the “Response JSON Path” field. By doing this, we say: “In your JSON, we want as a response only this specific field, not all the JSON”.
Where we get the proverbs
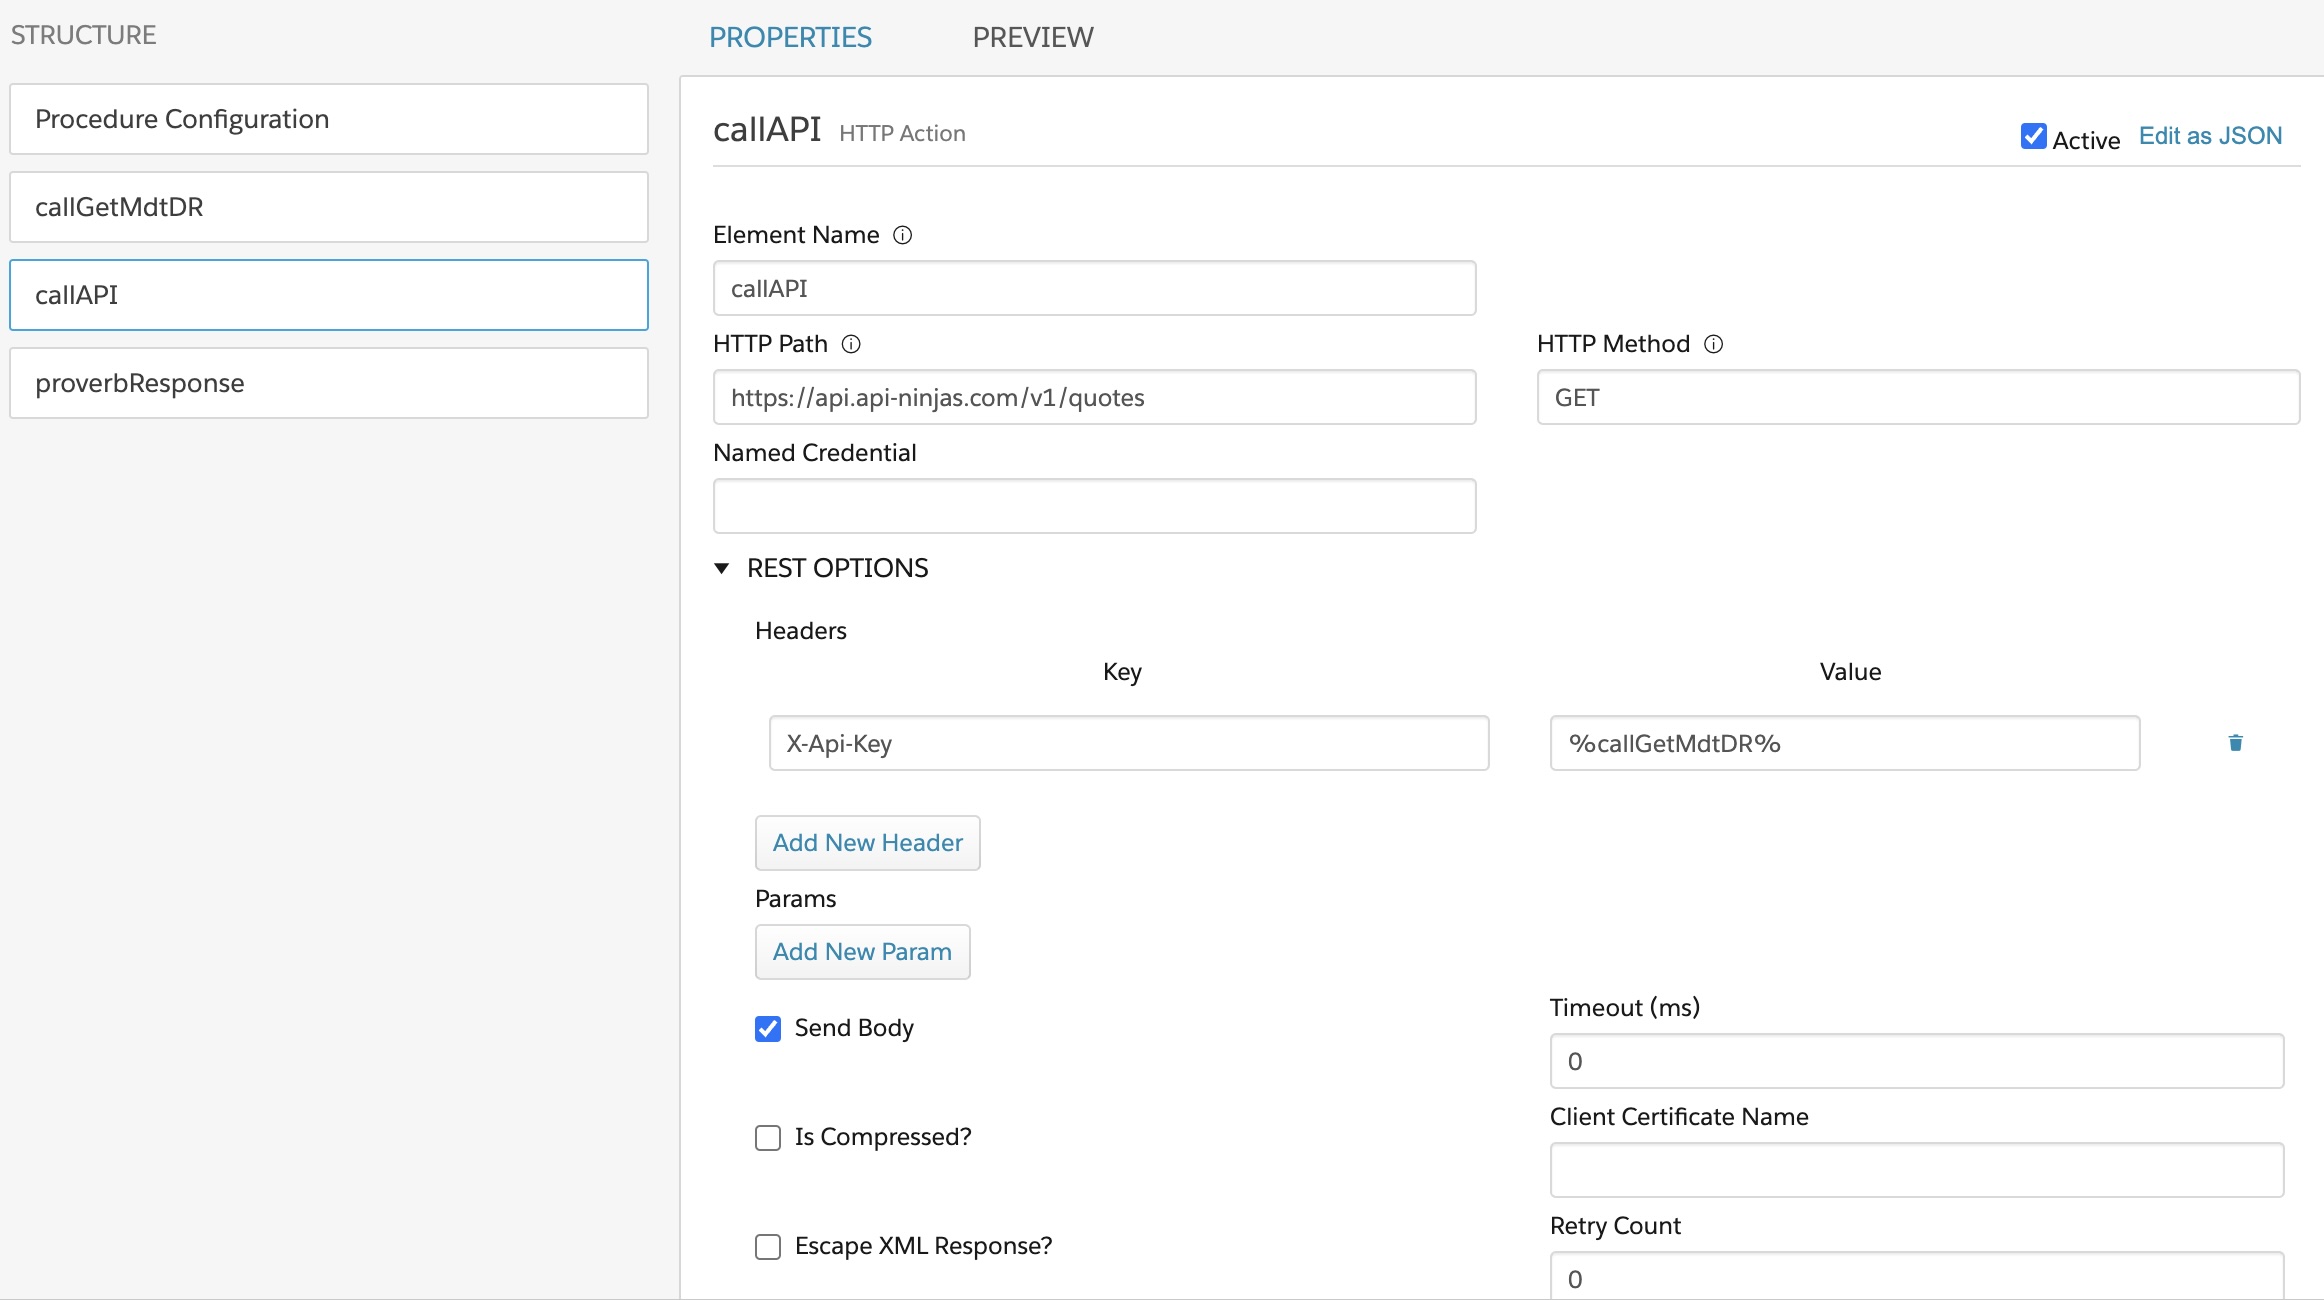
Ok, now that we have the API key on the Integration Procedure, we can perform the callout. At this time in Vlocity, only the POST and GET methods are supported(yes, I am thinking about Salesforce flows too, which have the exactly same limitation here). Here we need a GET method, to GET proverbs.
As we would do in Apex, we specify a header with the credentials.
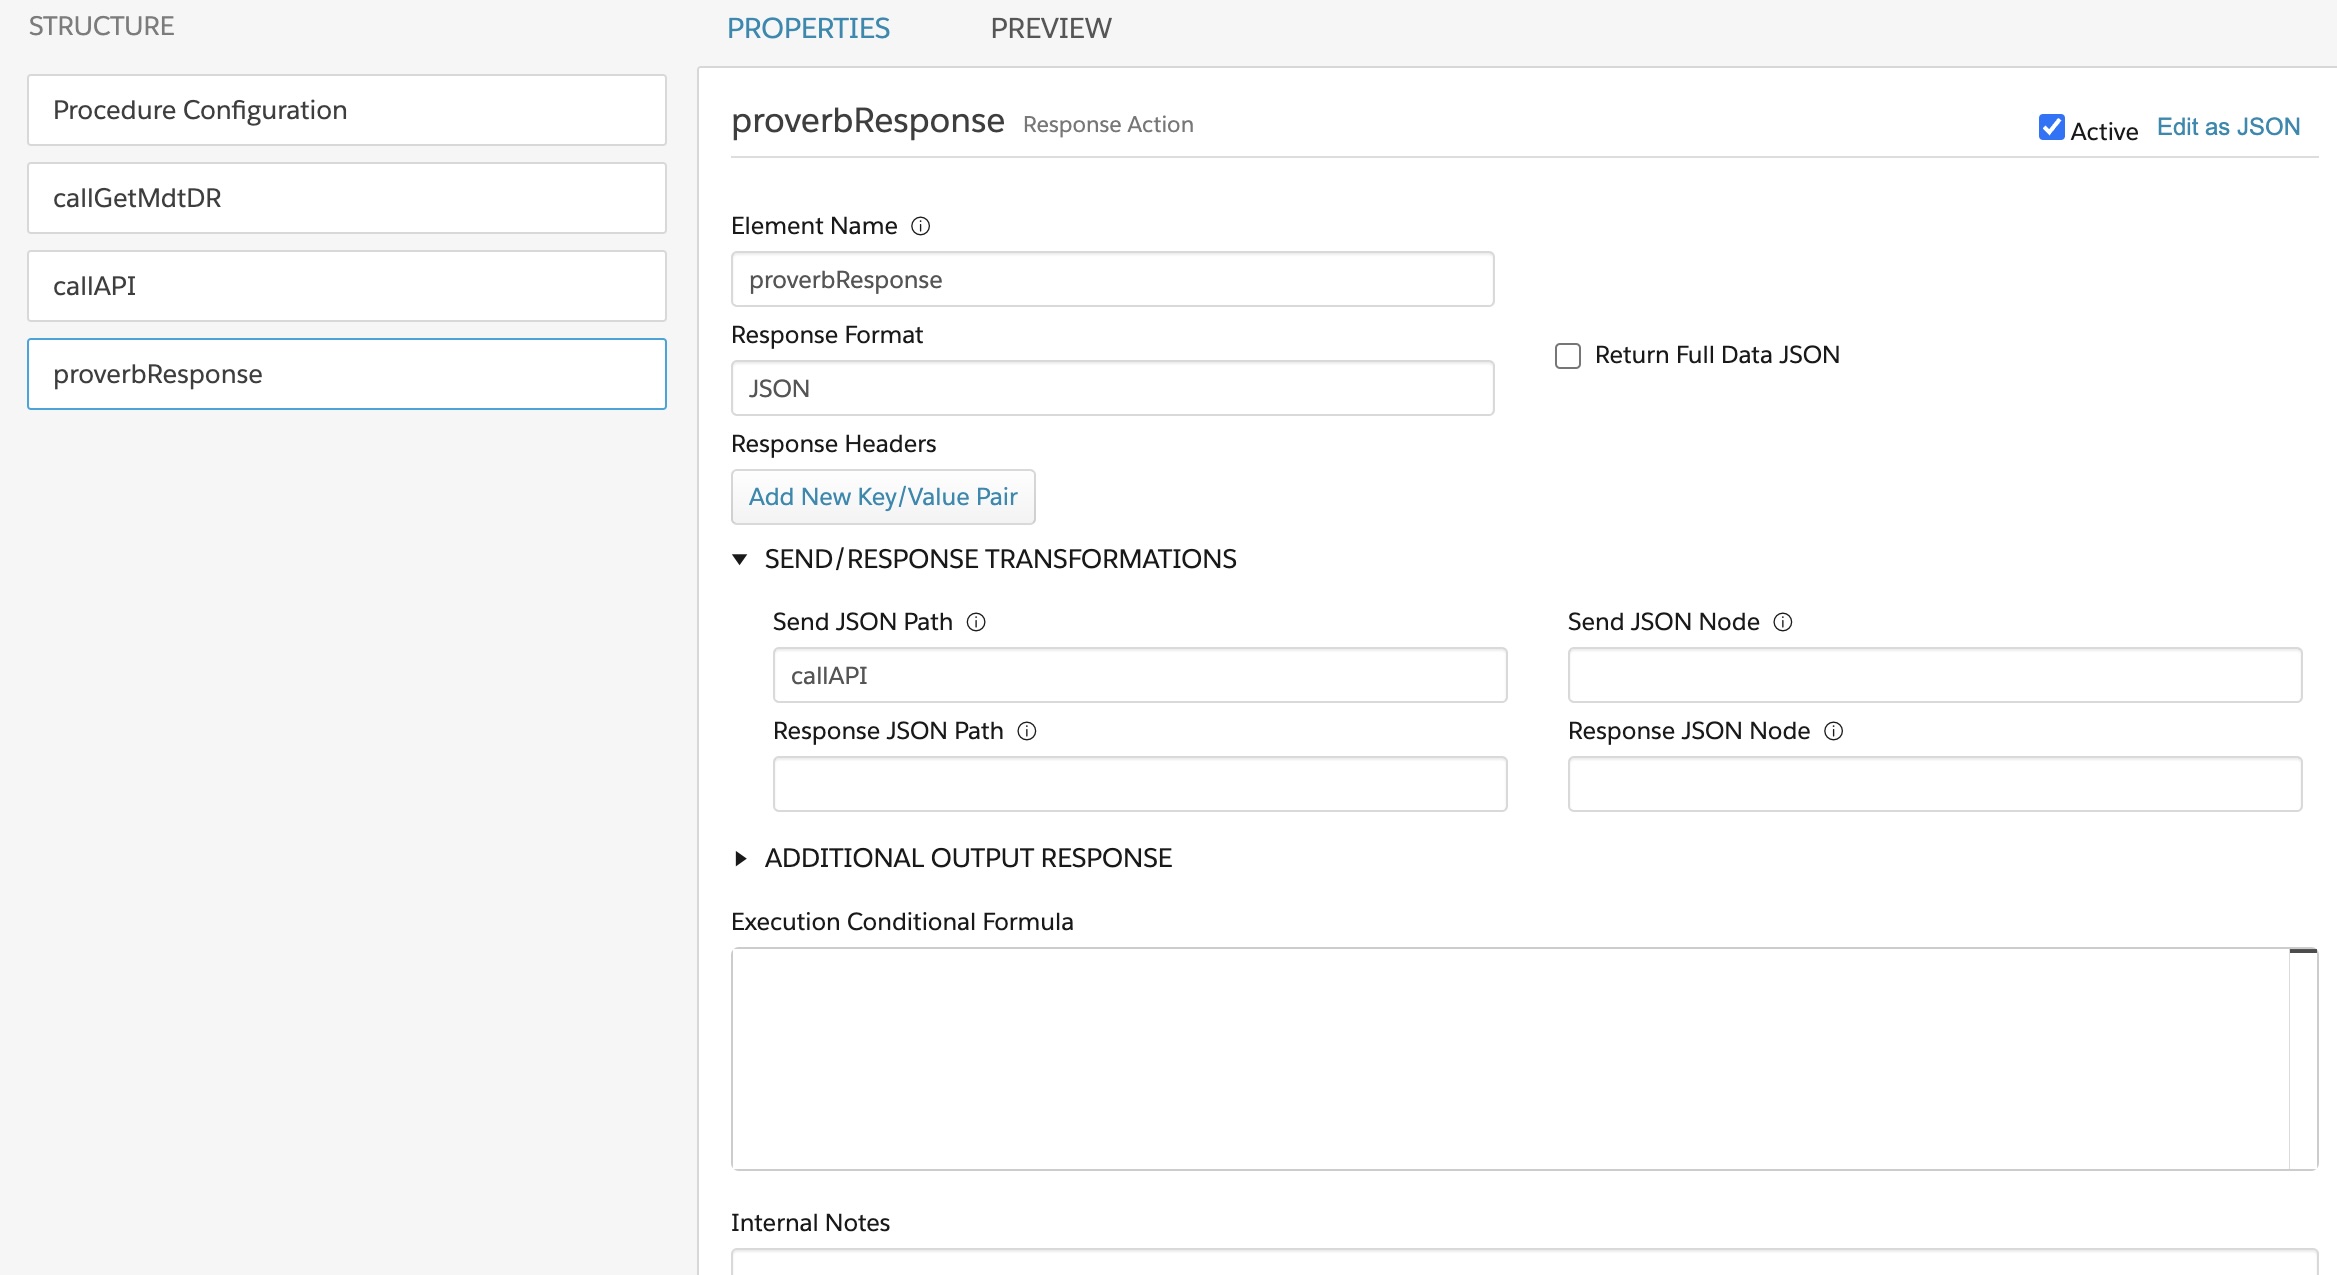
We finish by creating a response element, which is like the return word in Apex. If we don’t use it, our Flexcard won’t receive anything.
Oh, you can do an exercise when everything will be in place. You could deactivate the last step of your Integration procedure, go back to your Flexcard Setup menu, and click again on Save and Fetch. What would be the return?
Anyway, if you click on Preview, you get something like this:
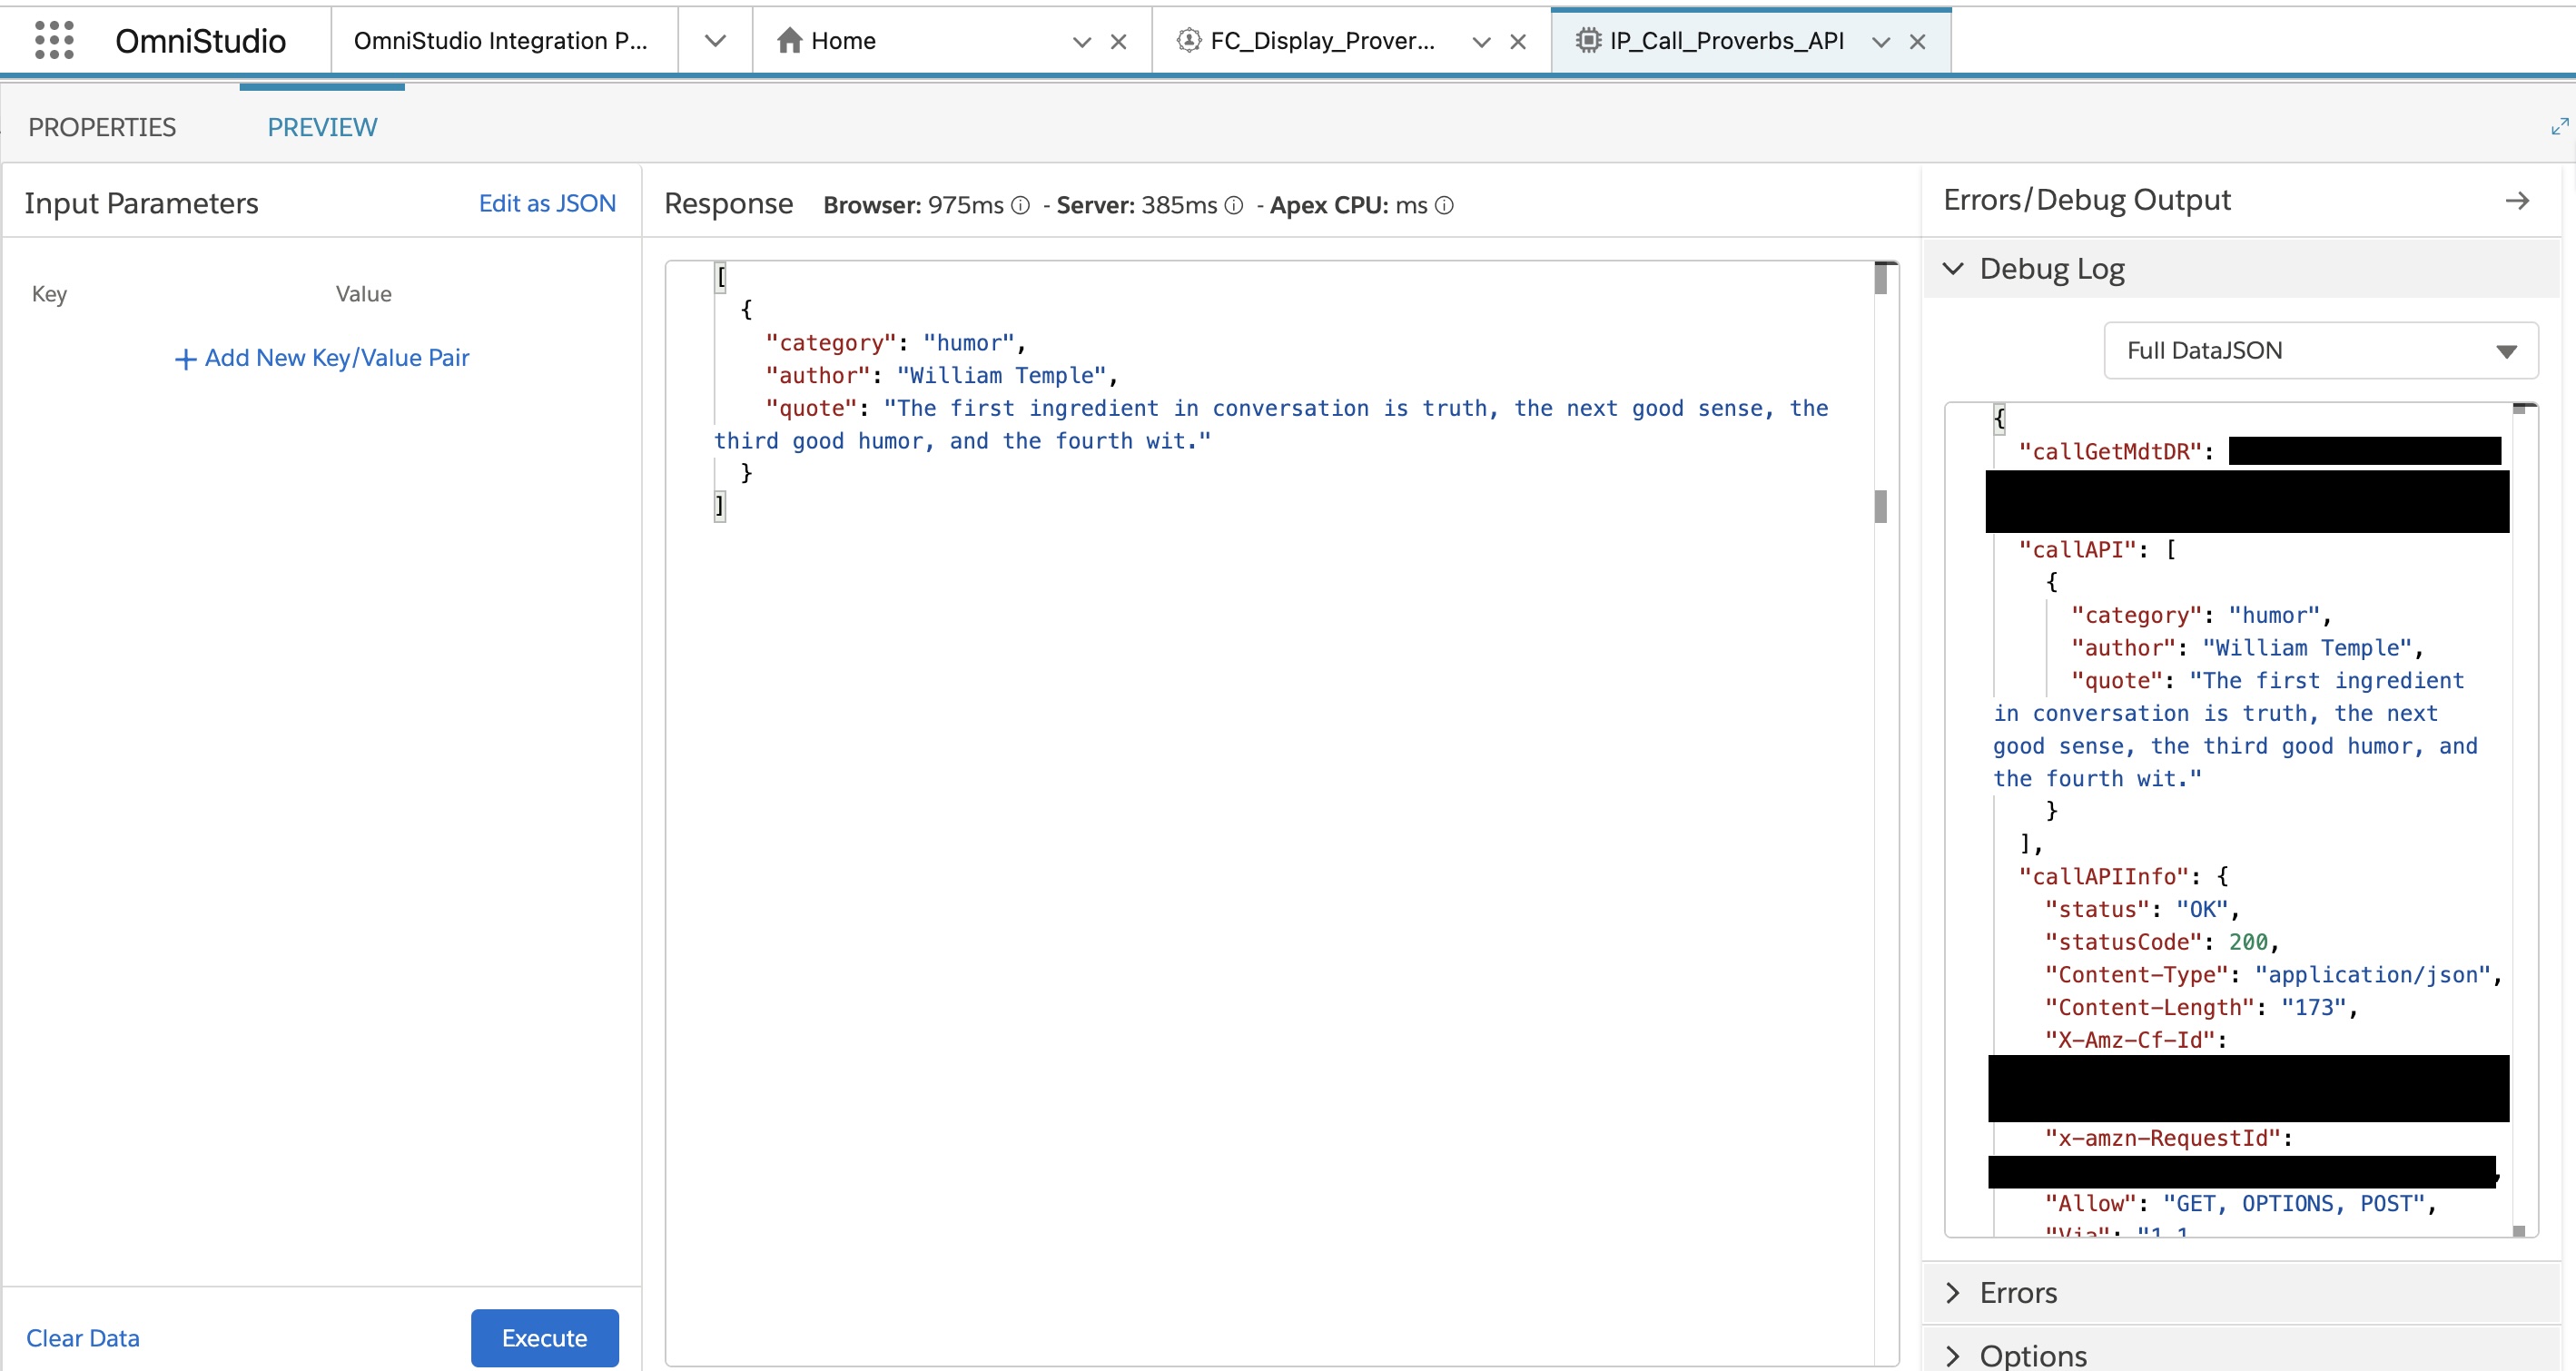 You can see that every step is on the Preview, which is really useful to debug it.
Where we display the proverbs
Wow, our integration procedure is finished! Nossa! Let me correct it. It’s not finished yet. First, we have to activate it. Right now, our Integration Procedure is like a standalone Apex method. Its destiny is to be called, but right now, it’s not. Let’s use a Flexcard to call it. By thinking about it, it’s really that simple. It’s really like a big point and click Lightning Web Components. Your (Vlocity) component - a Flexcard here - is loaded every time your page loads. So, every time your page is loaded, some backend code is executing. With LWC it could be Apex code called by the Wire service on the LWC, here it’s an integration procedure called by a Flexcard.
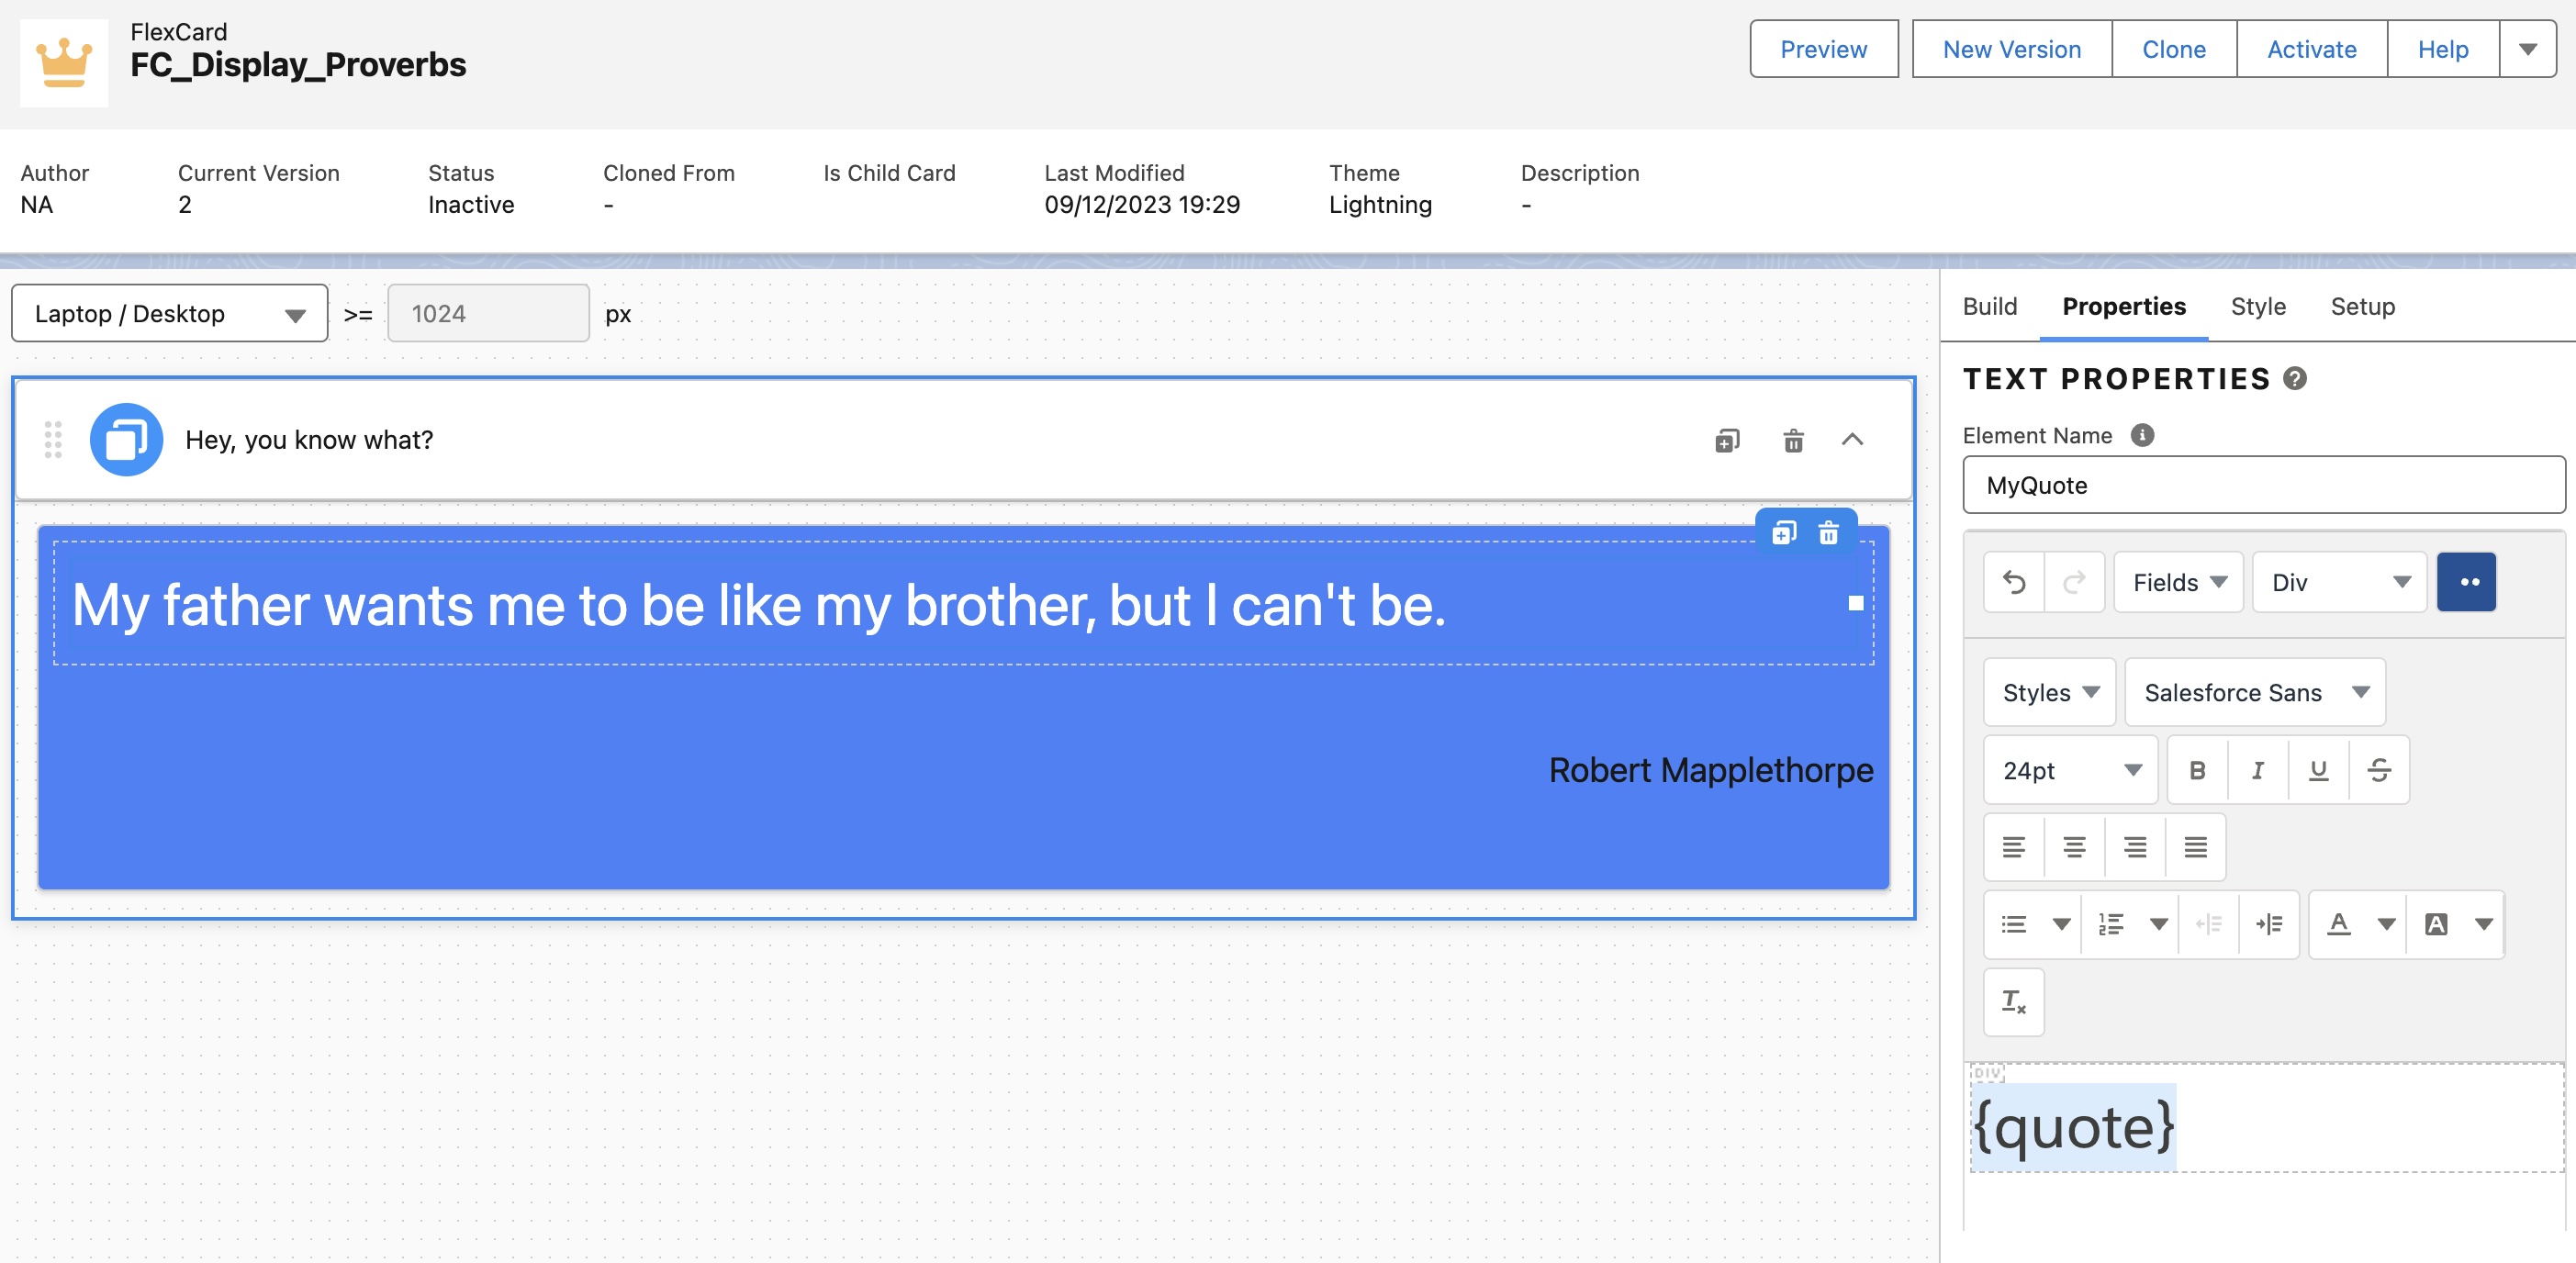
So now, let’s move to our HTML file(sorry, I meant the Flexcard). A huge part of our work is finished. At this point, we just need to display it on the screen. What do we want? Personally, I want a blue background, with the proverb and the author written in white. That’s it. It’s still up to you to change the design as you want it. And let’s be honest, Flexcards sometimes look like a word processor. Yes, a word processor from where you can call some other processes, but still a word processor.
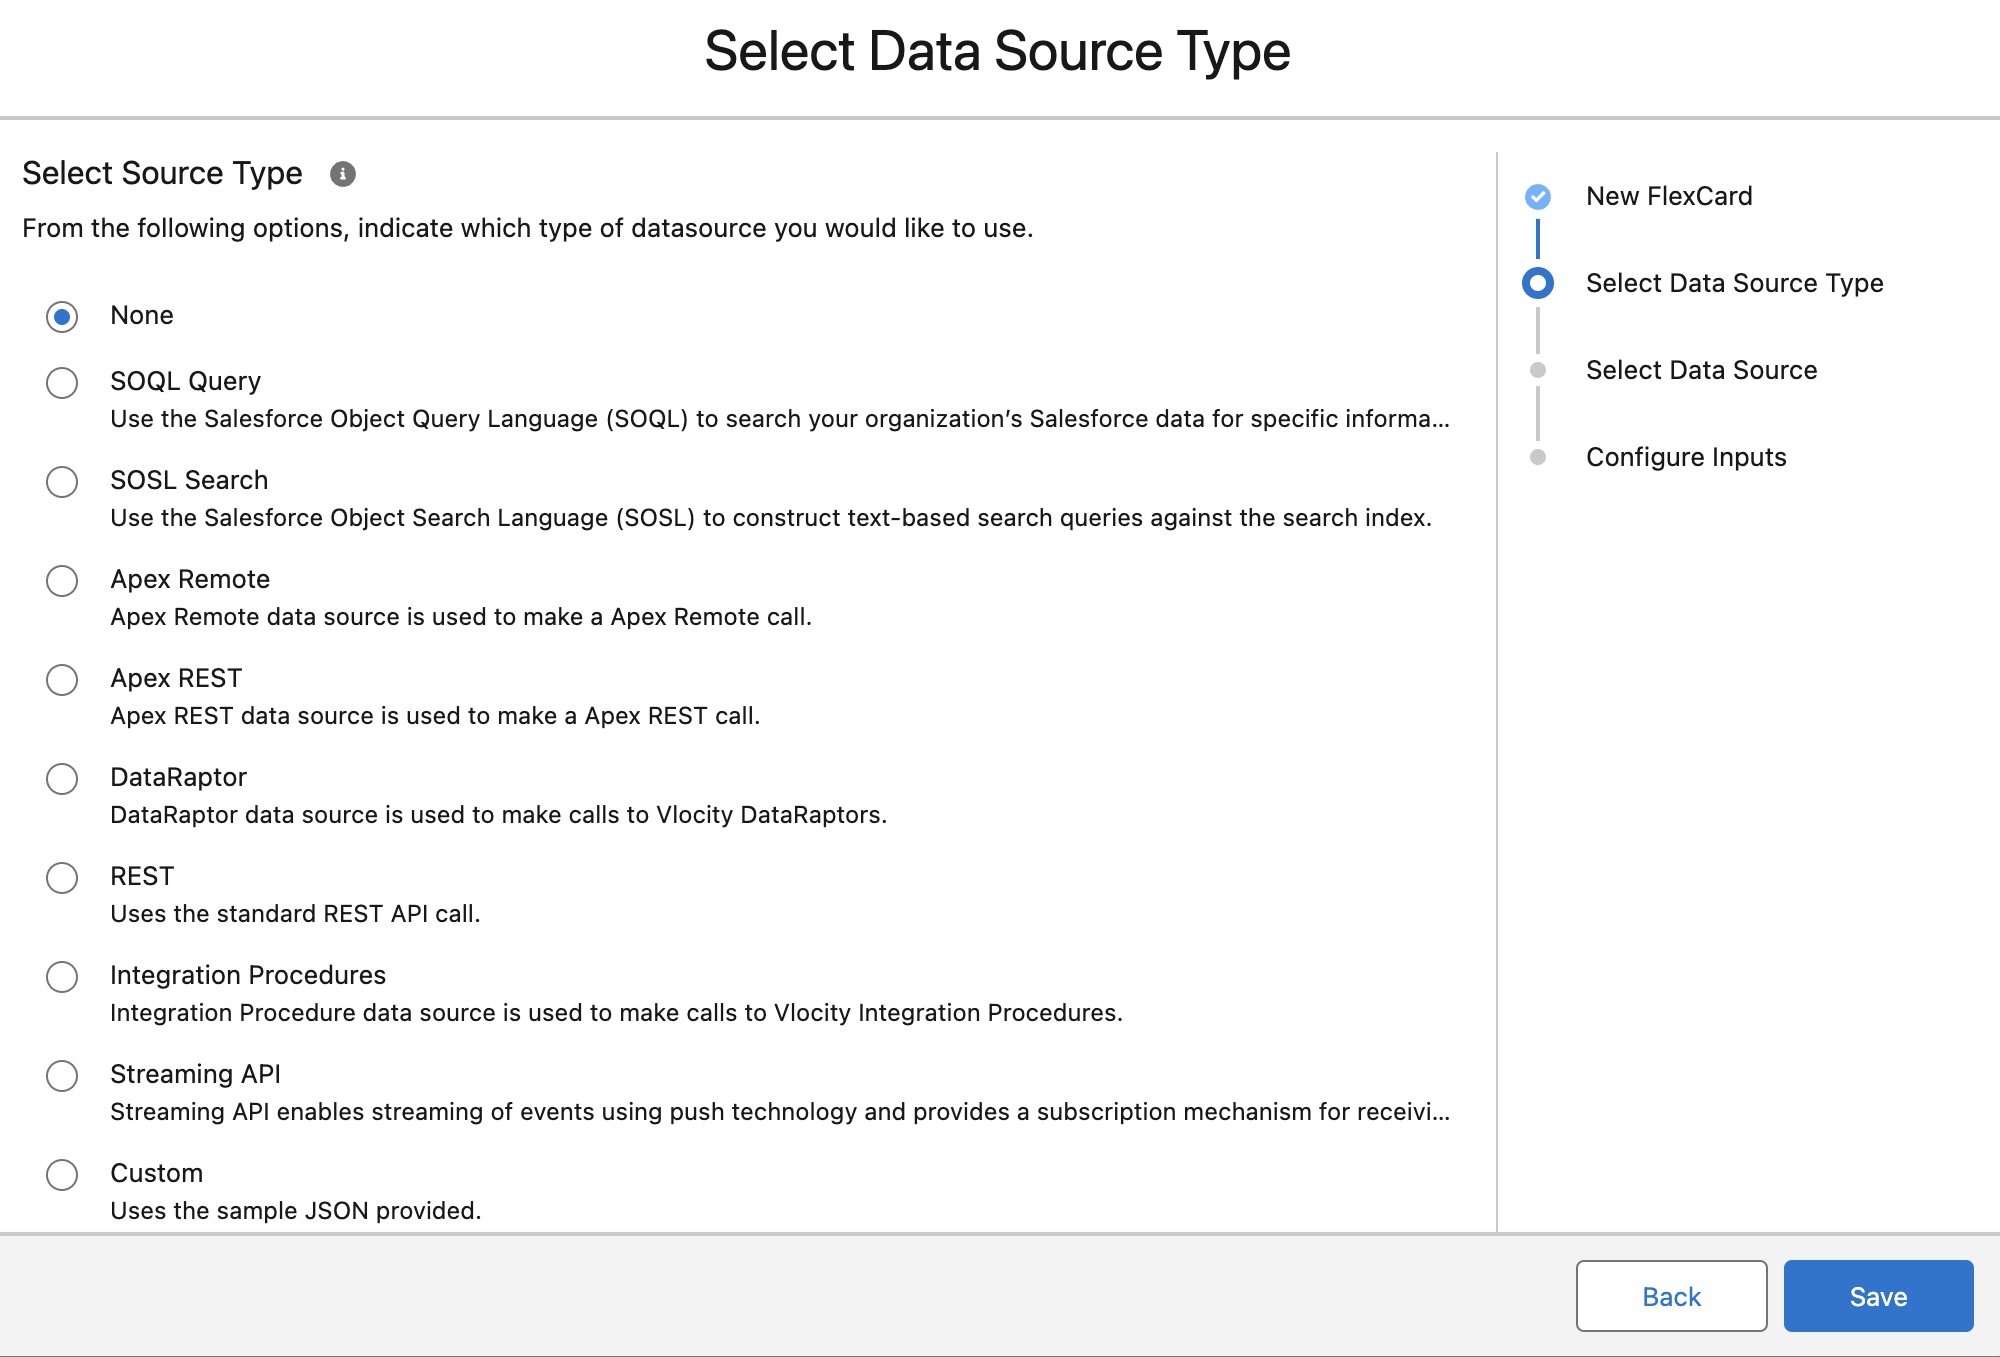
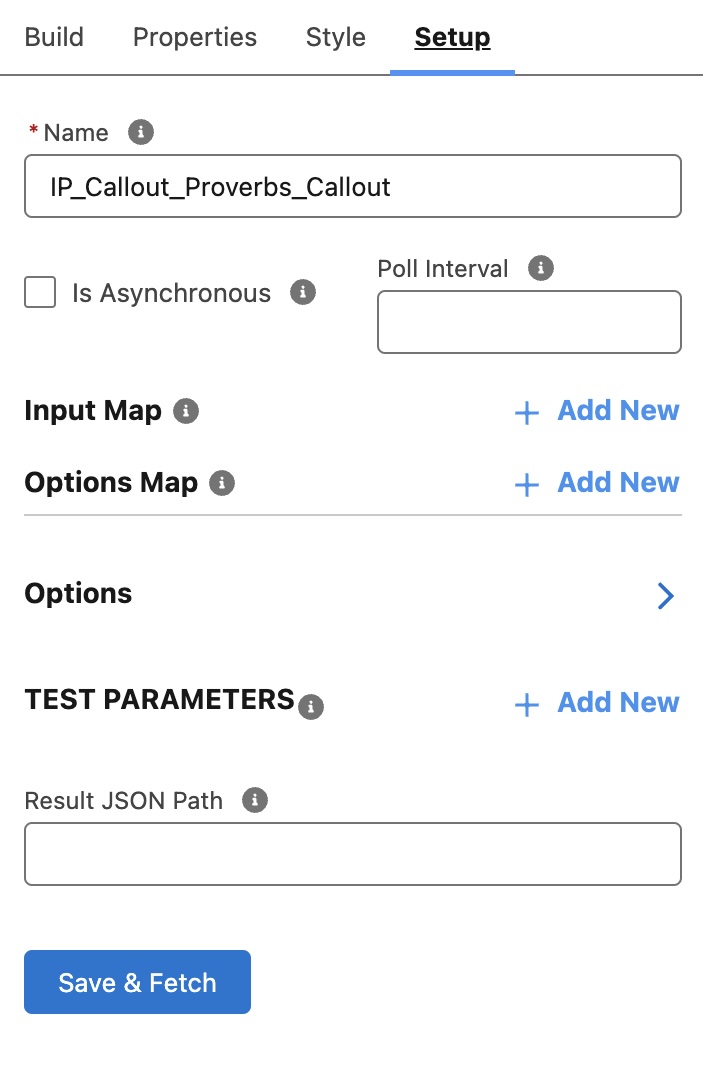
Just, while creating your first Flexcard you probably noticed that you can choose between multiple data sources. Why did we choose “Integration Procedure” against “REST Callout” for example? First, because we don’t want to put our credentials directly on the header. The “REST Callout” option would be suitable if we used an API allowing OAuth. And also, because separating the back end and the front end is the most straightforward and maintainable solution. If tomorrow we need to upgrade our solution, it will be a lot easier, especially if we need to add some additional steps.
In this step, don’t worry if you selected the wrong data source, or if you want to modify it. You can find it under the Data Sources section, in the Setup mode. Clicking then on Save & Fetch would allow you to see the new data sets.
And don’t worry about what “States” are. States and Flexcards are respectively like record types and page layouts in Salesforce. With states, you can display a blue flexcard when the current case is open, and a red one when it’s closed, for example.
Now we add two text components, one with the quote, and another one with the author. On the setup, we can select the nodes we need on the screen. The next is really up to you. I mean, be free to select the background you want, the police, the alignment you want…
I won’t show the Preview mode an other time, but feel free to switch from the Design mode to the Preview one every time you need to. The Preview mode on Flexcards even allows us to verify what the user would see, according to its device(which can be pretty useful).
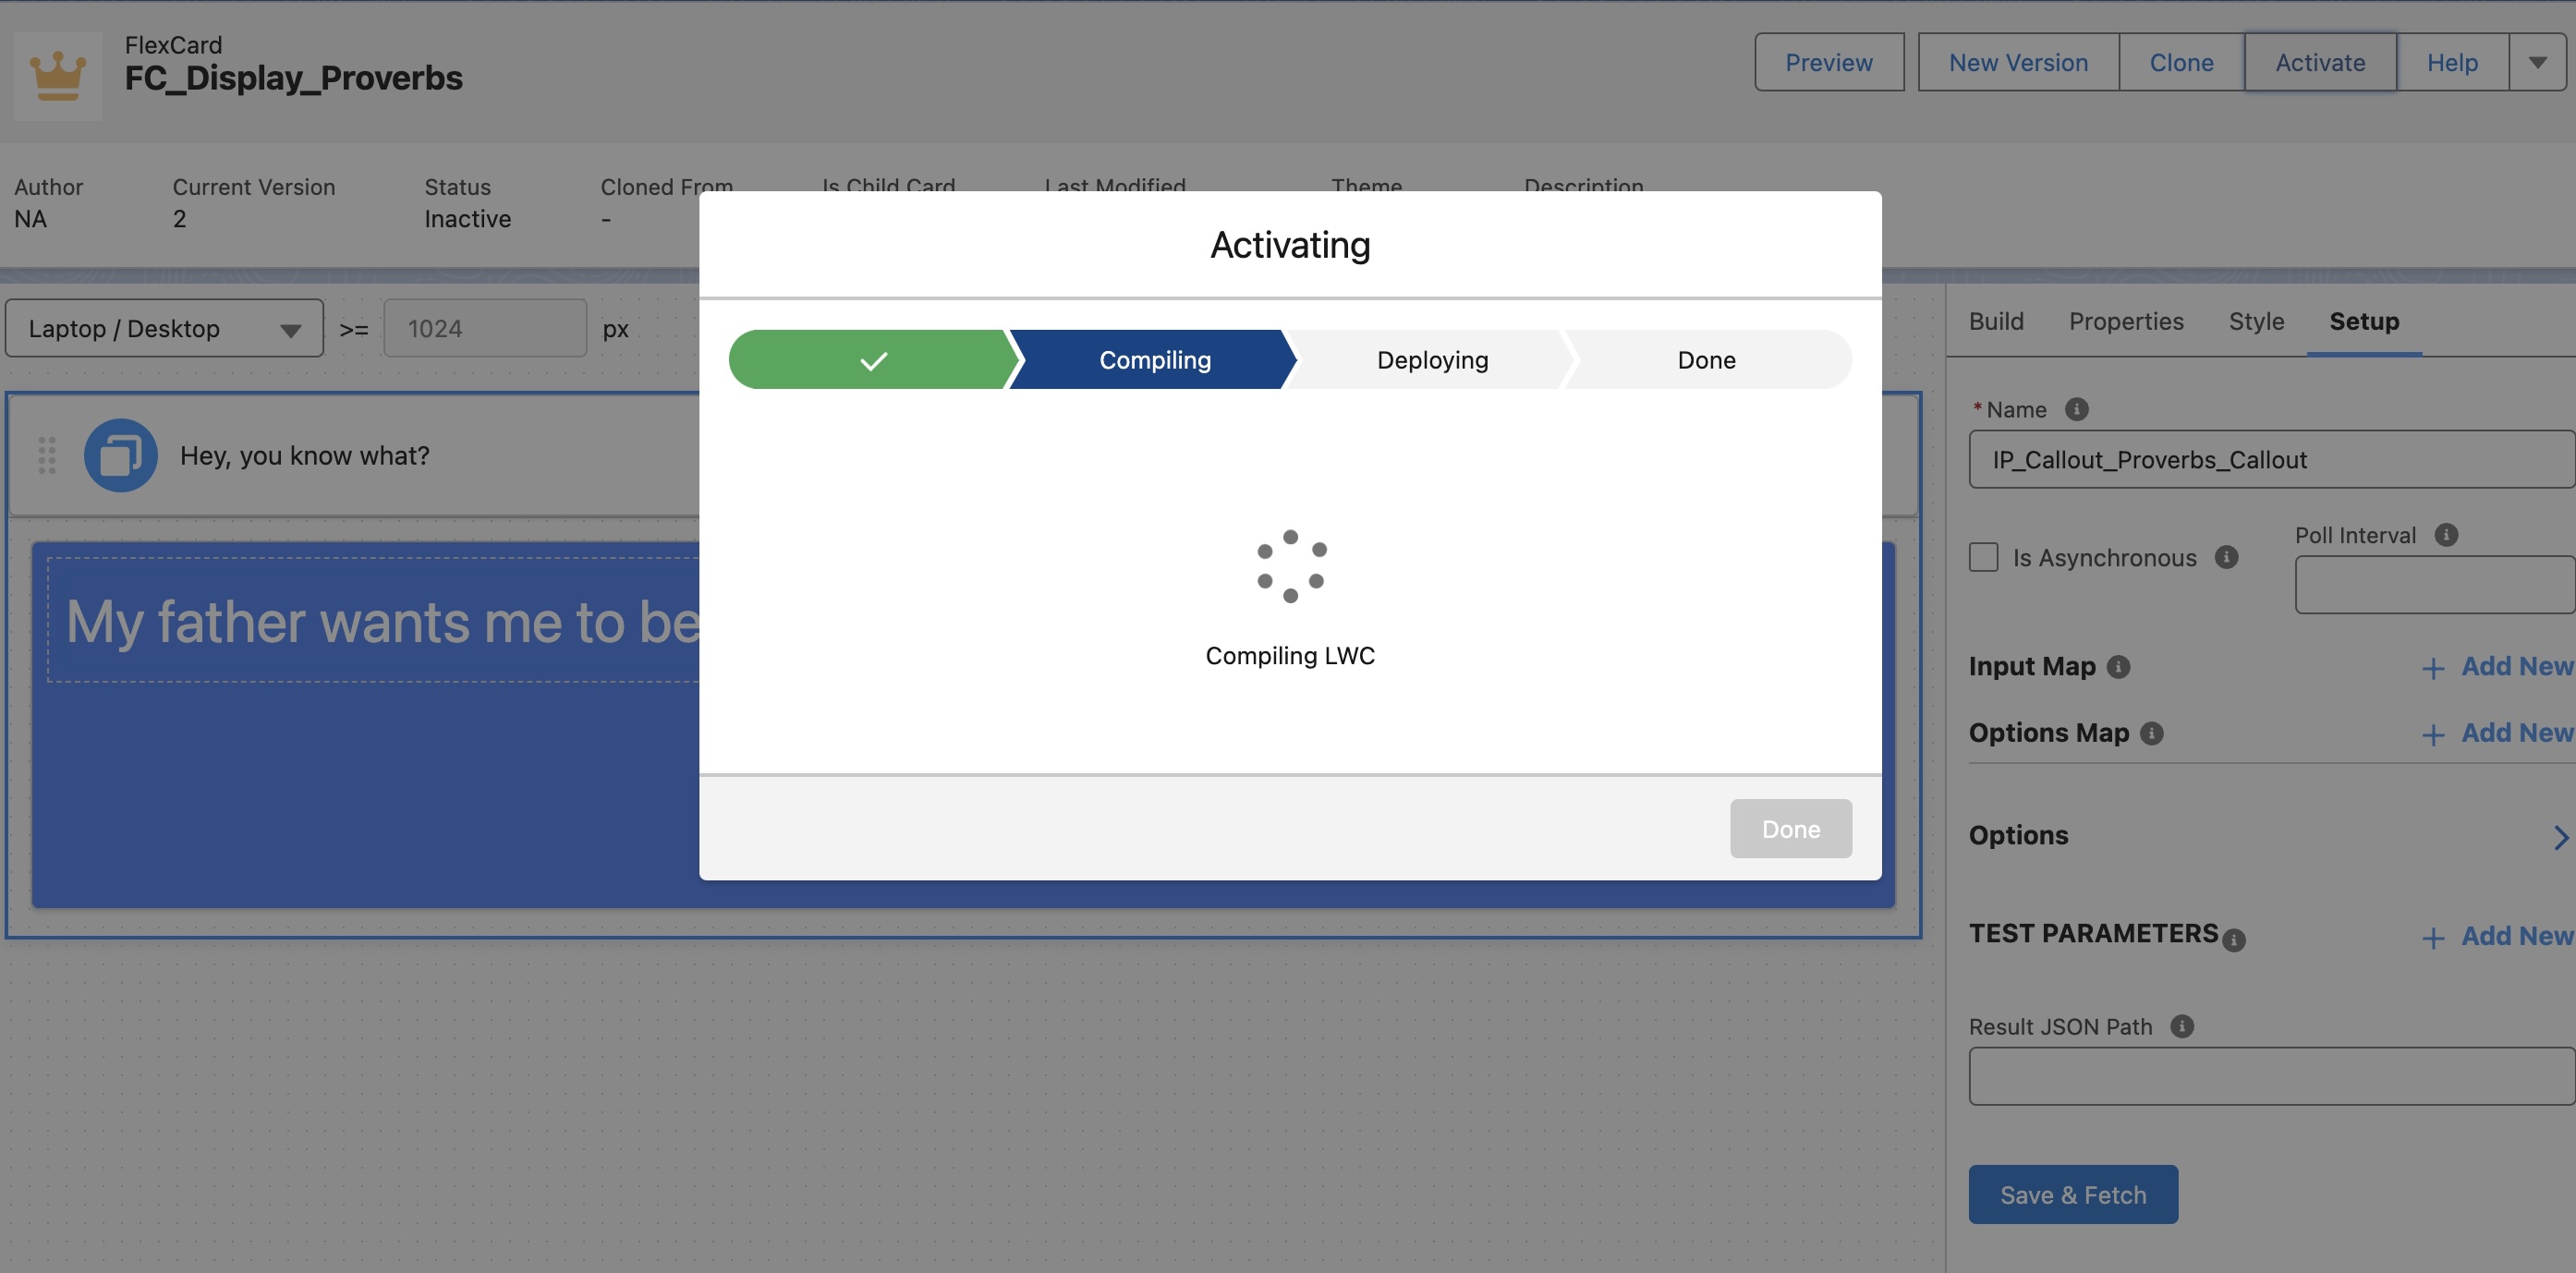
When it’s done, we just have to Activate our Flexcard, and Publish it. Let’s be honest, the Publish menu is also like a Point and Click meta file, nothing more. And as we would do with LWC, let’s move to the app builder, to add it to our home menu(or any relevant place of your current organization).
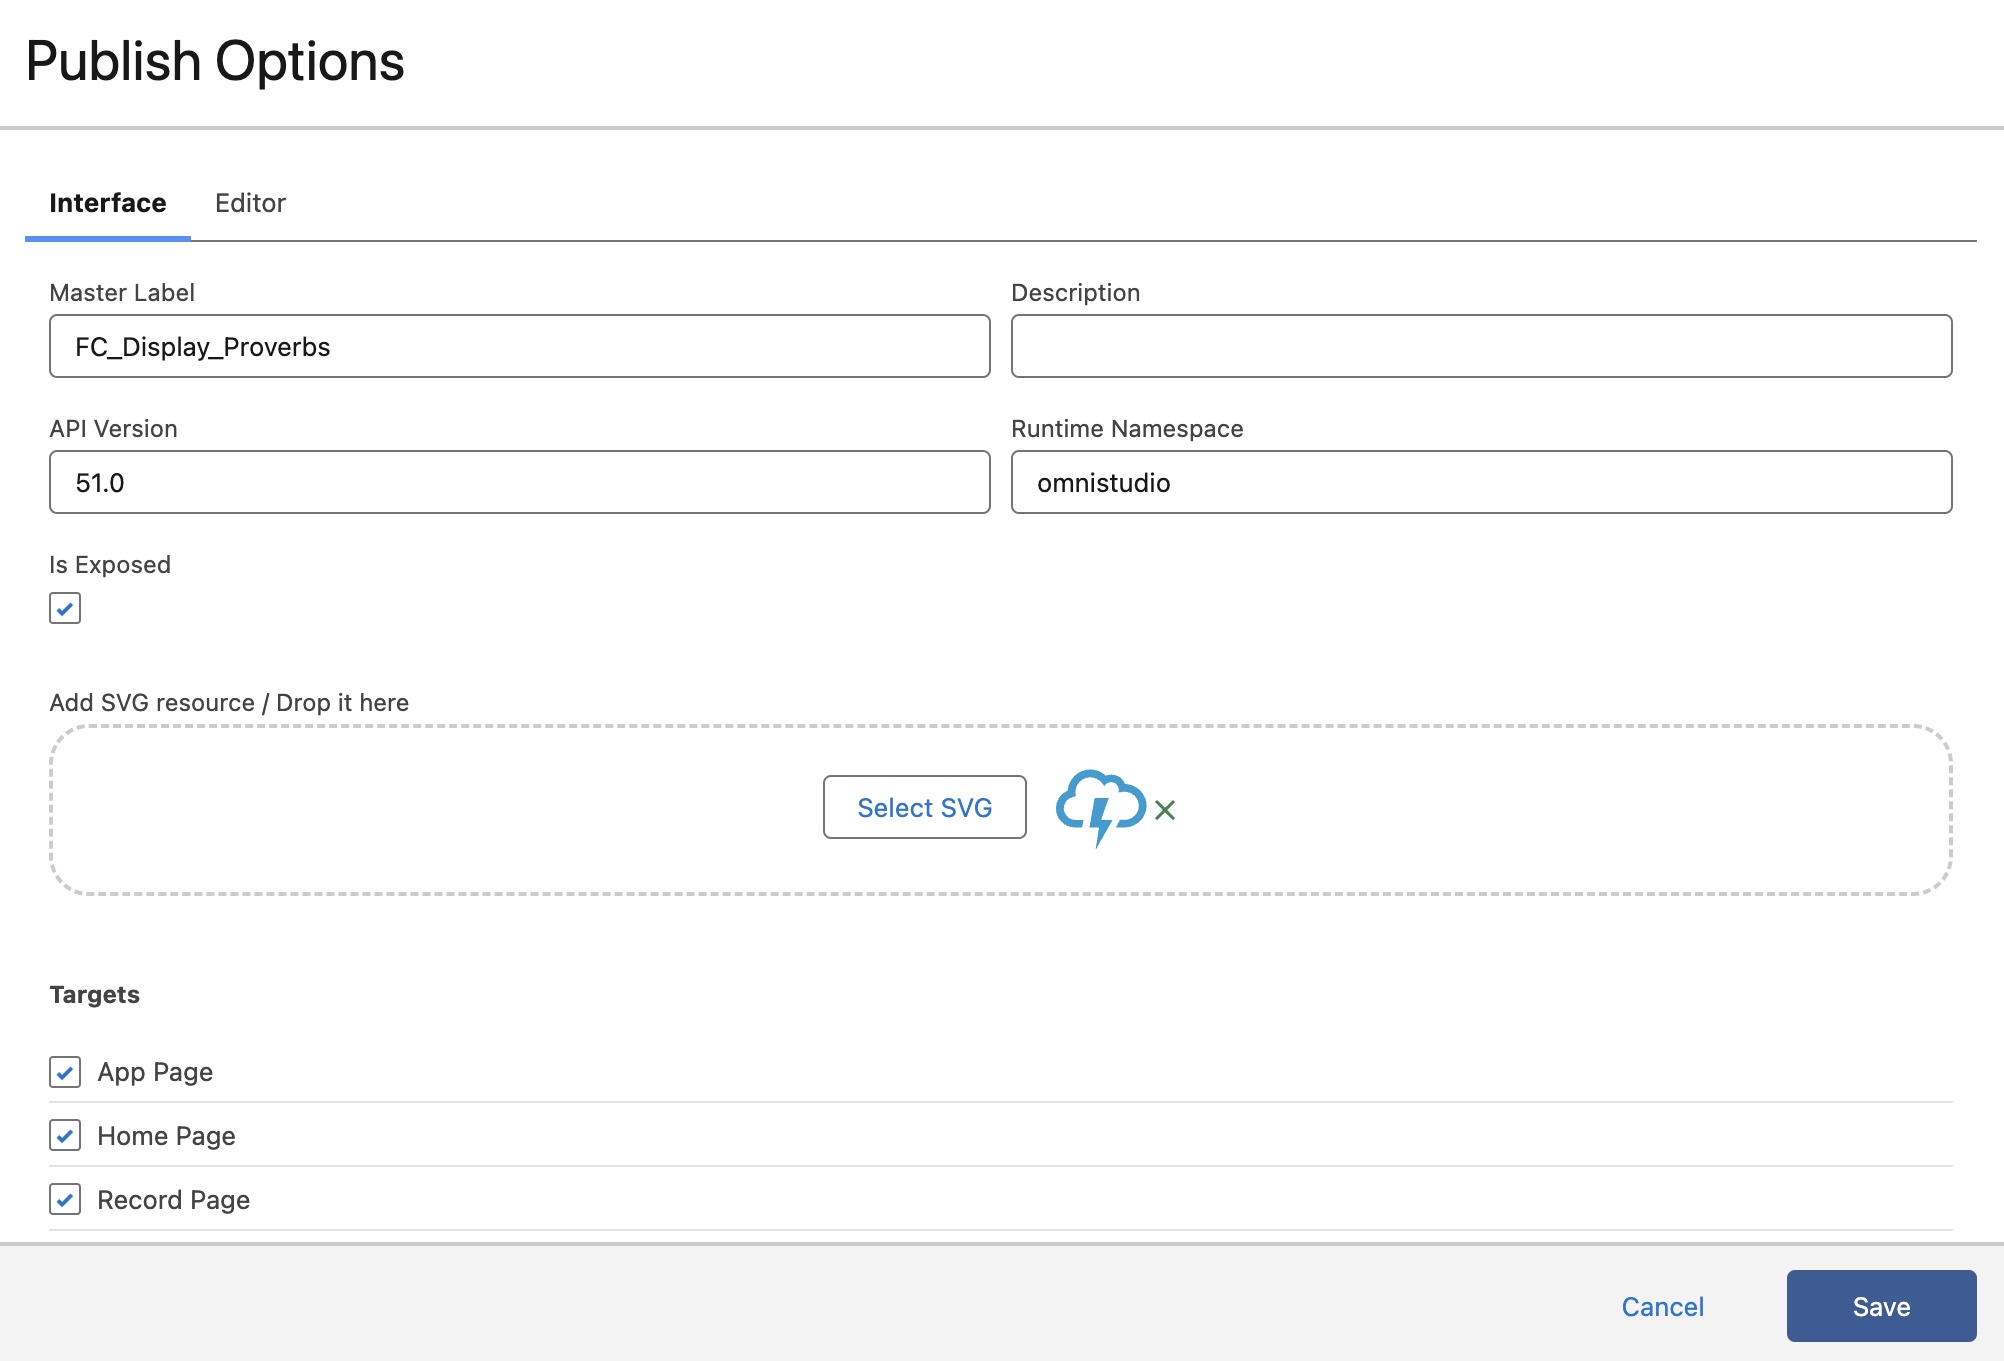
We now can add it to the App Builder, as any Lightning Web Component.
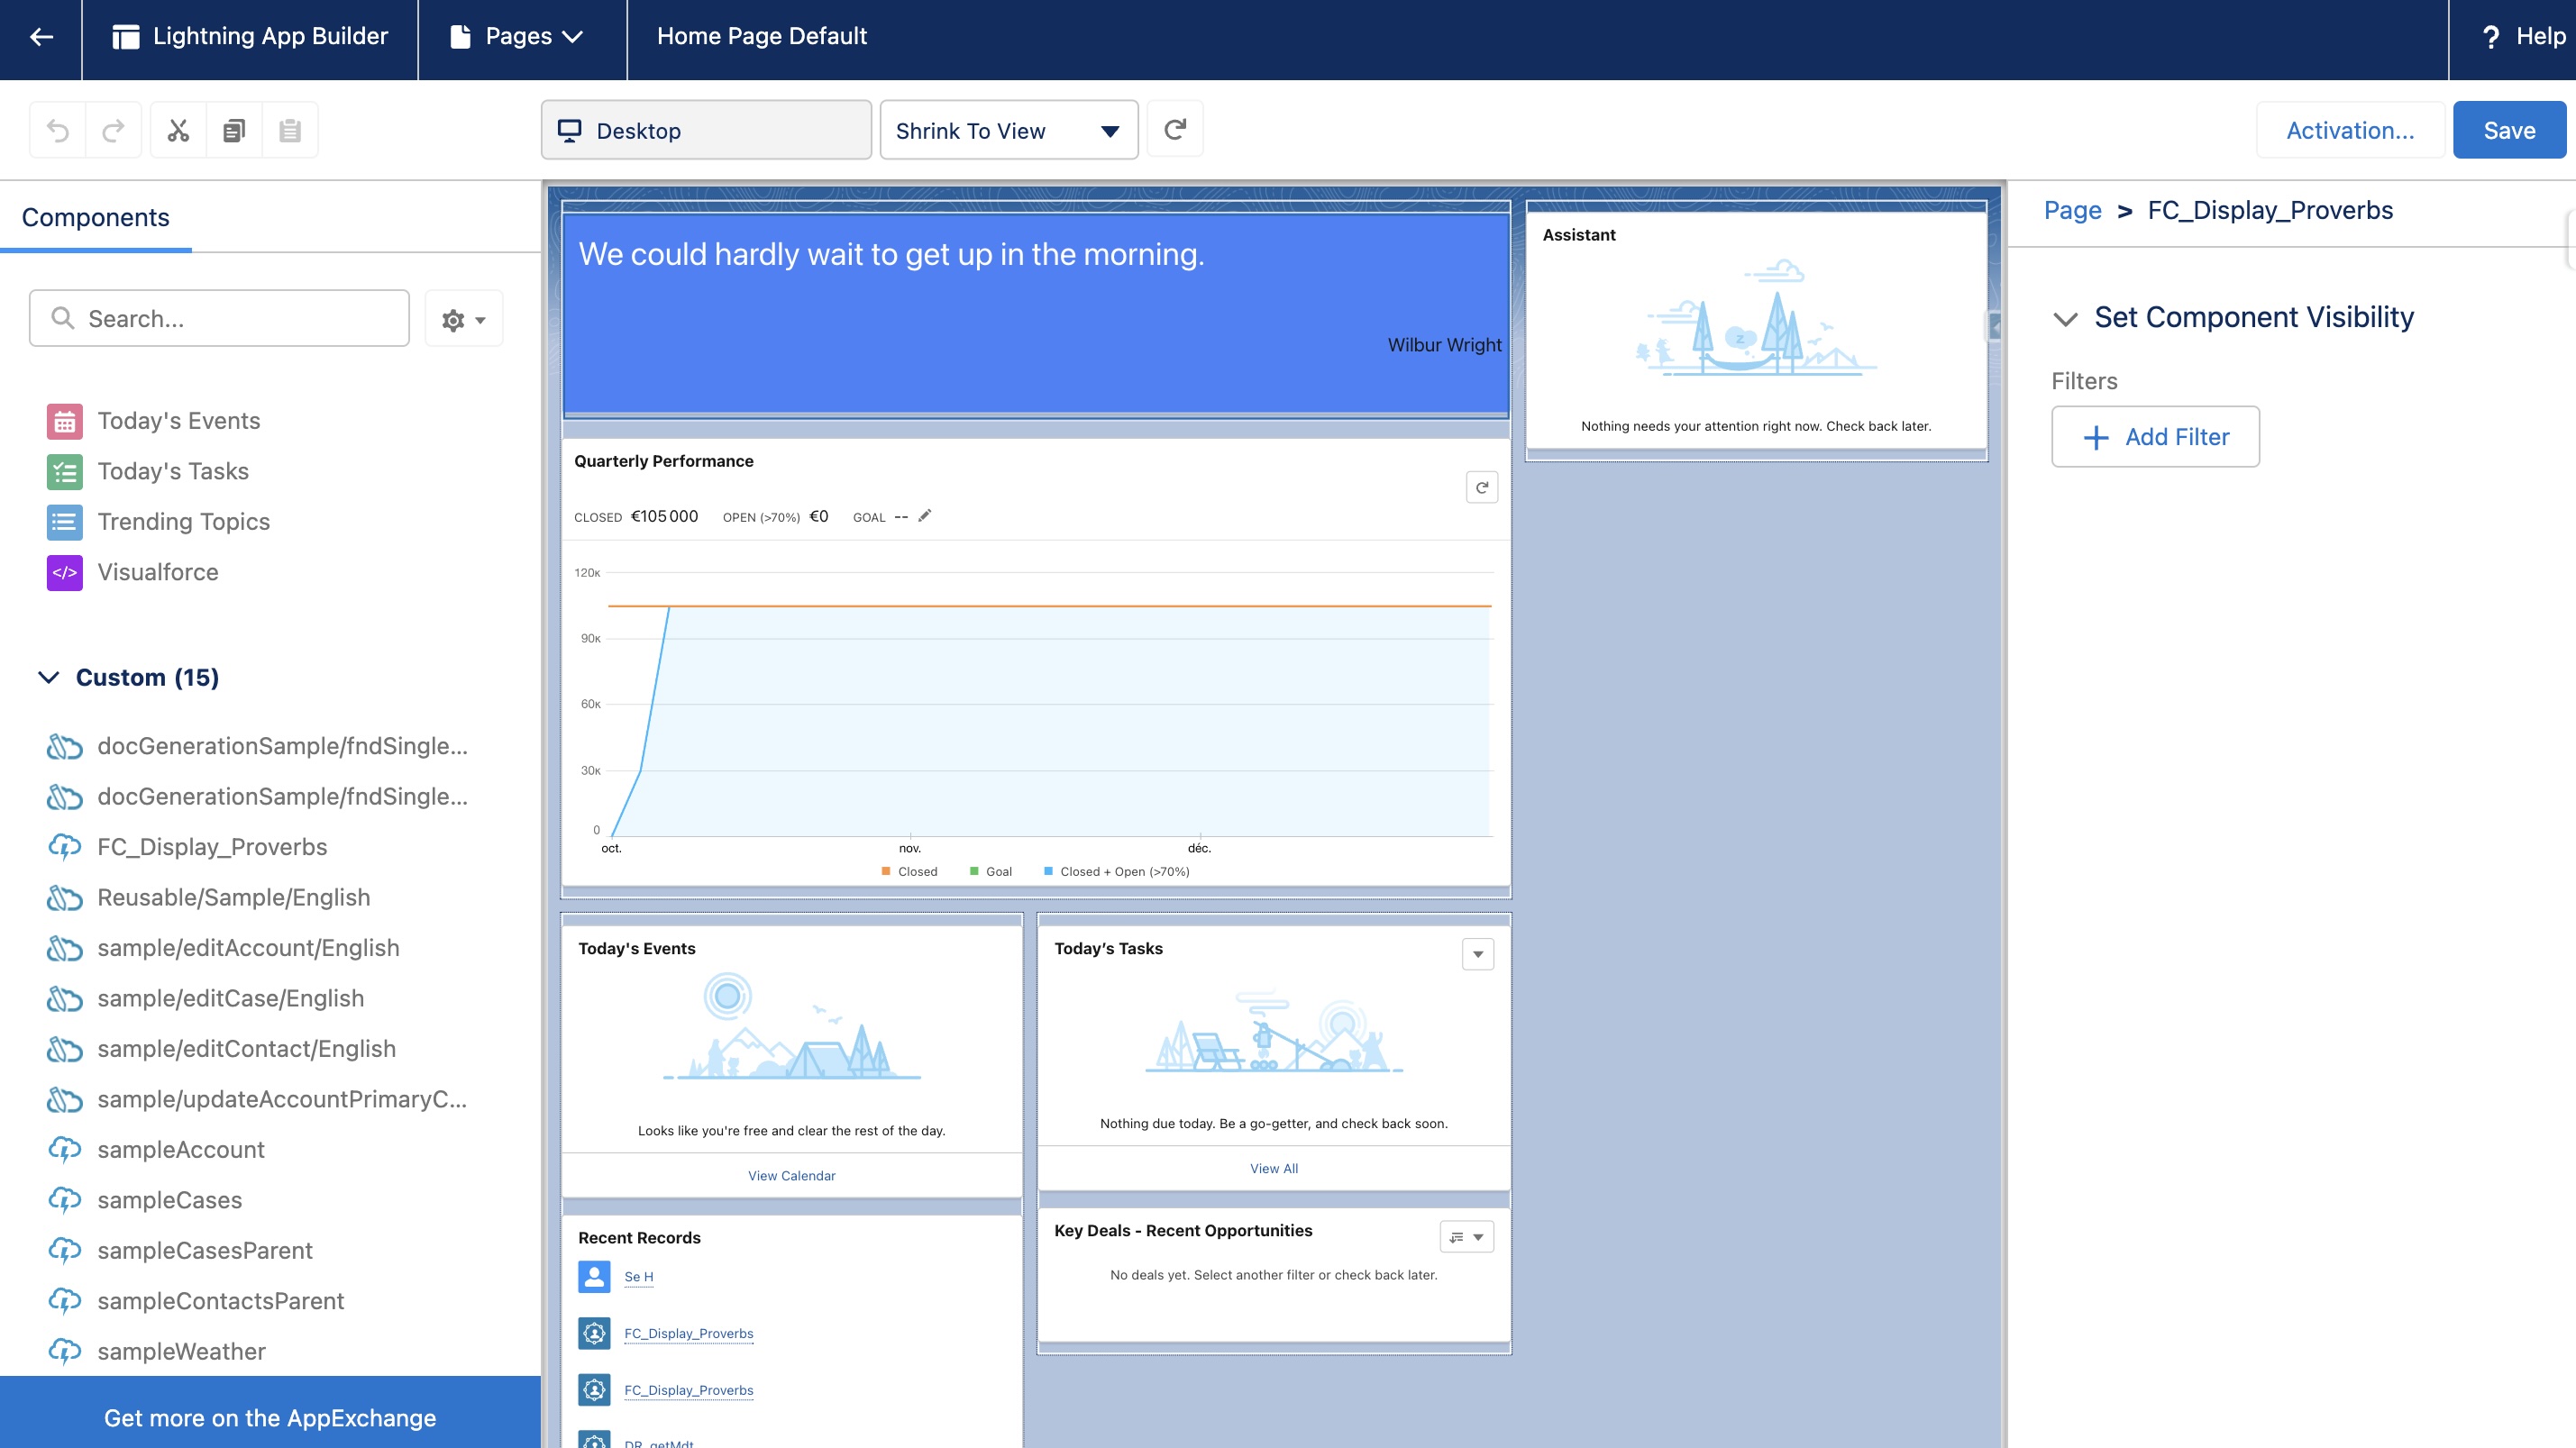
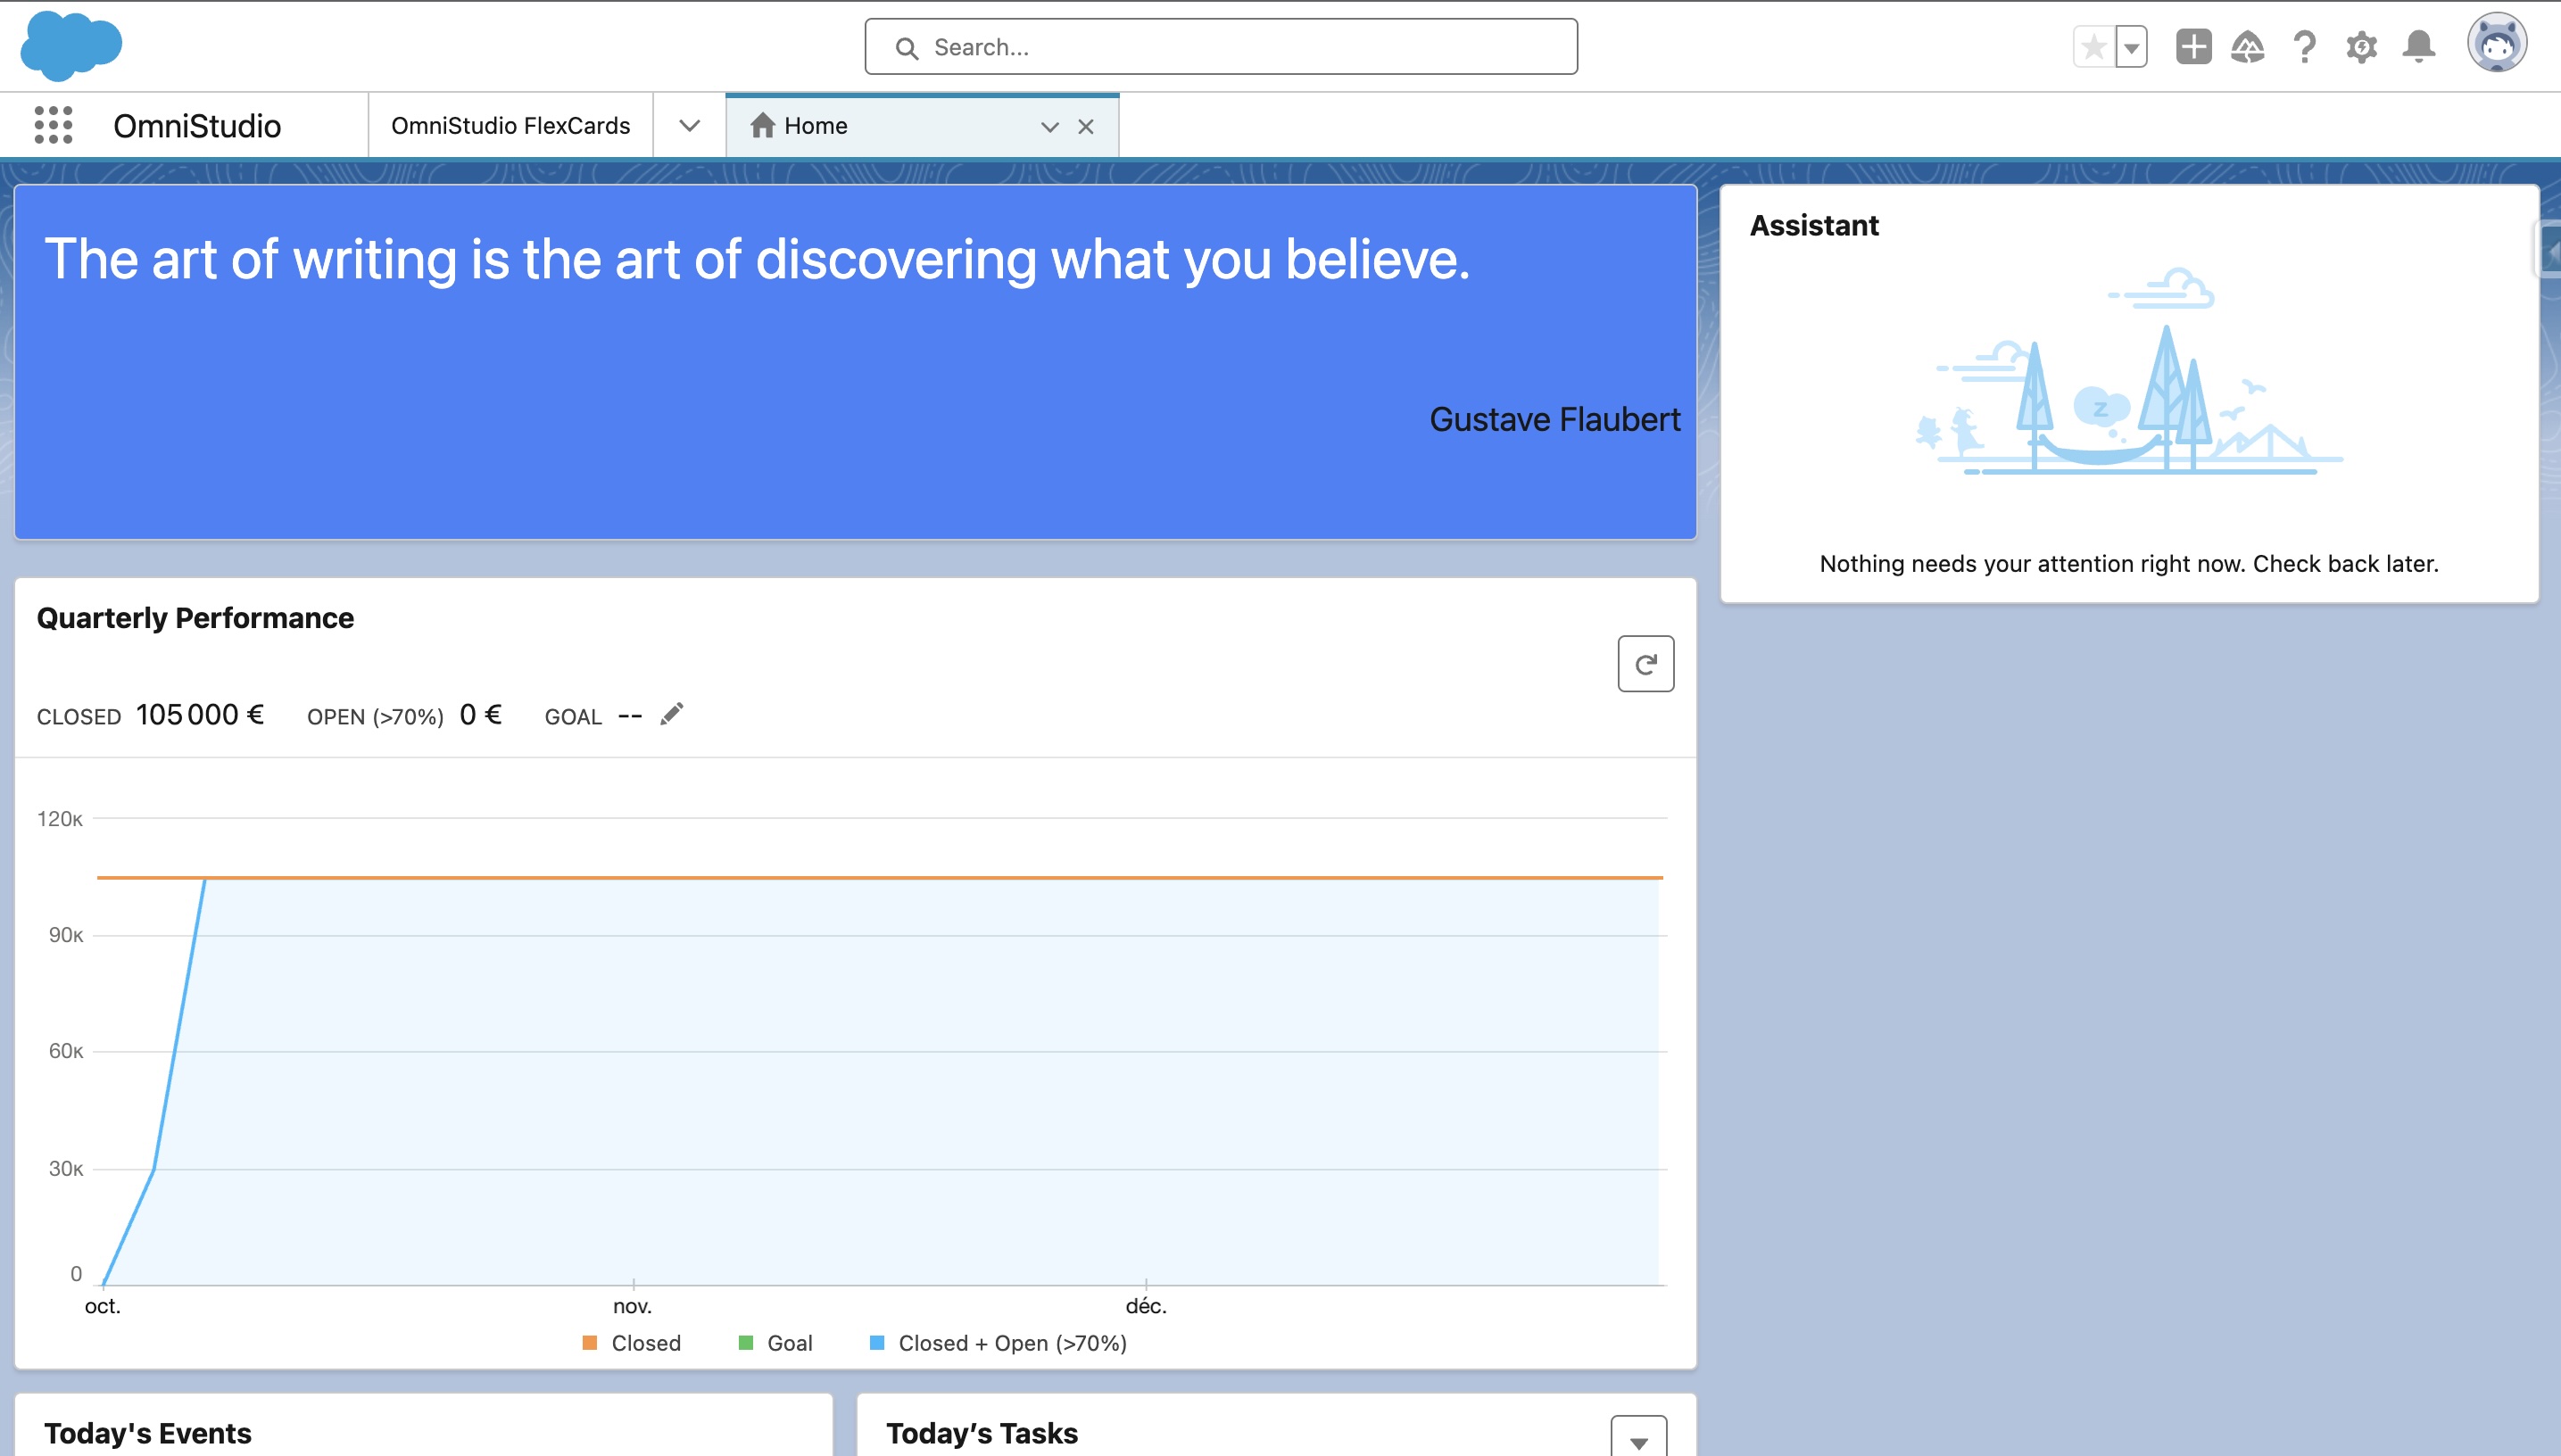
When it’s done, let’s see what you got:
Sources
Sélim HAMIDOU