How to ingest CSV data from AWS S3 into Salesforce Data Cloud

Step into the dynamic realm of Salesforce Data Cloud, where every dataset is an adventure waiting to unfold! Join me on an exhilarating journey as I navigate through AWS S3 buckets, leveraging the formidable capabilities of Salesforce Data Cloud to ingest and analyze Pokémon data. But first, let’s lay the groundwork for my epic expedition.
First part: Setting the Stage: Configuring AWS S3 Buckets
Creating Your AWS Account To kickstart our expedition, head over to AWS Signup and sign up for an AWS account if you haven’t already. Once done, navigate to the IAM service. Basically, about the menu: “IAM” will be to handle your AWS users, and “S3” will allow you to access to your bucket. \

Configuring IAM User
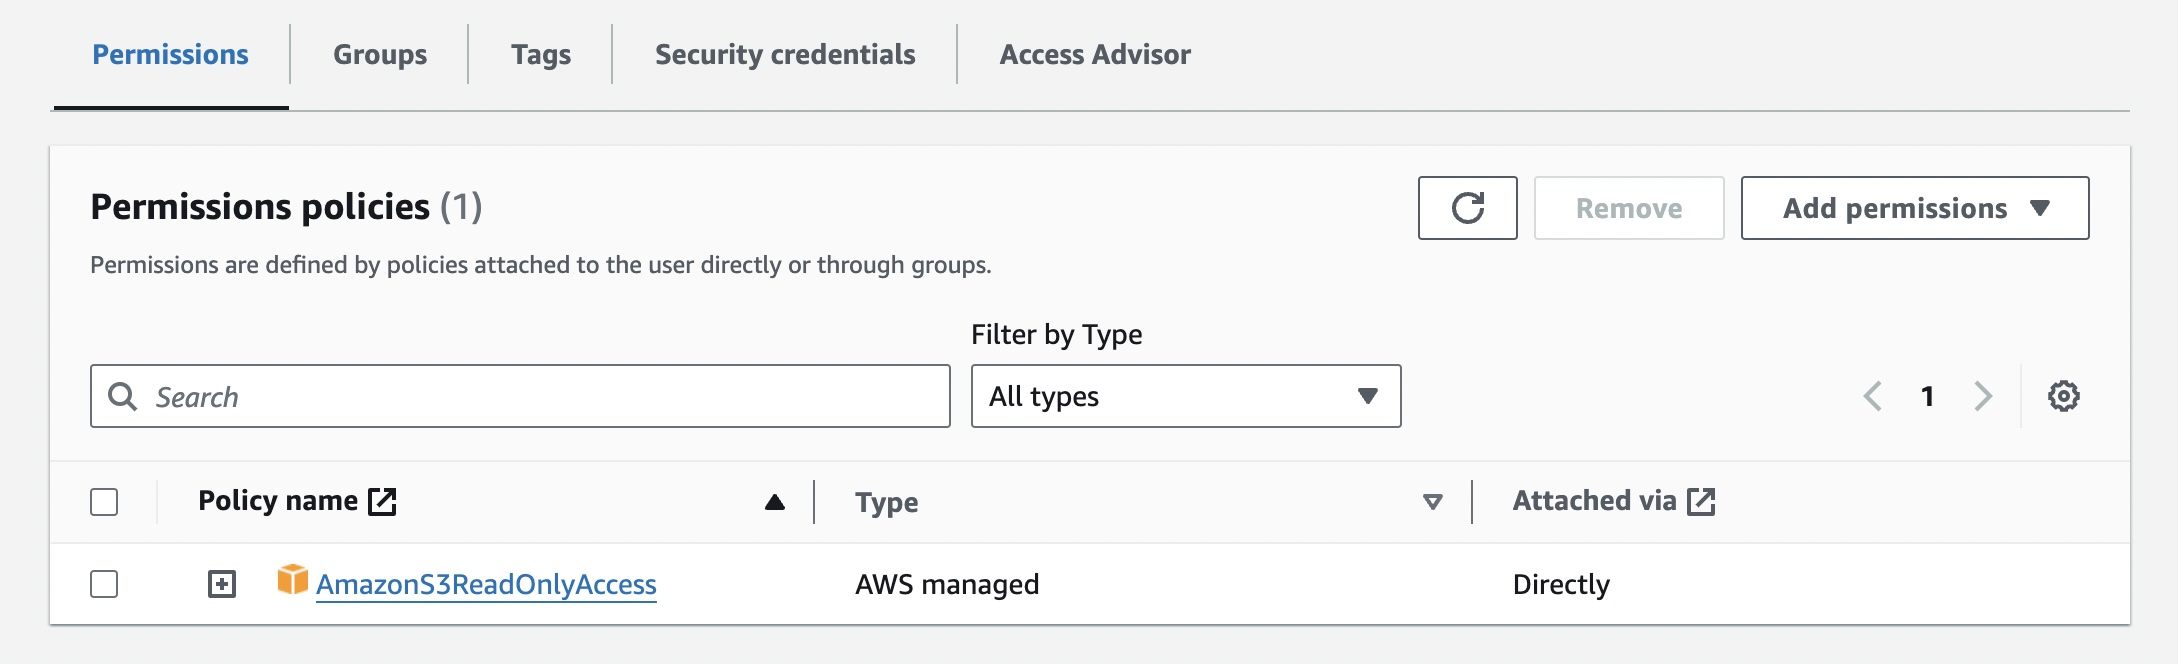
Just as a Pokémon trainer customizes their team, we need to configure a user for our AWS-Salesforce Data Cloud interaction. This user will act as our gateway to AWS resources. After creating the user, ensure to grant it necessary permissions under “Permissions” by attaching policies directly. Remember, less is more when it comes to access rights—grant only what’s essential. The standard permission AmazonS3ReadOnlyAccess is more than sufficient in our example.\
Creating Your AWS S3 Bucket
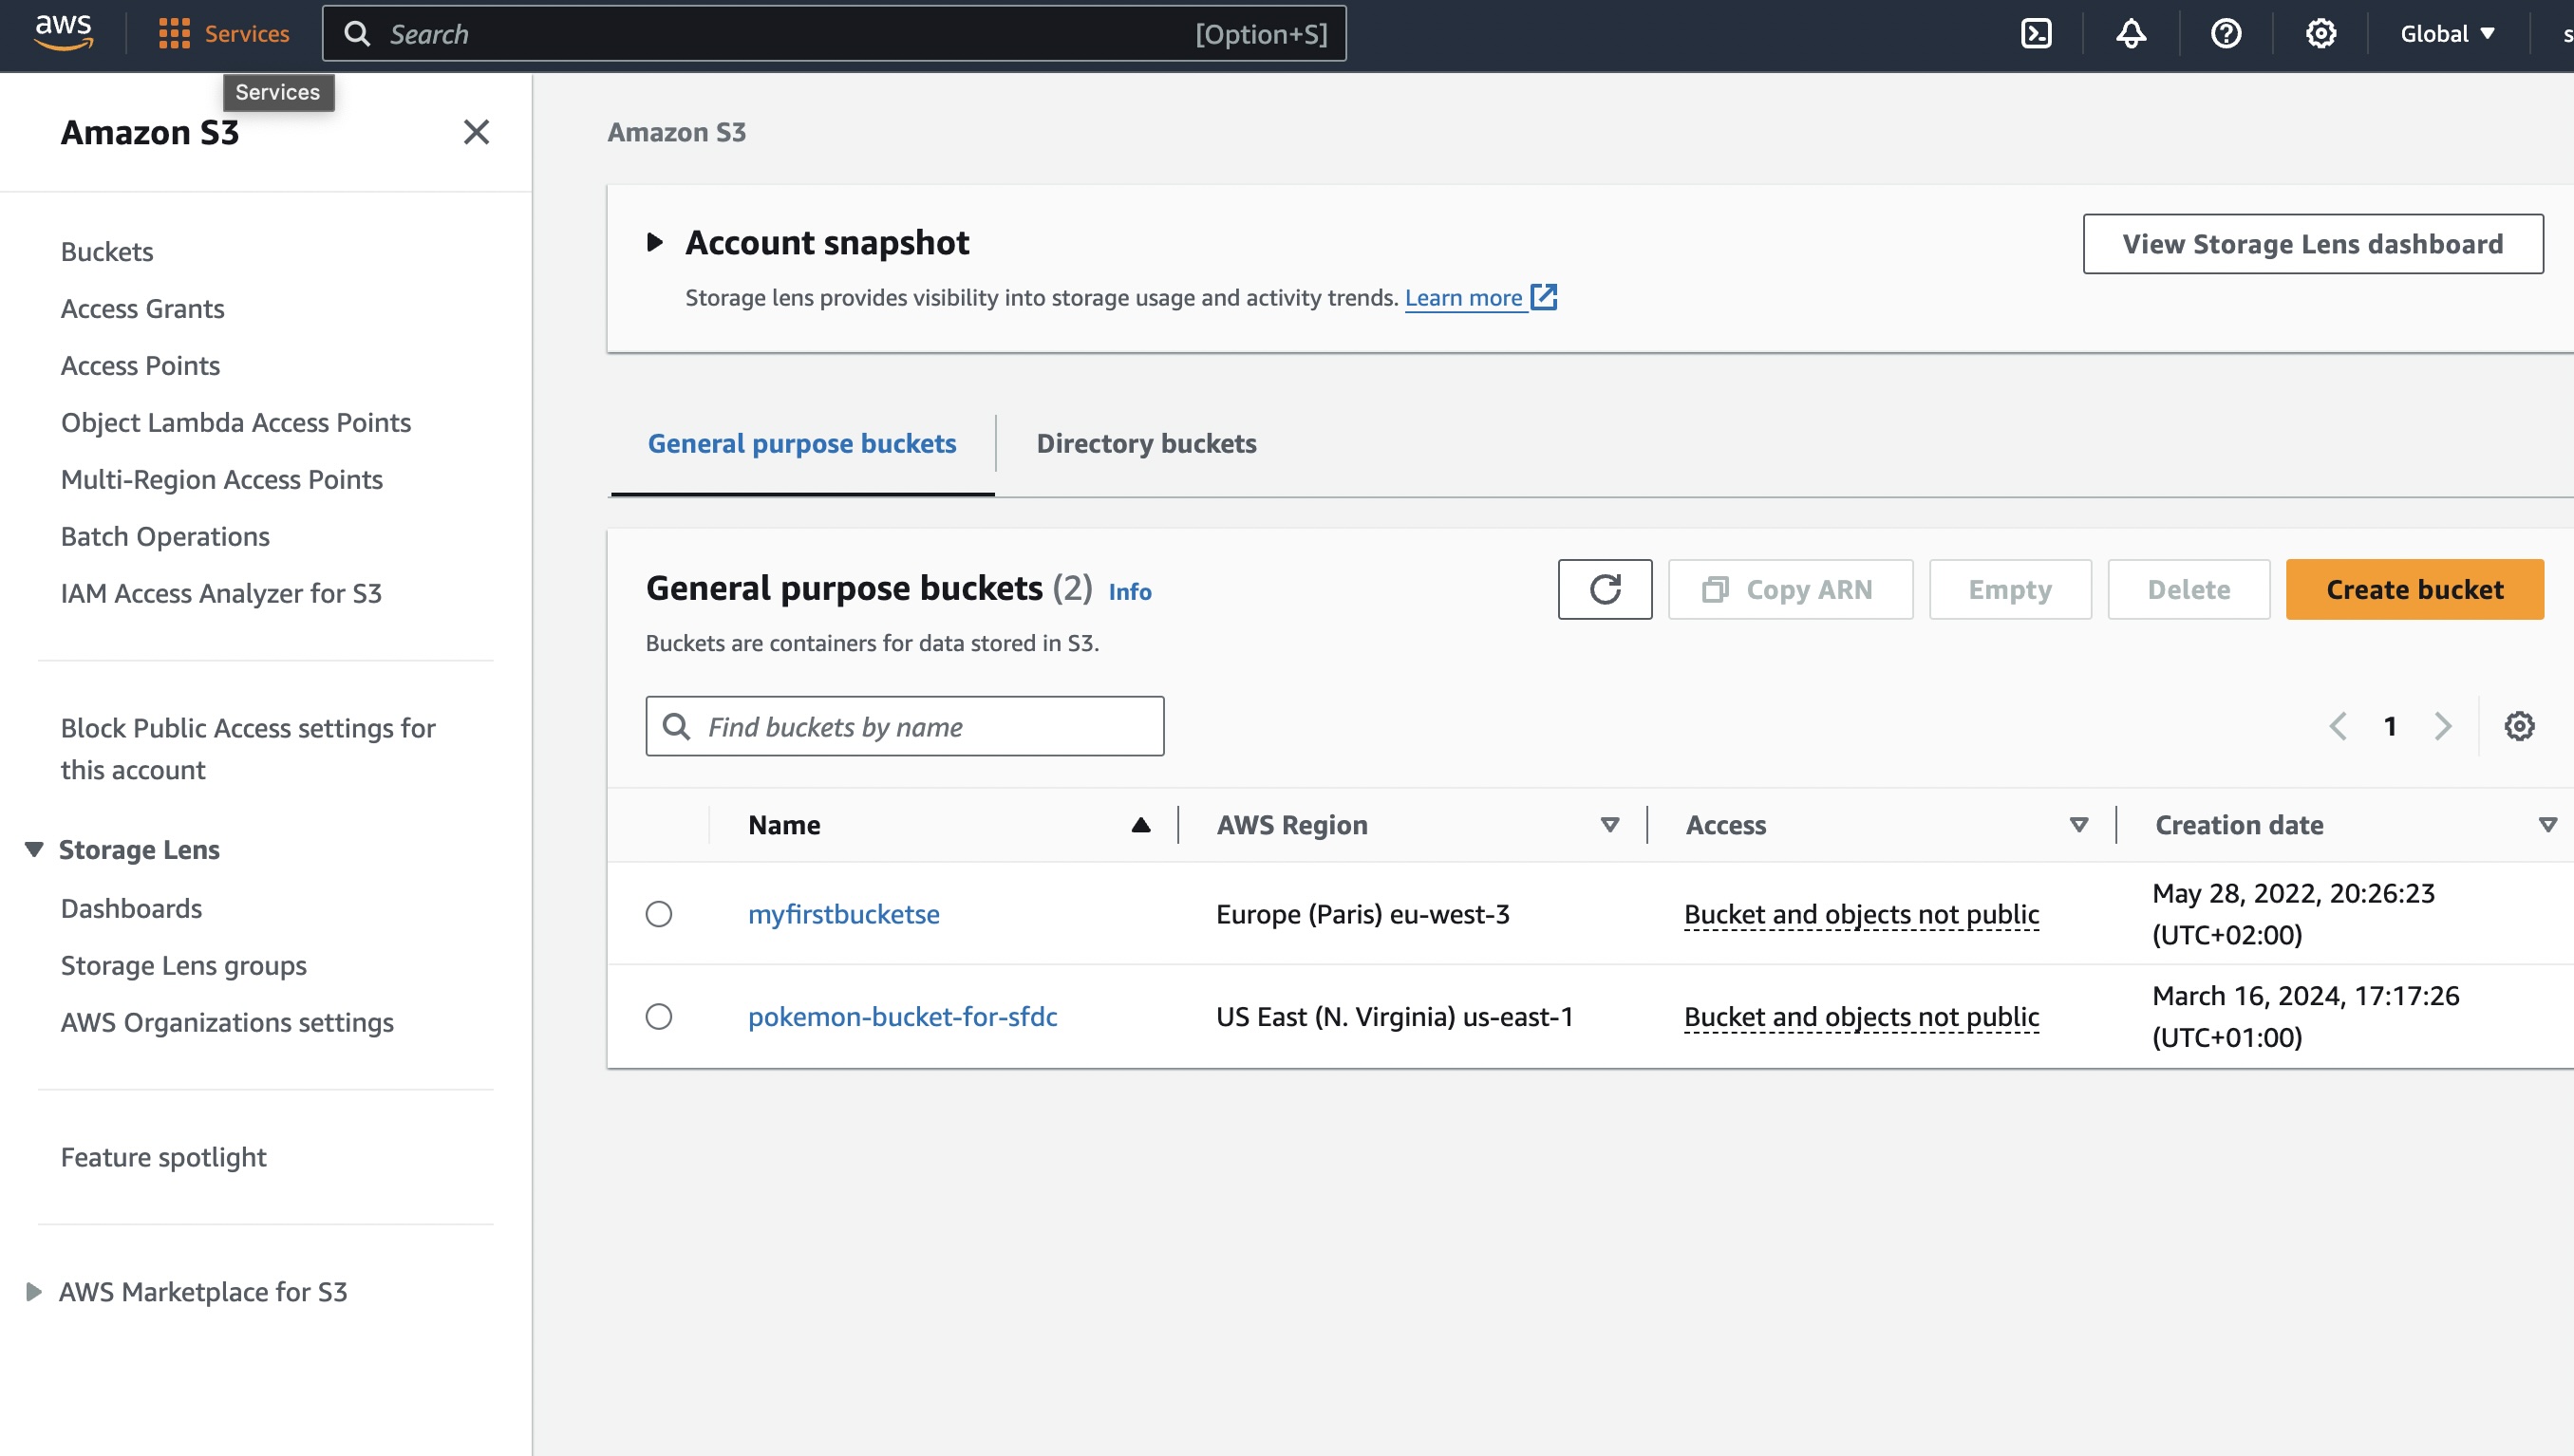
Now, let’s create the repository for our Pokémon data. Within the AWS Management Console, navigate to the S3 service and click “Create bucket”. Choose a unique bucket name, adhering to the kebab-case format(not the sandwich) to ensure compatibility. Once created, prepare to upload your Pokémon CSV file.\
Preparing Your Pokémon Data
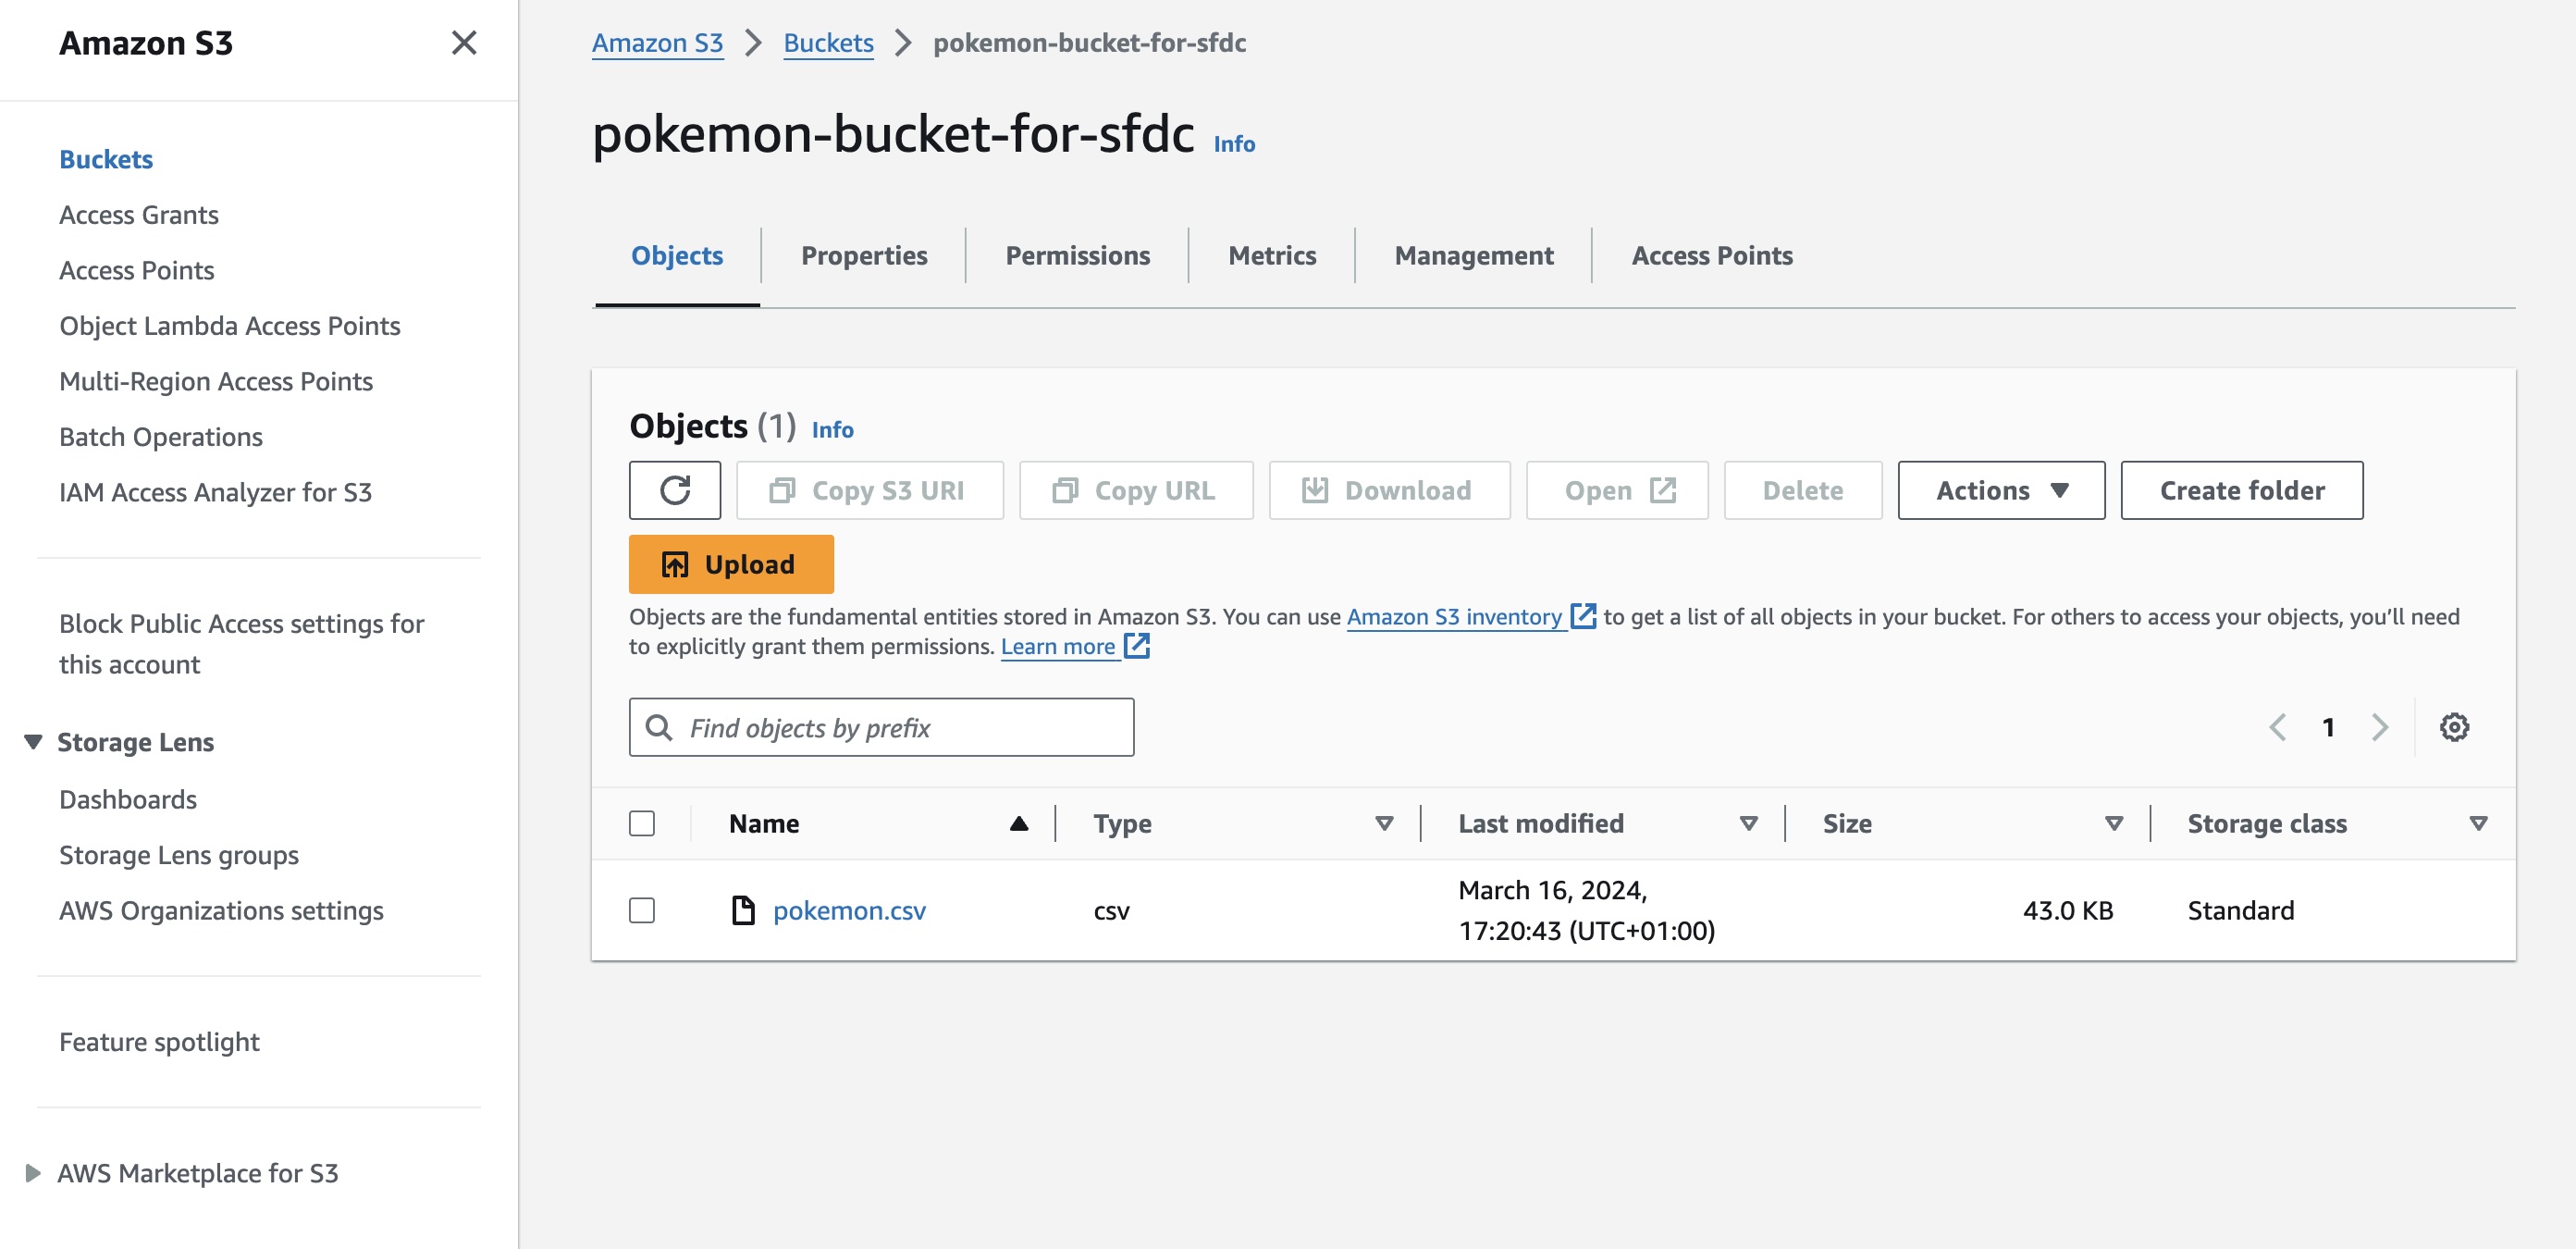
Now, let’s fetch our Pokémon data. Simply search for a Pokémon CSV file online, ensuring it aligns with the standard file format of Salesforce Data Cloud(That means that, without adding a new file format to our Data Cloud, this file won’t be able to be ingested to Salesforce. So, just keep it simple, remove dots and spaces on your header with a Text Editor). Once your Pokemon file looks good to you, proceed to upload it on your bucket. It should now be ready for Salesforce Data Cloud ingestion.
Securing Access Keys
Last step before we proceed, create access keys for your IAM user under “Security Credentials” and securely store them. Remember, losing access to these keys means you’ll need to recreate them, so handle them with care.\

Second part: Let’s (finally!) move to Data Cloud
Transitioning to Salesforce Data Cloud
Accessing Salesforce Data Cloud To proceed further, acquire a developer org with a Salesforce Data Cloud license. You can obtain one for free via Trailhead here.
Setting Up Data Cloud
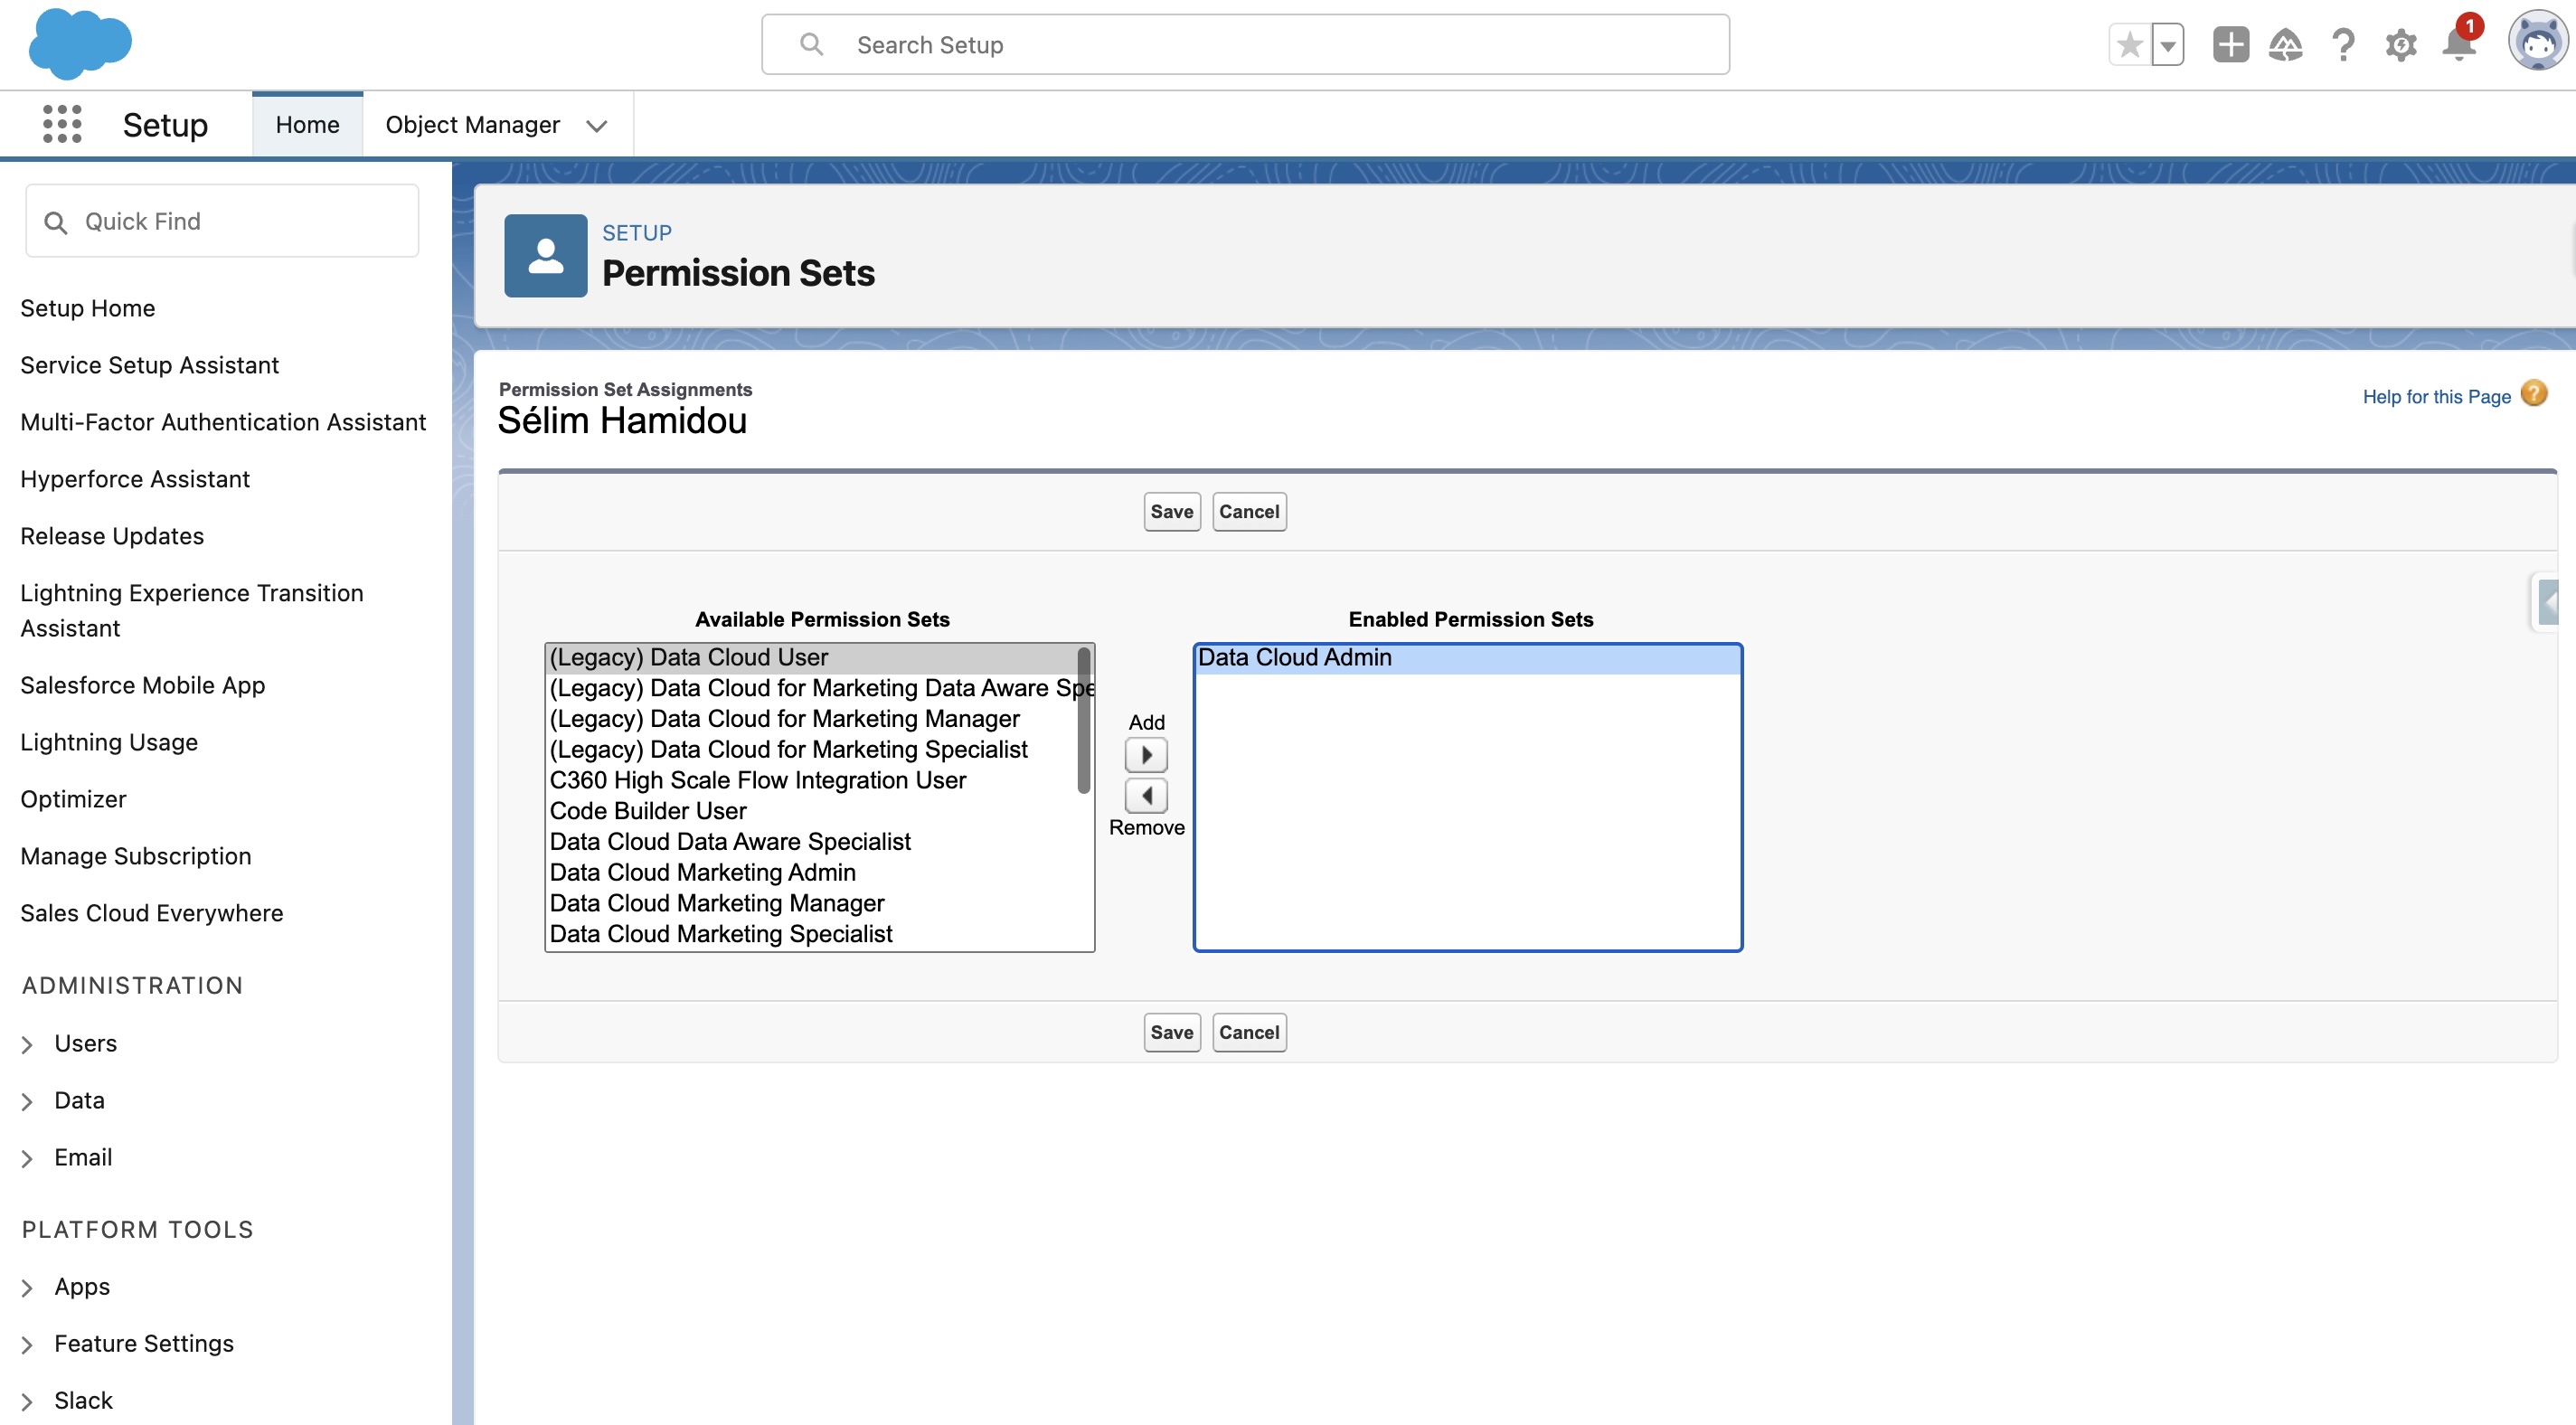
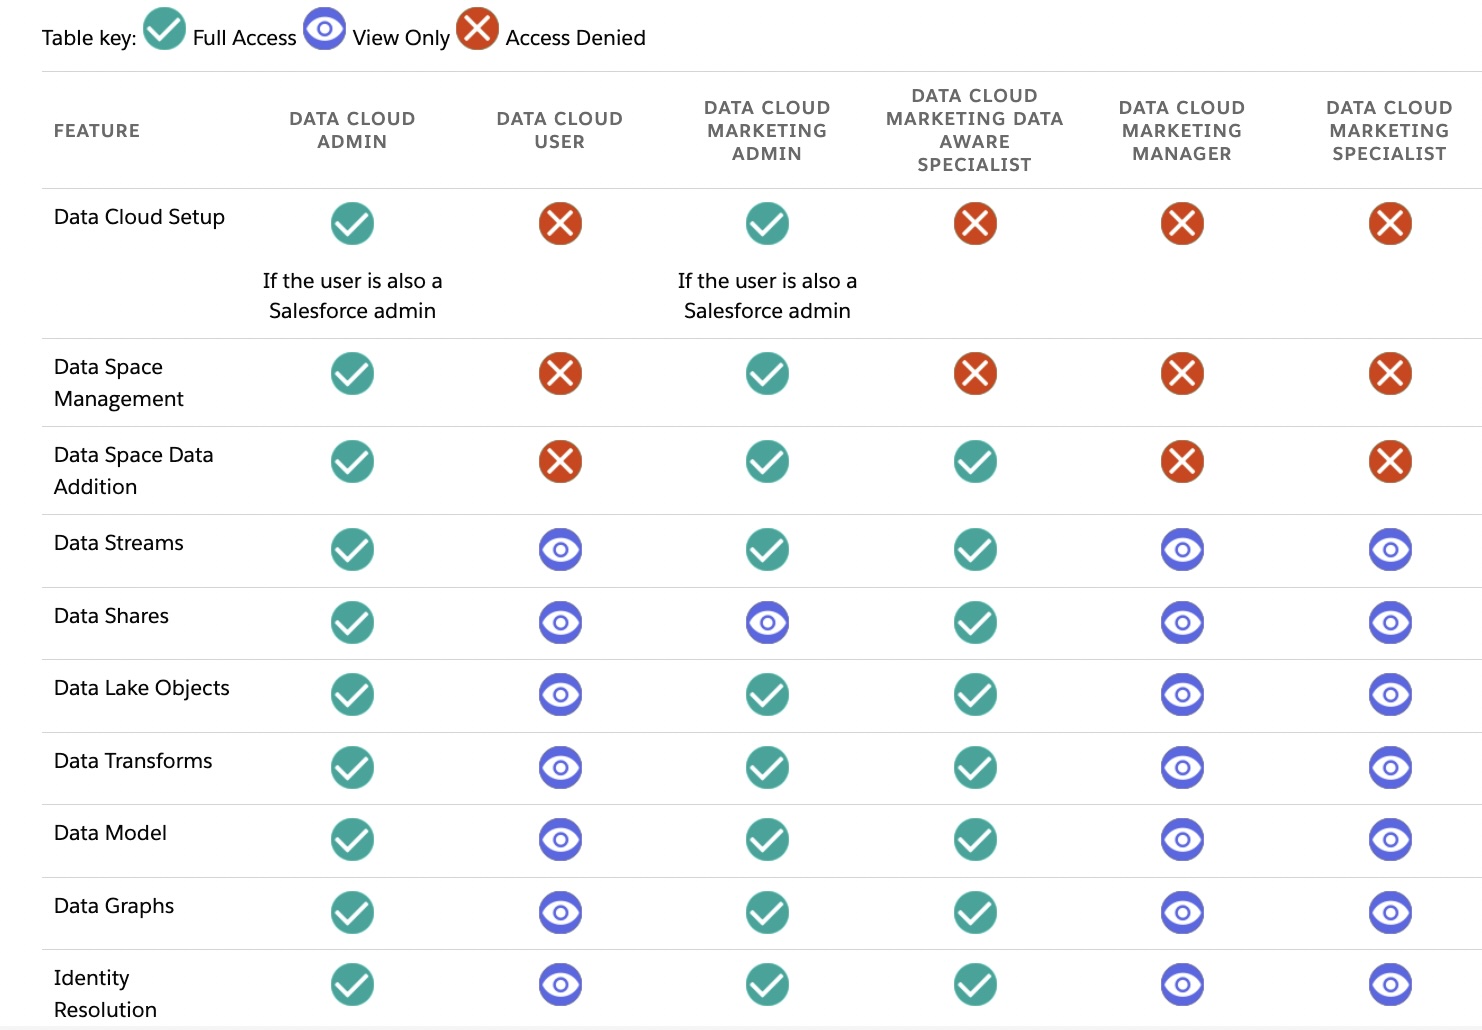
Upon obtaining your developer org, grant your user the Salesforce Data Cloud Admin permission(you don’t need the other ones, they are either useless or legacy).
 \
\
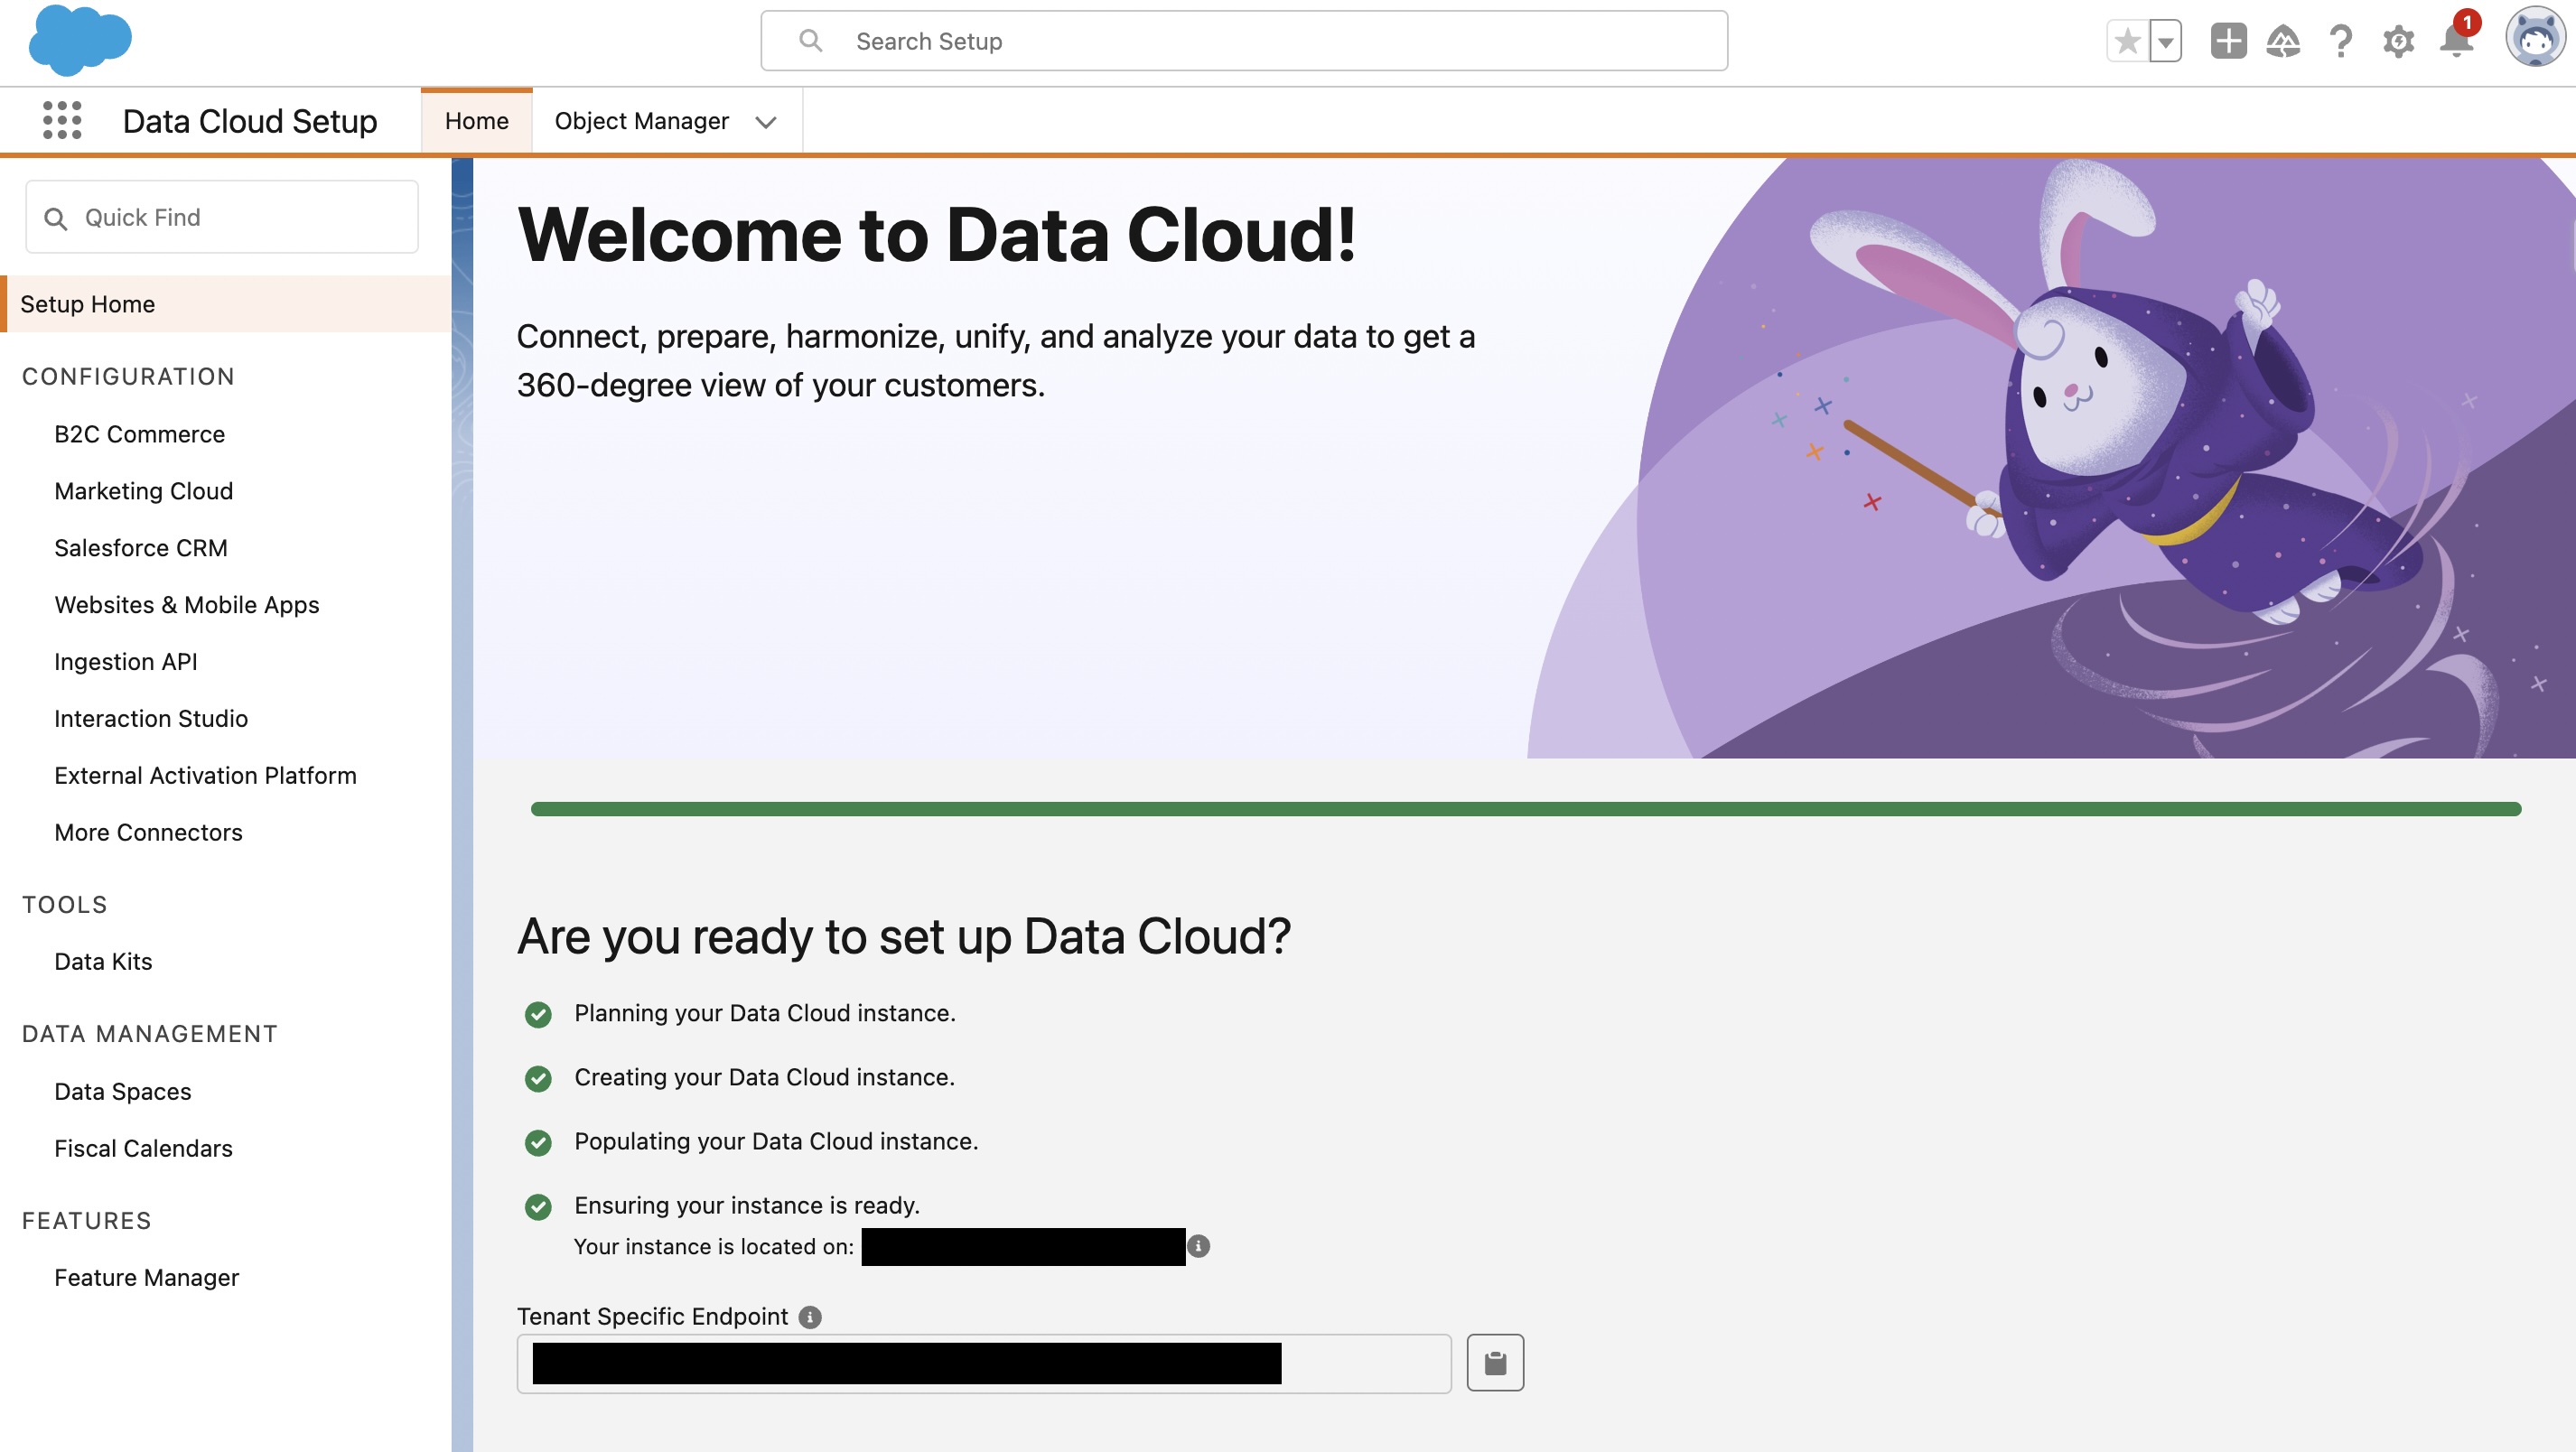
When it’s done, you can set and navigate to Data Cloud Setup to initiate the setup process. This may take some time, so be patient—perhaps brew yourself a cup of coffee or two while you wait.\
 \
\

Configuring Data Cloud Connectors
In the Data Cloud Setup, configure how you wish to connect with external systems. Click on “More Connectors” to set up your connection to AWS S3. Provide the necessary details, including your bucket name and previously saved credentials. Test the connection to ensure seamless integration.\

Ingesting Pokémon Data
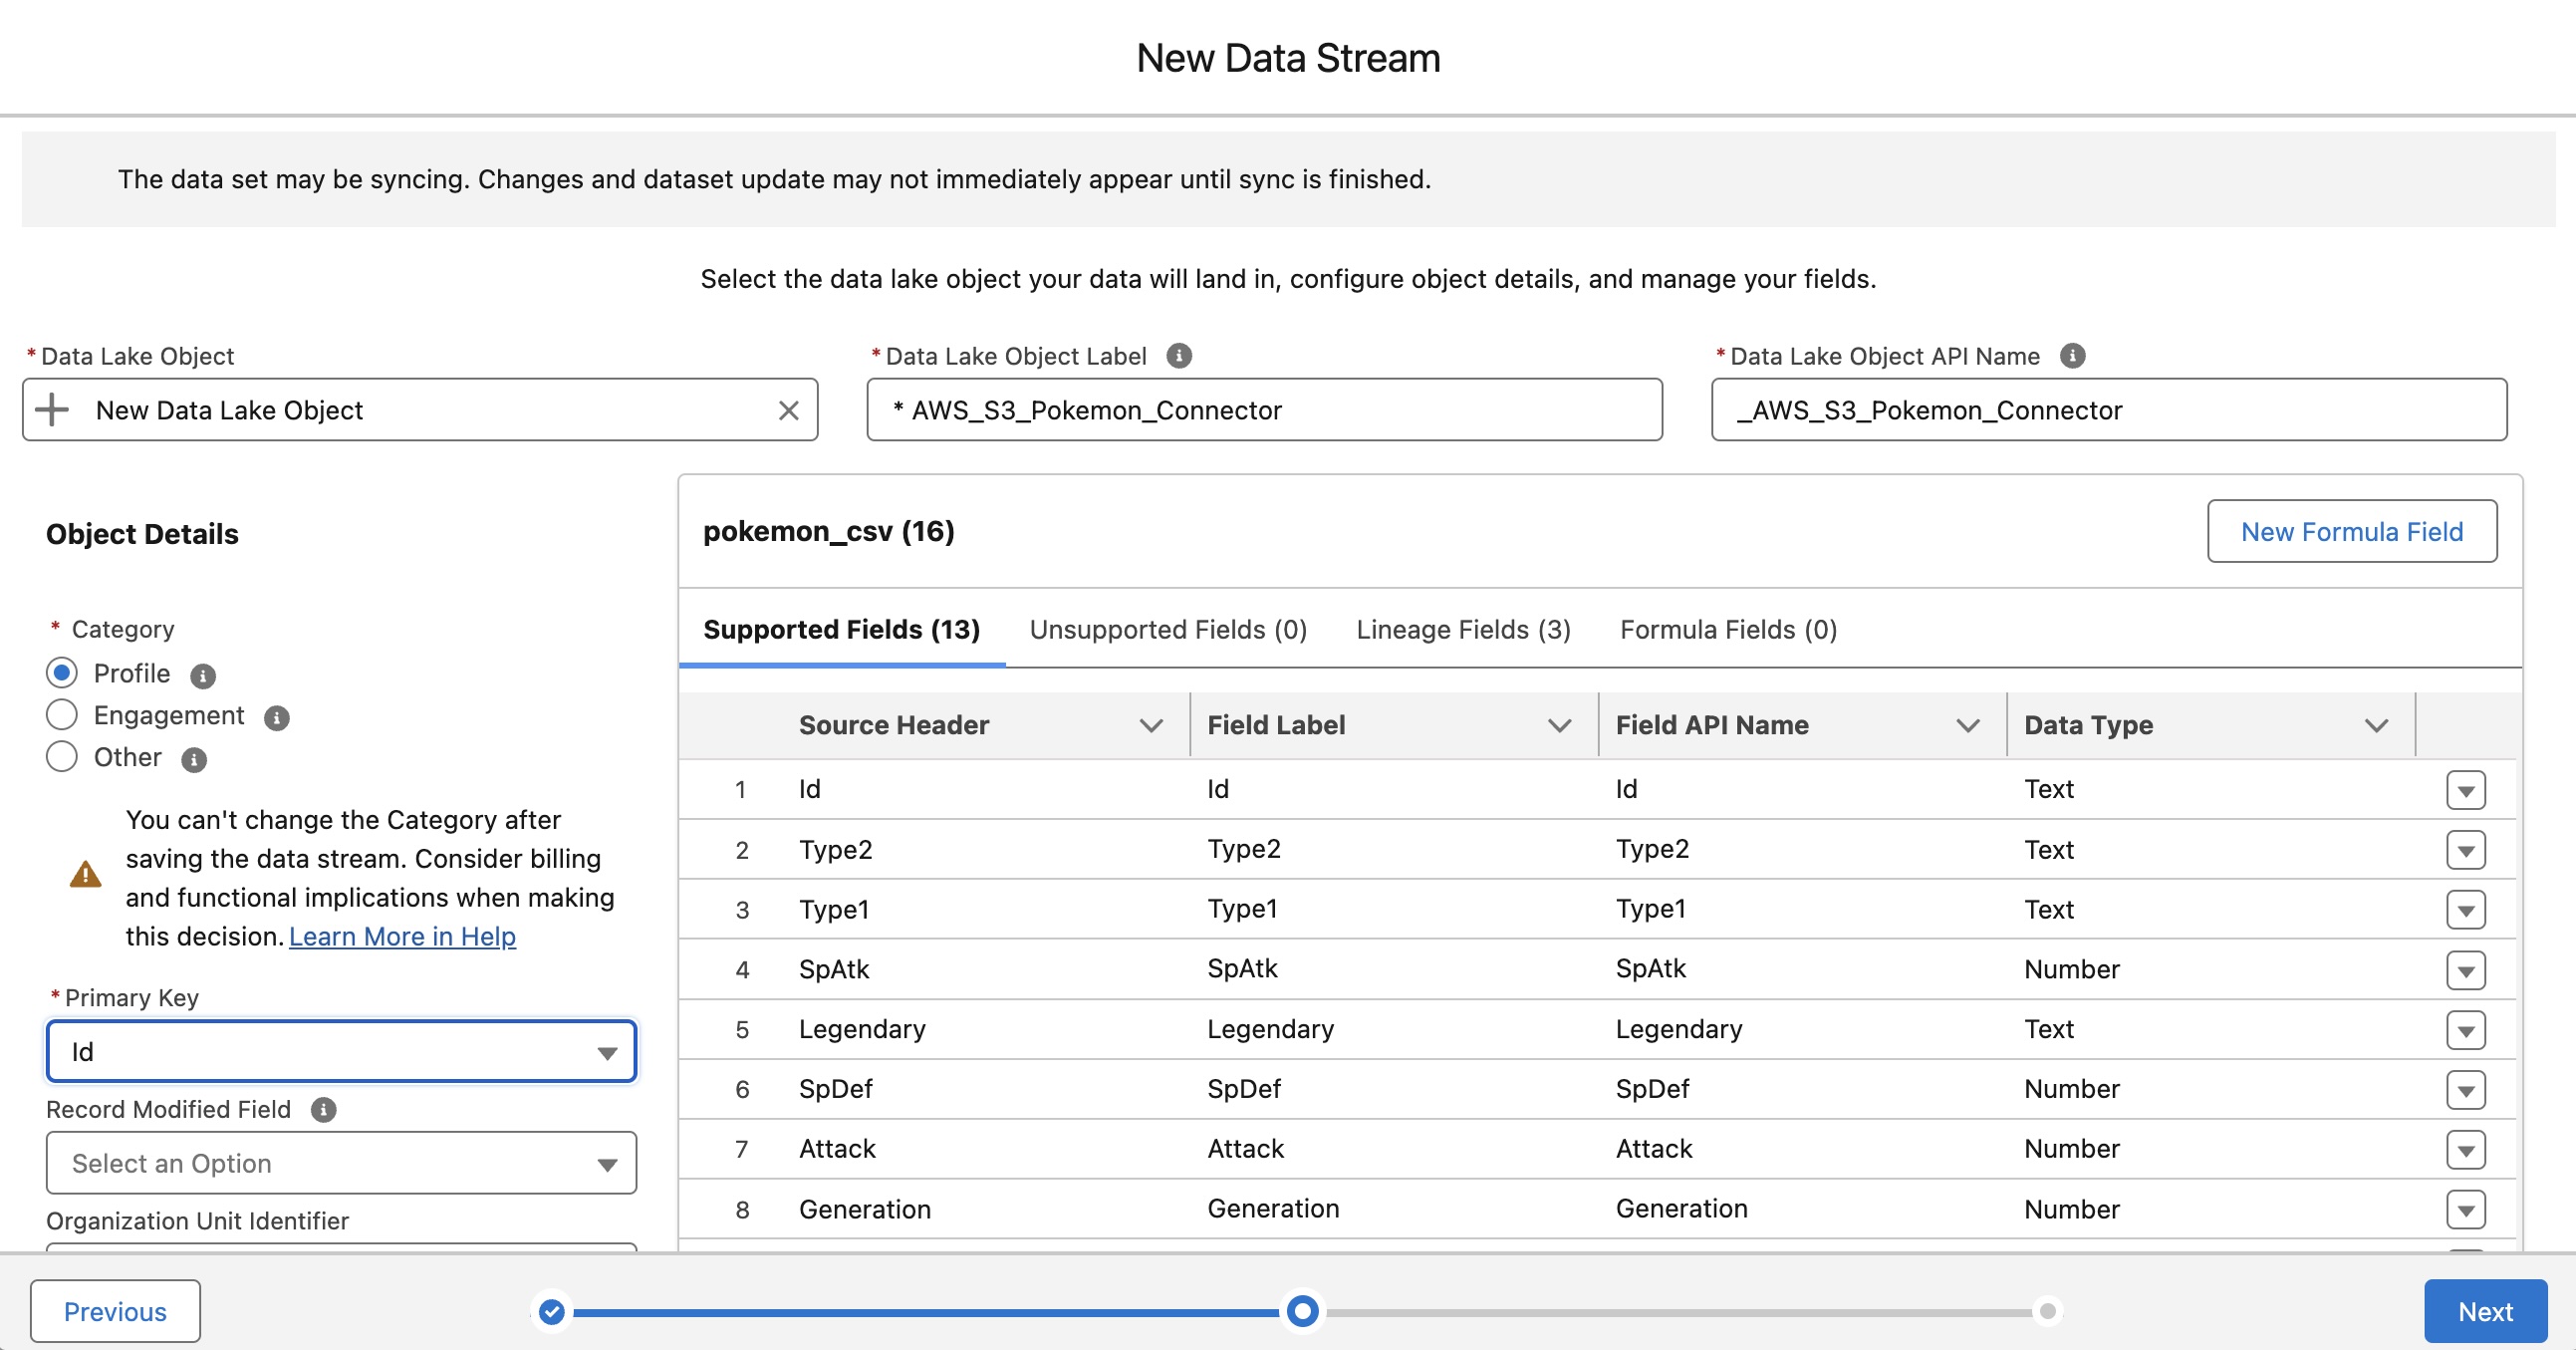
With the connections established, it’s time to ingest our Pokémon data. Navigate to the App Launcher, search for “Data Cloud,” and select “Data Stream.” Create a new stream, specifying Amazon S3 as the source. \
 \
\
Even if for our example it’s not that important, you should in your projects choose very wisely the category, because you won’t be able to change it afterwards. Just remember that “profiles” represent customer characteristics and traits, such as age, location, or preferences. Whereas “engagements” refer to customer actions, such as purchases or online interactions with a company. In short, profiles describe who the customers are, while engagements show what they do. And “Other” is a mix of both. Also, to identify our records, we specify the primary key to Salesforce. Id is the most logical choice here, but you could choose Name as a primary key too(it just has to be unique).\
 \
\
Then, just click on Deploy.
Visualize your data
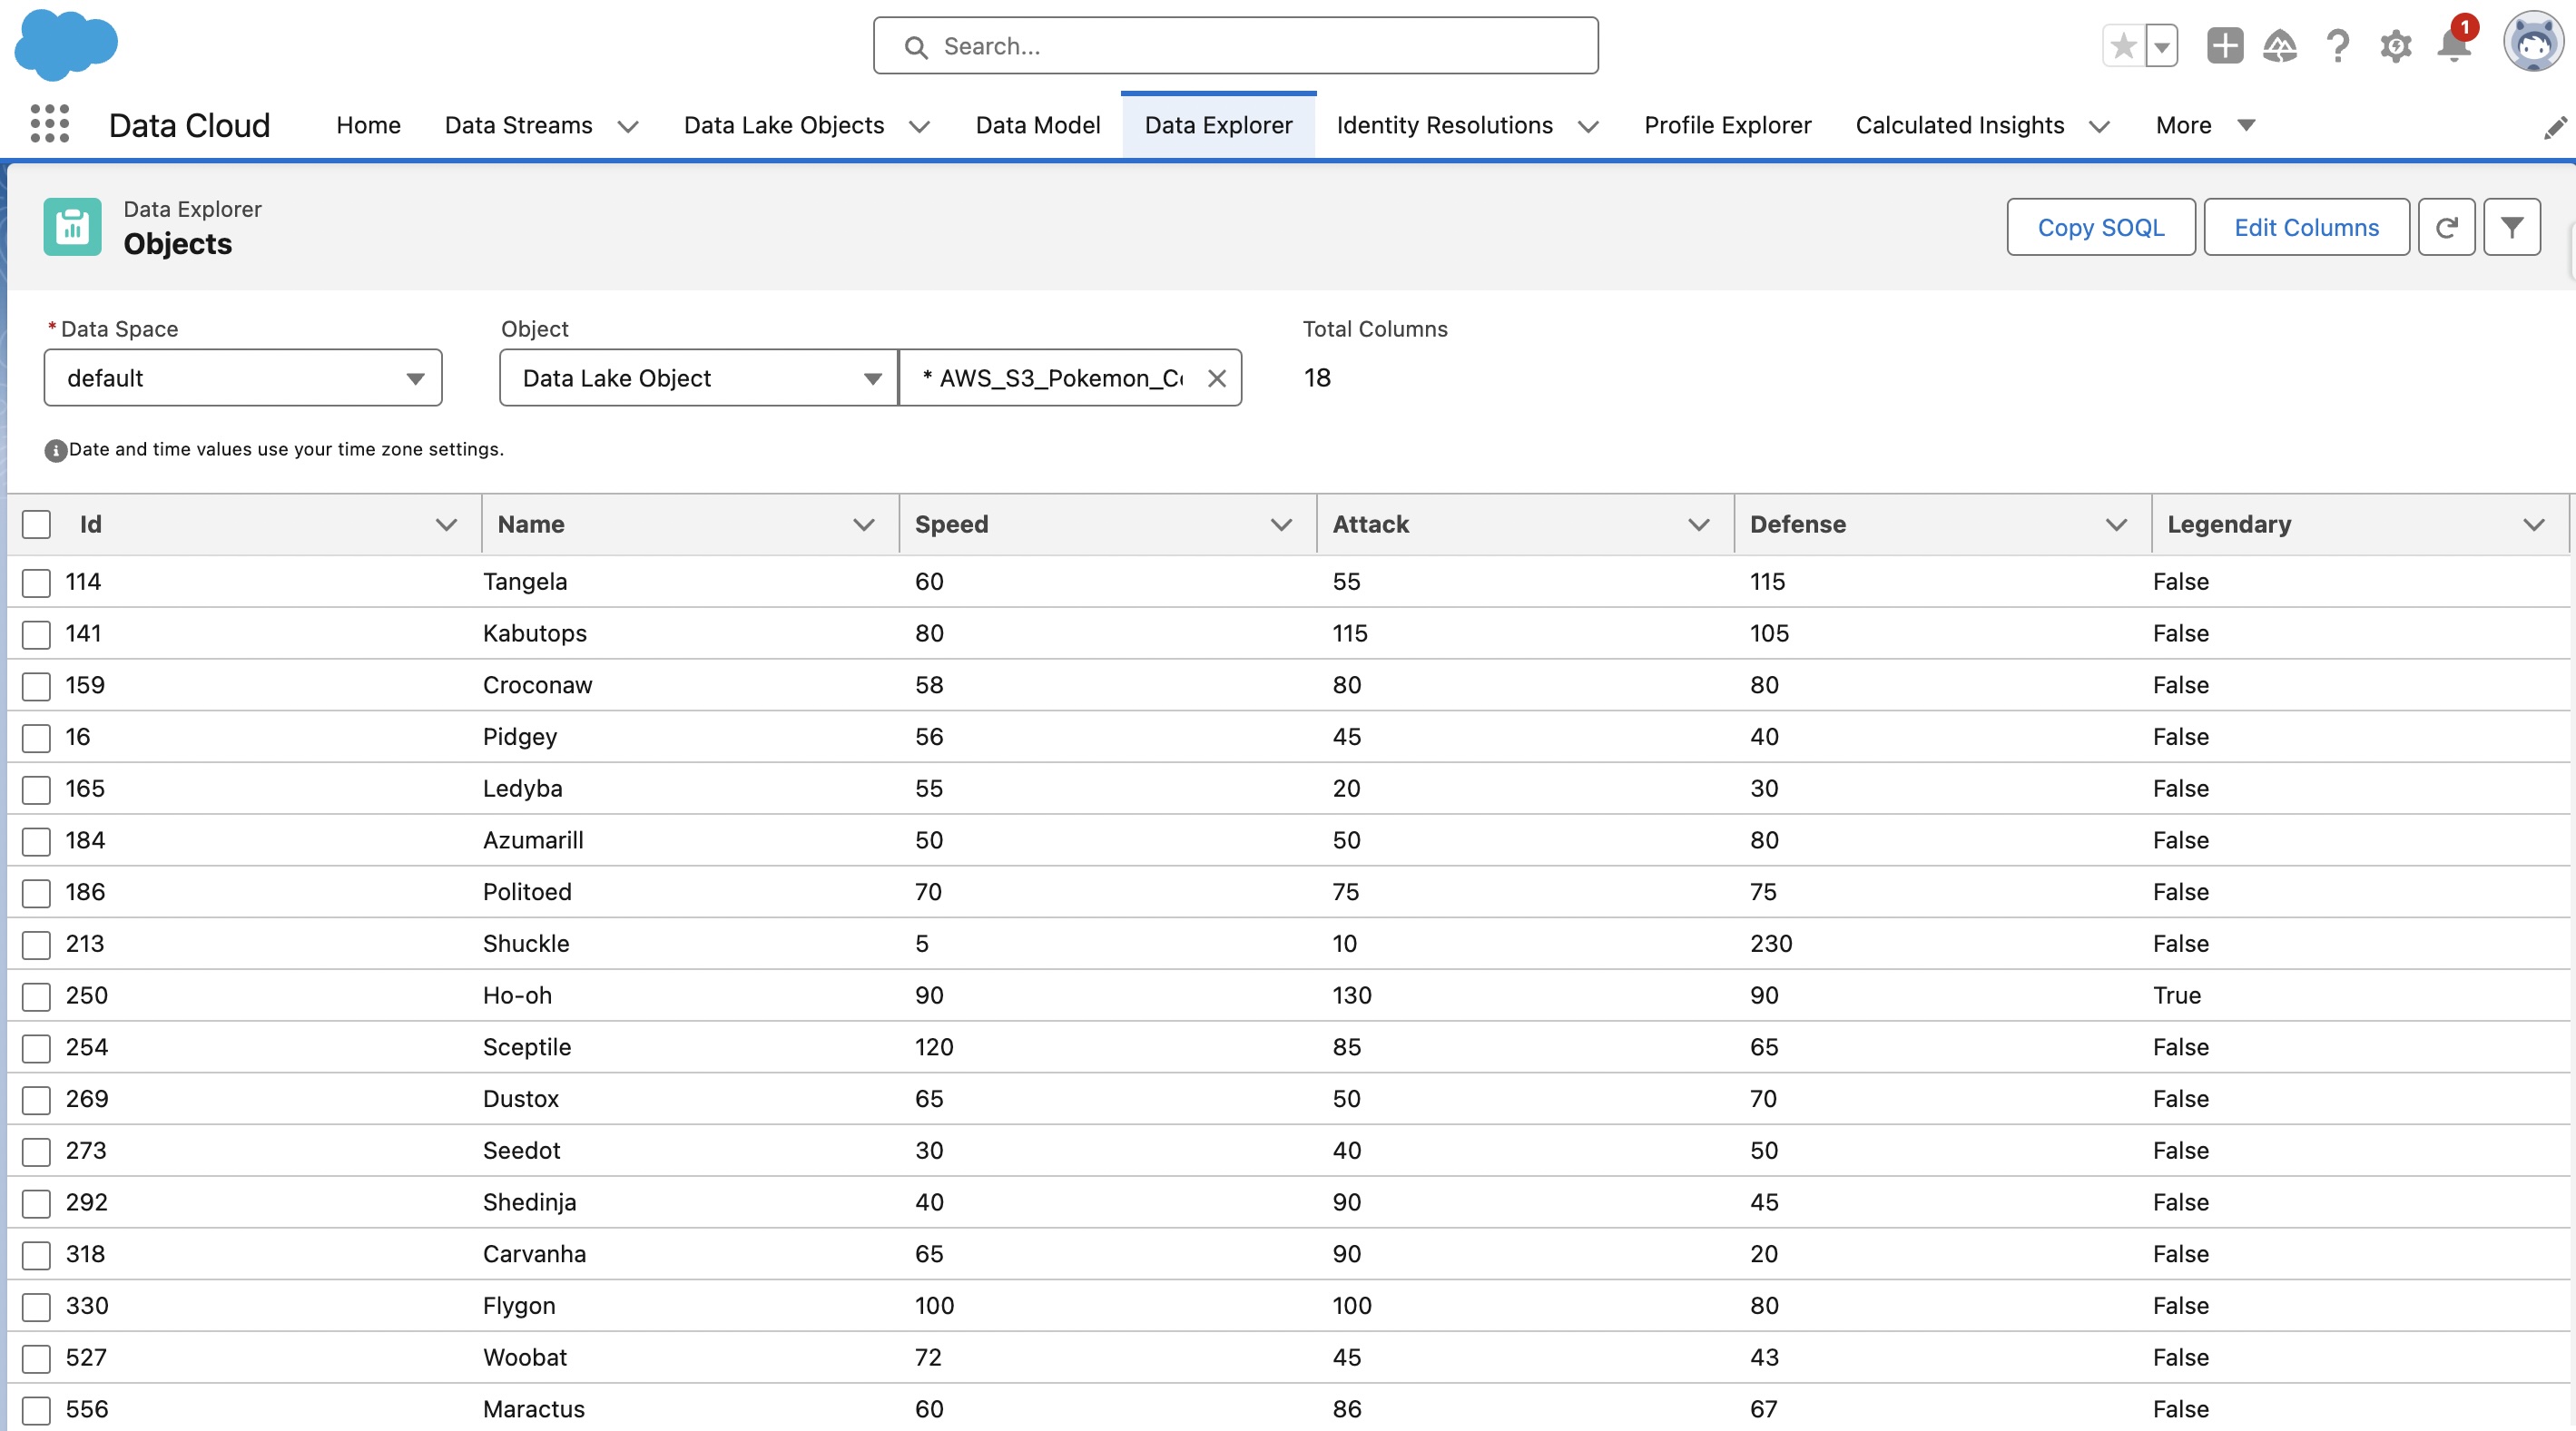
When it’s done, go to Data Explorer. There, you can visualize your data.\
Sources
- Really great article from Andres Peres
- Salesforce documentation on Data Cloud
- Amazon S3 documentation
Take care, Sélim HAMIDOU